Selecting RPL Items
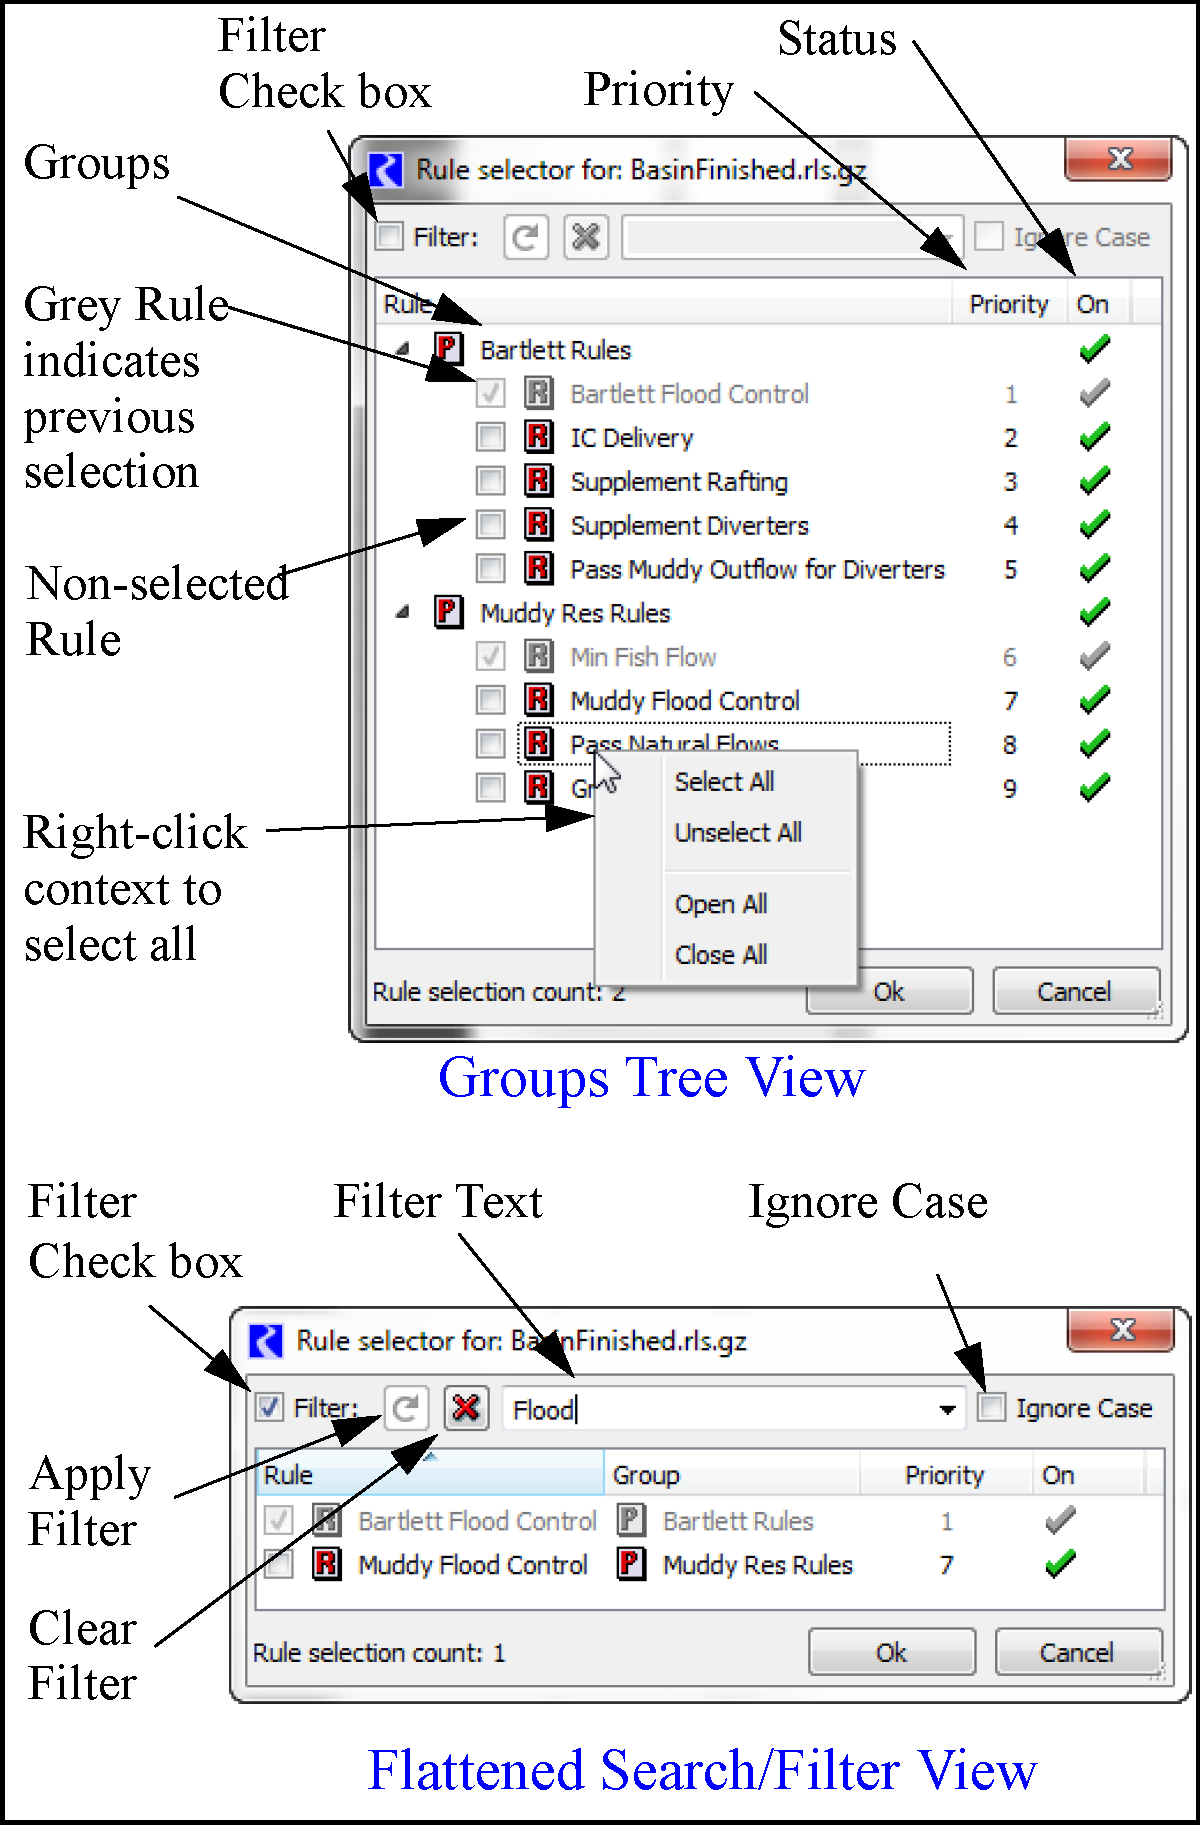
The RPL Item selector dialog is used whenever groups, rules, or functions (i.e. RPL items) are to be selected. For example, in diagnostics, you may select the rules for which you want to print messages.
Figure 2.27

This dialog initially shows the groups and rules in a tree view. Also shown are the rule priority and rule status. In this dialog, you select the RPL items by selecting the boxes to add check marks next to one or more items. Depending on the context from which this dialog is called, you may be able to select one or many items. Items that have been previously selected for display are shown in grey and cannot be deselected. They can only be removed from the dialog from which this dialog was called.
Tip: All items can be selected by right-clicking and choosing Select All.
You can also select the Filter check box to show a flattened list of the rules. Then you can sort by column heading or filter by entering a text string at the top. Use the green arrow to refresh, red X to clear the filter, and the Ignore Case check box to do a case insensitive filter. Select RPL items by checking the boxes as described above.
Revised: 12/06/2024