
Managing Scripts
The Script Manager is used to create, export/import, and delete scripts.
Accessing the Script Manager
To access the Script Manager, from the workspace, use the Scripts, then Script Management menu.
The names of the defined scripts are presented in the Scripts menu. Those scripts in the default group are listed first followed by a cascading menu of the other groups. For more information on specifying the default group, see Tour of the Script Manager.
From the Scripts menu, select the name of a script to open the Script Dashboard.
Figure 1.1 Screenshot of the Scripts menu.
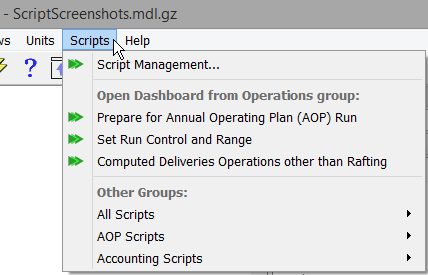
Note: In this screenshot, the “Operations” group is the default group for this model. There are three other groups as well listed in the Other Groups section the internal “All Scripts” group, “AOP Scripts” group, and “Accounting Scripts” group.
Tour of the Script Manager
The Script Manager contains lists of the defined scripts in the model. These scripts are all shown on the All Scripts tab, as shown in Figure 1.2. In addition, you can create your own tabs or groups; see Working With Script Groups for details.
Figure 1.2 Screenshot of the Script Manager
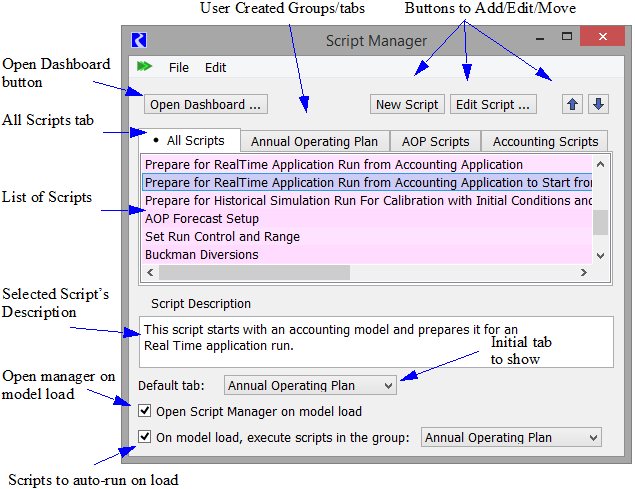
Within any of the tabs, use the Edit Script button to open the Script Editor; see Editing a Script for details. Select the Open Dashboard button or double-click a script to open the Script Dashboard; see Script Dashboard for details.
The All Scripts tab contains the complete list of scripts, and it is the only group from which new scripts can be created or deleted. The following options are available when on the All Scripts tab
• To Create a new Script, use the New Script button or the Edit and then New Script menu.
• To duplicate the selected script, use the Edit and then Duplicate Script menu. A copy will be created with the Name “Copy of <script>”. A number (for example “_01” will be added to the end of the new script name if the name already exists.
• To delete an existing script, use the Edit and then Delete Script menu.
The lower portion of the Script Manager shows the selected script’s description. This allows you to quickly see the description to know what the script does or why you would want to use it. The descriptions are edited as part of the script; see Using the Script Editor for details.
Finally, there are three independent controls at the bottom:
• Specify which script group tab is initially displayed by selecting a script from the Default tab menu. That tab is shown when the Script Manager window is initially opened (either upon model load or manually) within a RiverWare session.
• The Script Manager can be configured to automatically open upon loading a model by checking the Open Script Manager on model load toggle. This opens the script manager and makes it ready for the user to interact with the scripts.
• The Script Manager can be configured to automatically run the scripts in the specified group, upon loading a model. Check the On model load, execute scripts in the group toggle and specify the group.
At the end of the model load process, the scripts in the designated script group run automatically in the order specified in the group, see Working With Script Groups. As each script runs, the script's dashboard opens and the progress indicators are updated. Pauses via the Memo action are supported in the script dashboard, or ignored if RiverWare is running from batch mode. In the event of script failure, a message box and diagnostic message indicate the failure and processing of the script group is halted.
Automatic execution can run a group of scripts that get your model ready for some usage. For example, the scripts could open and load a ruleset and an SCT, thus further automating this process during model load.
Working With Script Groups
To create a user-defined script group, use the Script Manager's Edit, then New Group menu. To modify an existing user-defined group, select the tab and then use the Edit, then Edit Group menu item. Both of these menu items open the Script Group Editor, shown in Figure 1.3.
Figure 1.3
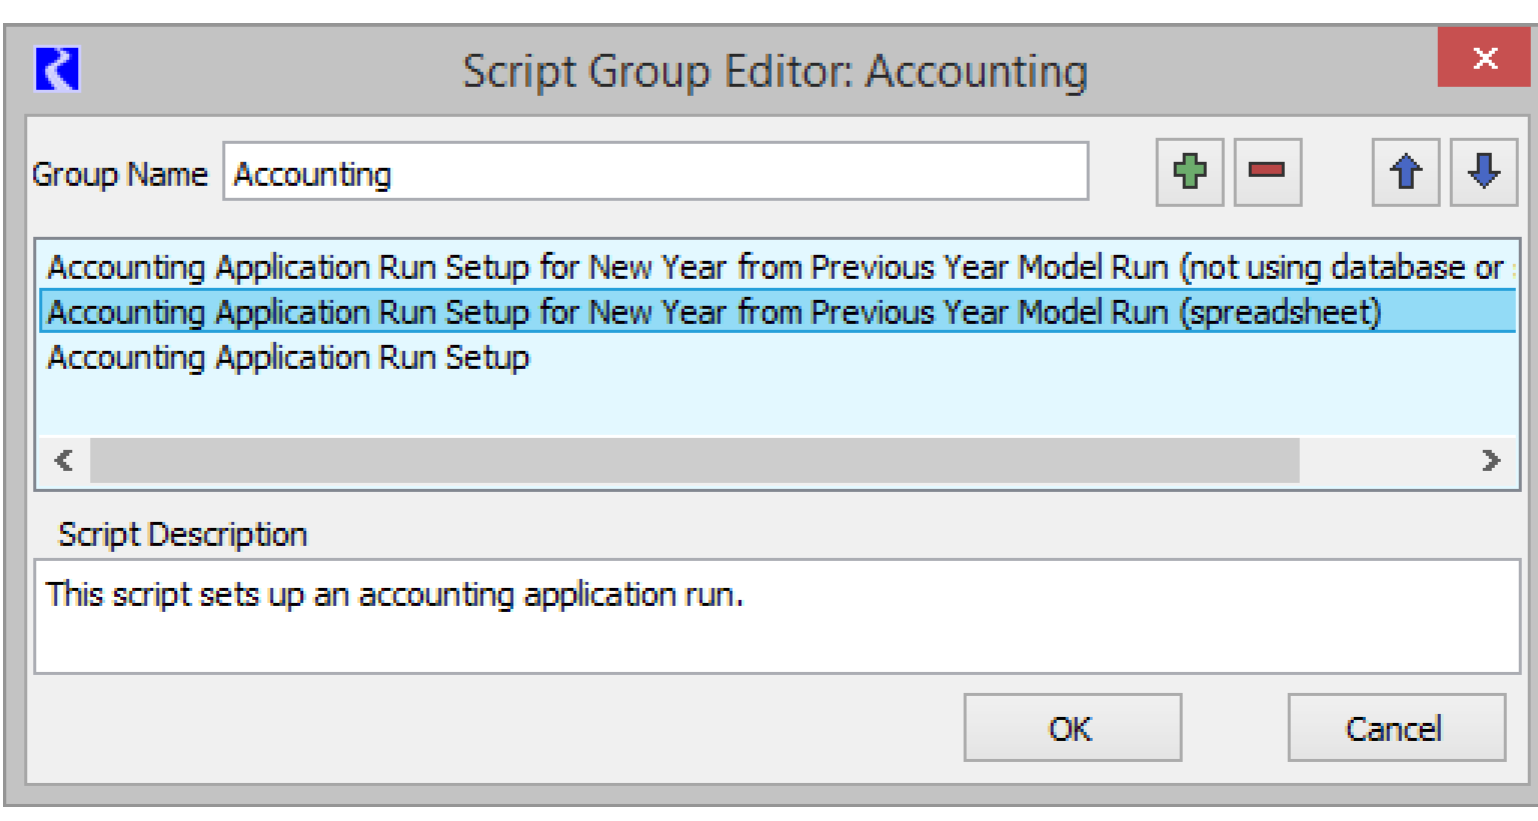
The Script Group Editor lists the scripts within the group and you can add, remove and reorder the scripts within the group.
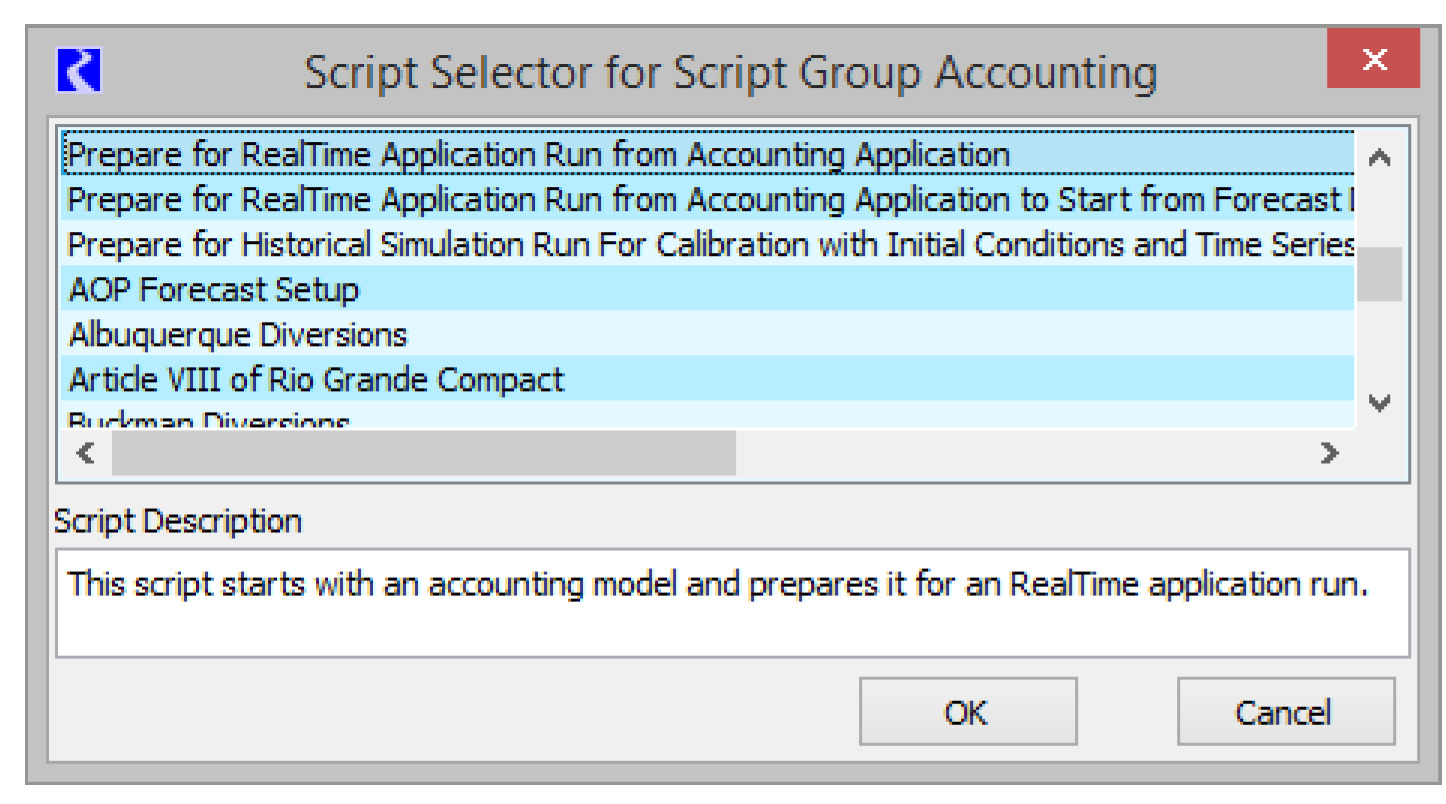
To add a script to the group, select the green Plus button. This opens the Script Selector, which lists those scripts not already included in the script group. Select one or more scripts and select OK to add the scripts to the group.
Within the Script Manager, you can rearrange the tab groups by dragging a tab to a new position.
Note: A script group does not own the scripts listed as within the group. Instead, the group is simply a set of references to existing scripts. Thus, a script can be shared by multiple groups, and the effort of developing a new script need not be duplicated in order to immediately include and use a script in other groups.
Importing and Exporting Scripts
One or more Scripts or Script Groups can be exported from the model and then imported into another model. This section describes this process.
Exporting Scripts
From the Script Manager, use the File, then Export Selected Script to export one or more scripts or groups to a file. This opens the Export Scripts and Script Groups.
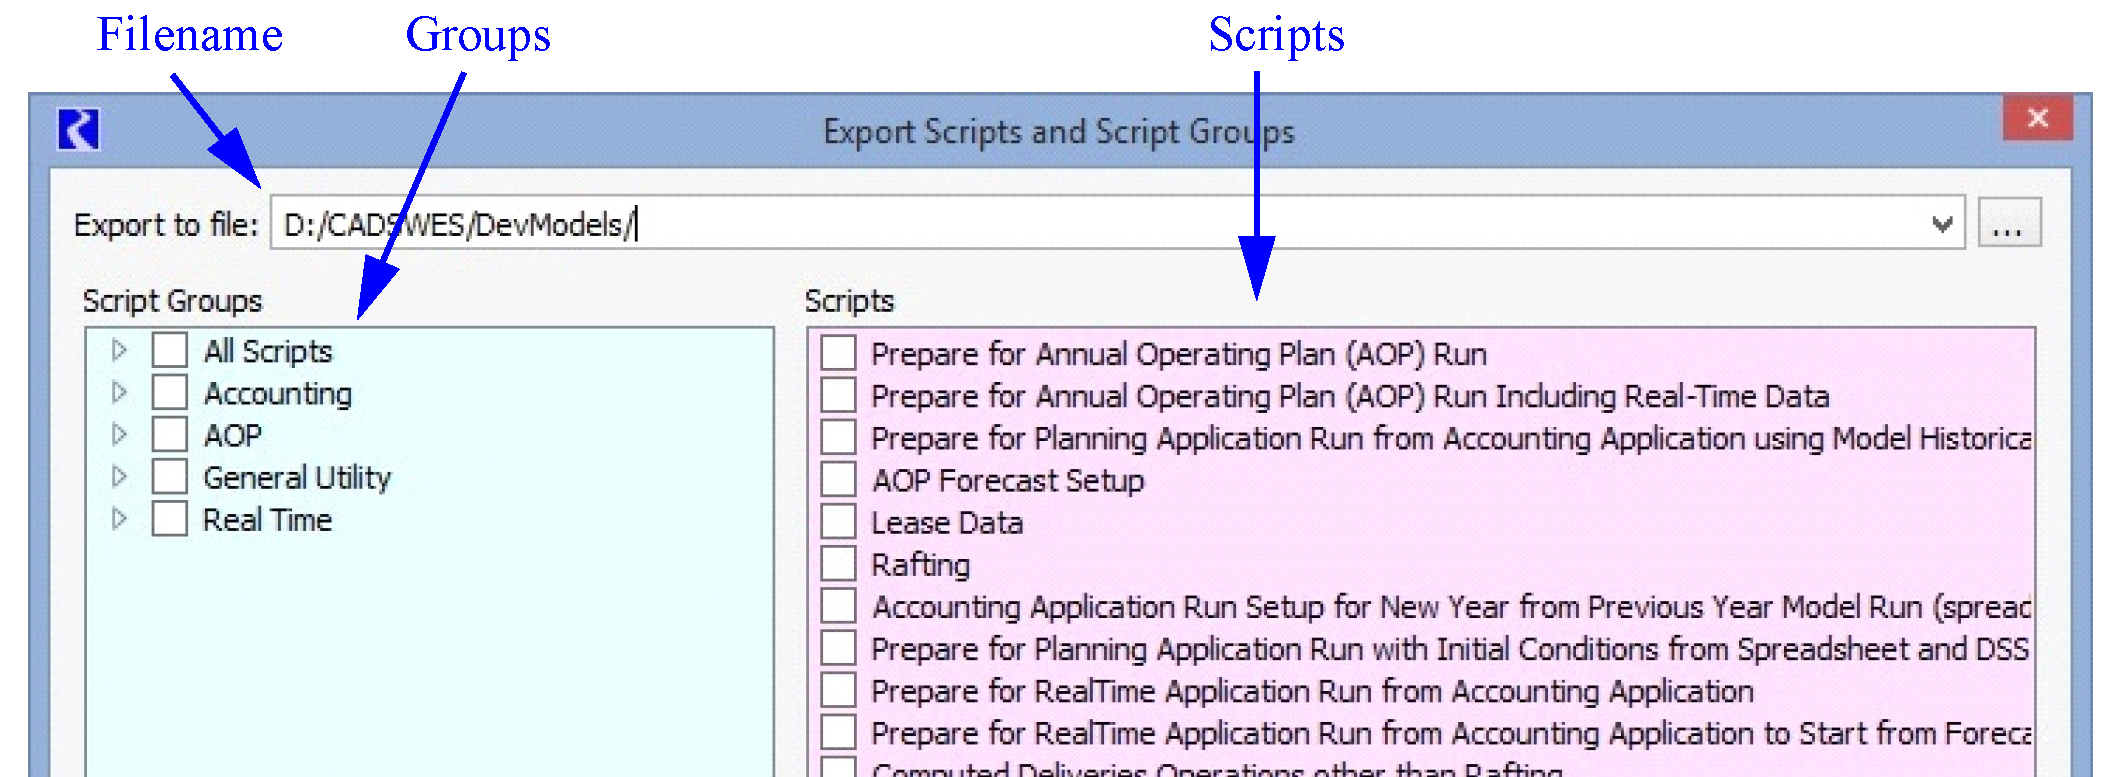
First, specify a file for export. Either select from the menu, type in a file name or select the More button to choose a file on the system.
Then specify the scripts or groups to export.
The dialog contains two sections, one on the left, listing Script Groups and one on the right, listing all Scripts. The lower panel shows the description of the highlighted (not checked) script.
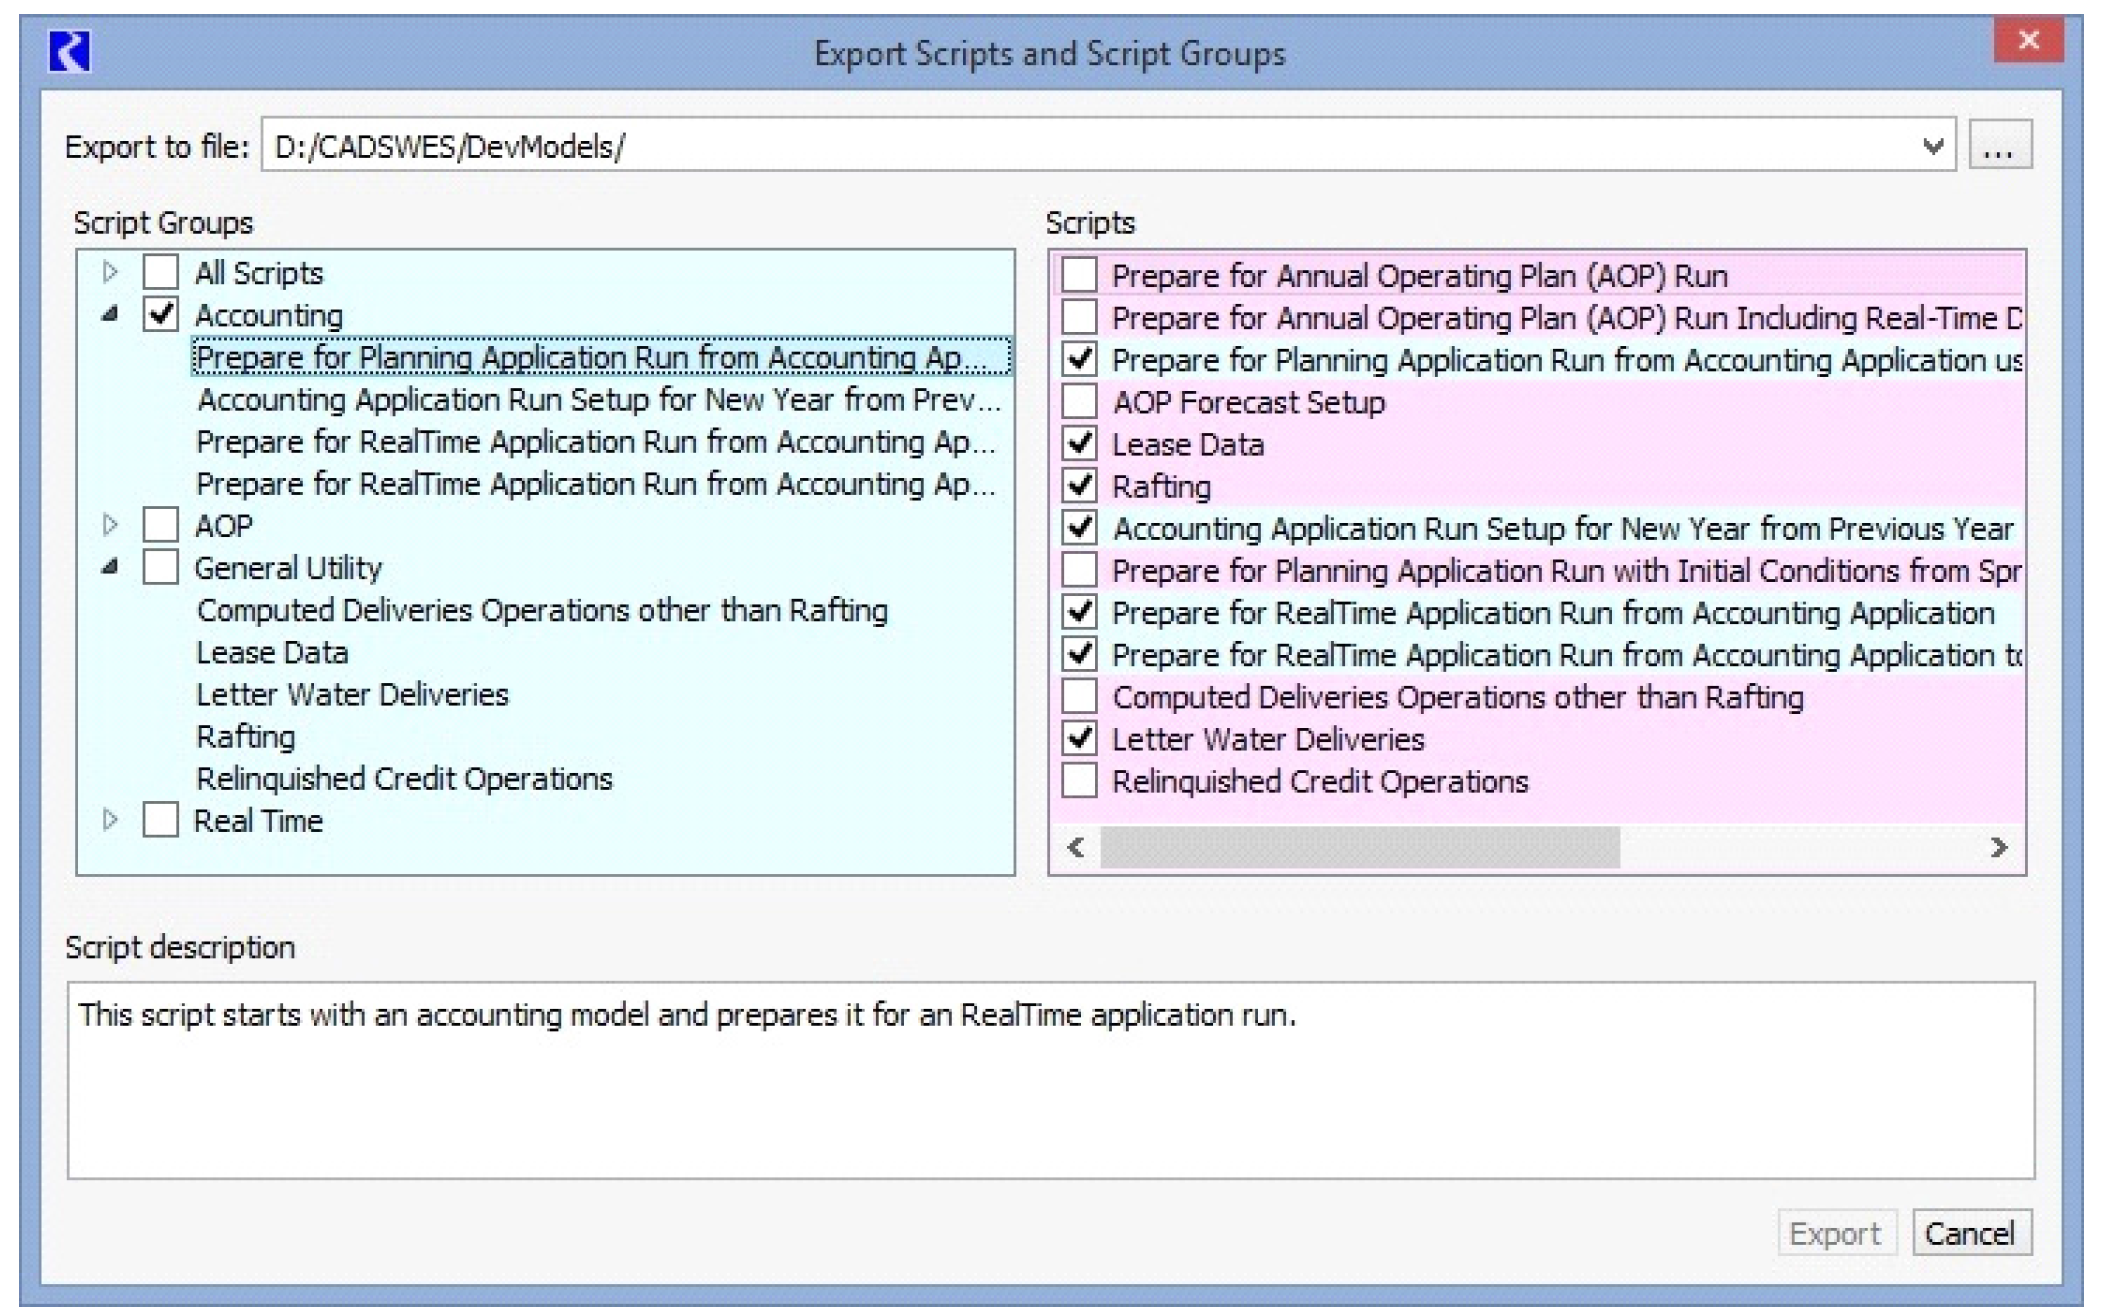
To export one or more Script Groups and the scripts referenced by the group, select the checkboxes in the left panel. All constituent scripts will be exported. Use the tree view arrows to see which scripts are part of the group. Also, as you select a group, the referenced scripts will also be checked and the background color will change in the Scripts panel on the right, as shown in Figure 1.4.
Note: You cannot deselect scripts that have been selected for export that are part of a group. The following screenshot shows that one group containing four scripts (blue) will be exported as well as three additional scripts (pink).
Note: To export all of the scripts in the model, simply select the All Scripts checkbox.
Figure 1.4
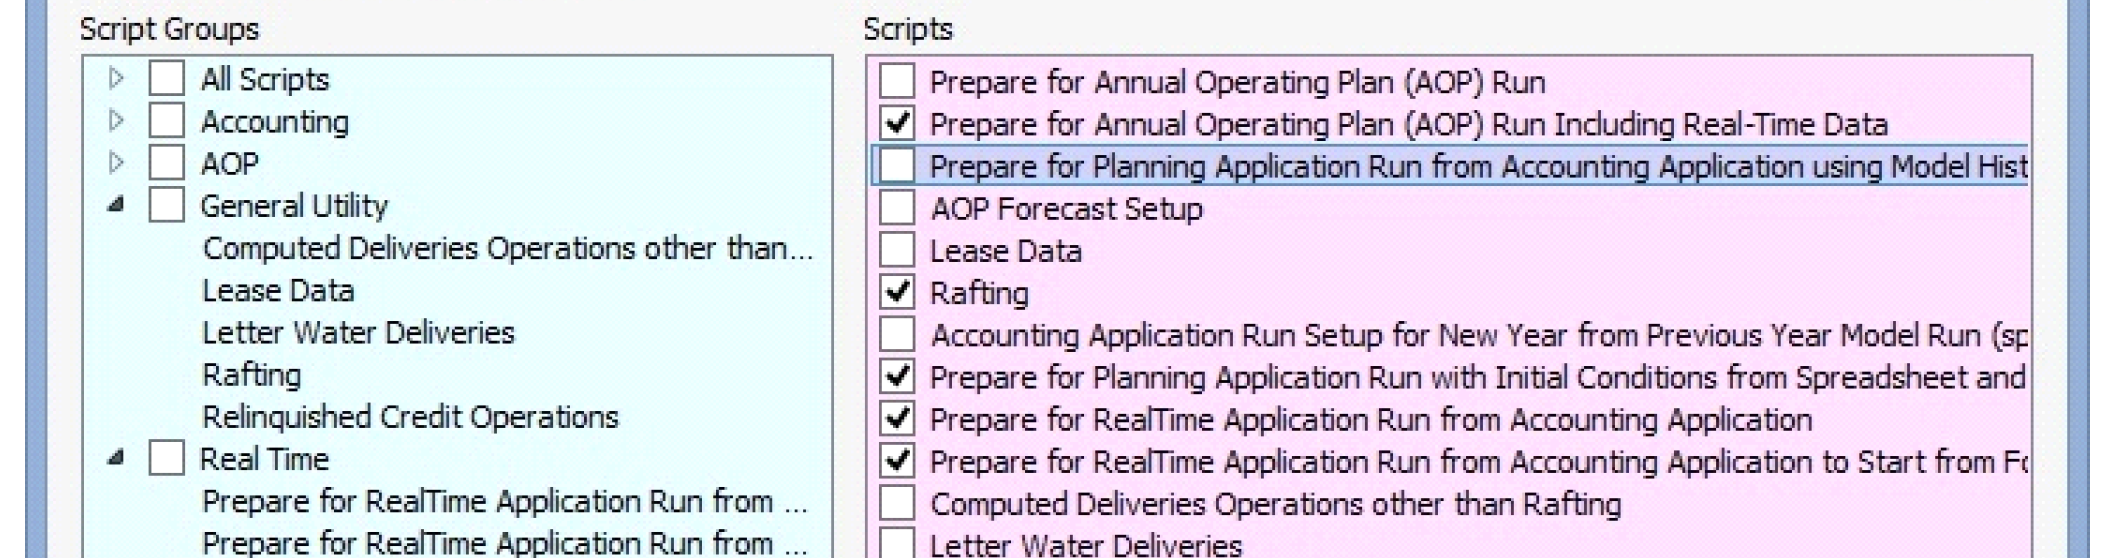
To select one or more scripts to export that are not part of a group, select them from the right panel. In Figure 1.5, five scripts will be exported.
Figure 1.5
Once you have checked the desired groups/scripts, make sure to specify a file name at the top of the dialog. Then select Export to export the file.
Importing Scripts
Use the File, then Import Script to import previously exported scripts. Choose the file name and select Open.
If there are no conflicts between imported items and existing items, then the items are imported and the Script Manager is shown.
If there is a conflict between the names of imported scripts or groups, you are presented with the following dialog to specify what to do.
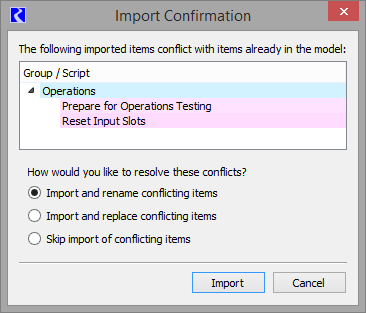
The top panel shows the conflicting items. The bottom portion asks how to handle those conflicts. Select either:
• Import and rename conflicting items: import the items and rename with a unique name (the default). The newly imported items are renamed by appending "_NN" to the existing name, where NN is a two digit unique integer.
• Import and replace conflicting items: import the items and replace the items in the model.
• Ski Import of conflicting items: skip the conflicting items but import any new items.
Tool tips on the radio buttons gives more information.
Select Import to bring in the items. After the import has completed, a notification dialog informs you of the actions taken during the import. The possible messages are:
• Renamed to
• Replaced the script in the model
• Skipped
Revised: 08/02/2021