
Examples
The best way to learn how to use the selector dialogs is to experiment with the various filters, checkboxes, and options. Shown in the following sections are examples of common selections.
Finding Slots in a Model
A modeler might wish to find all of the slots in a model that have a certain attribute. The modeler might need to change all of these slots or might just wish to show them all in one SCT. Example 8.1 illustrates this type of action.
Example 8.1
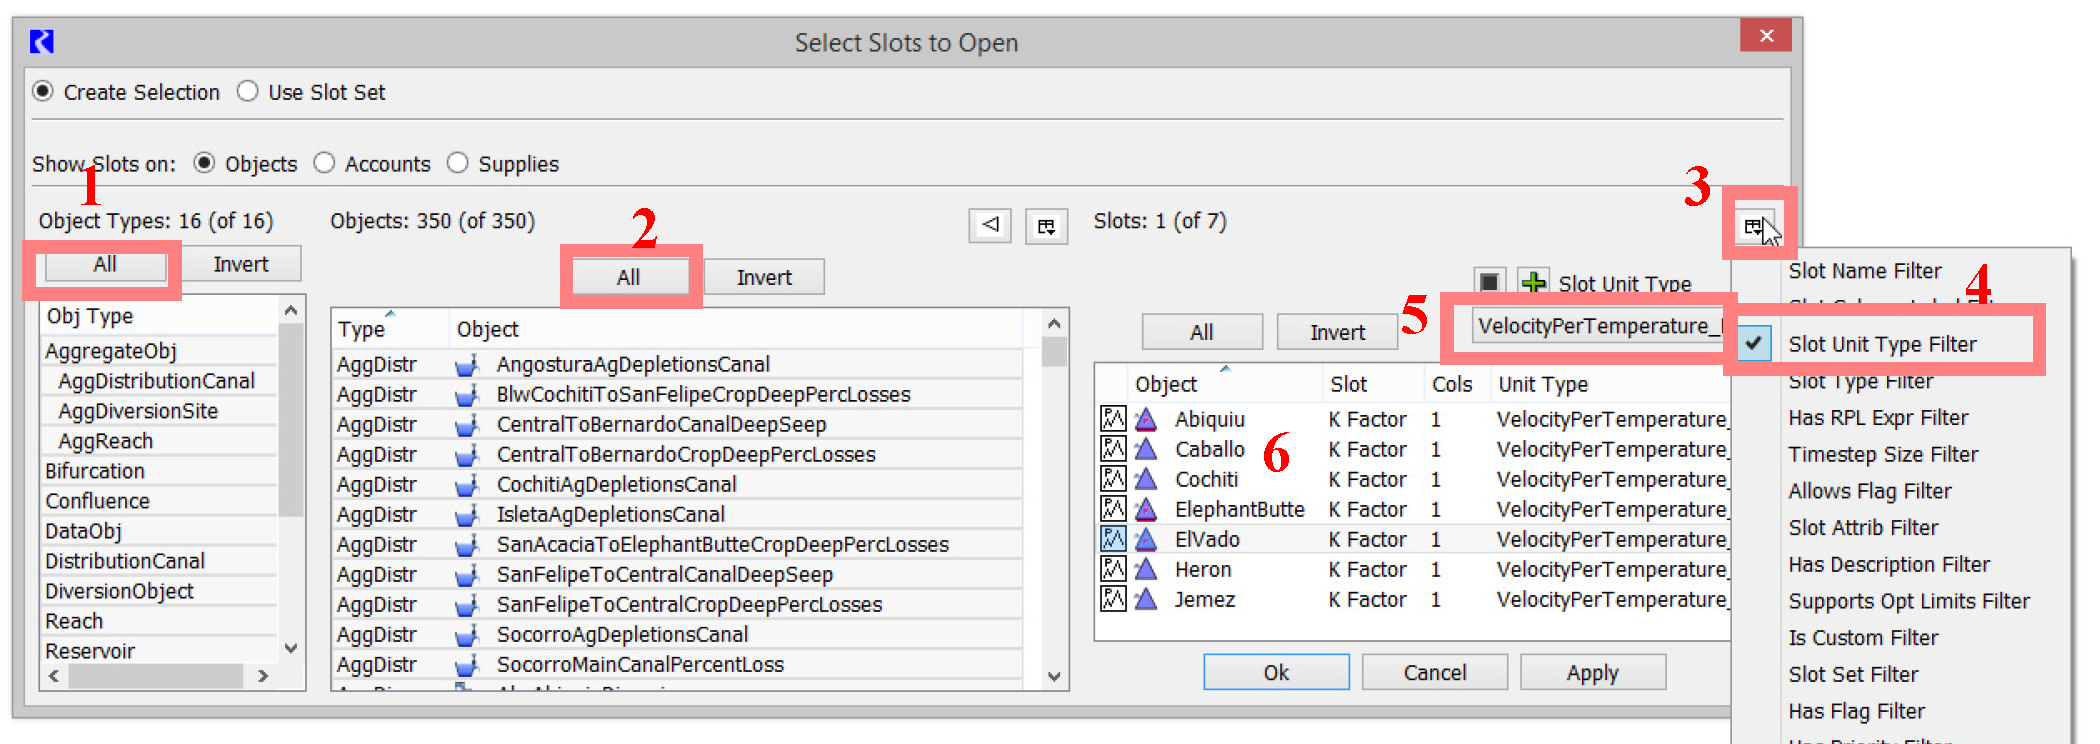
In this case we are trying to find all of the slots that have the VelocityPerTemperature_F unit type.
From the main workspace, select Workspace, then Slots, then Open Slot to bring up the slot selector.
Figure 8.10 shows the slot selector configured to select slots with this unit type.
1. In the Slot Selector, select the All button in the Object Types column (1) and the All button in the Objects column(2).
2. Then select the Slot Filter button  (3) and select Slot Unit Type Filter (4).
(3) and select Slot Unit Type Filter (4). 3. In the Slot Unit Type menu, select VelocityPerTemperature_F (5).
4. Any slots that appear in the slot area (6) have this unit type. Select one of them, and select OK to bring up the Open Slot for that slot. If you were making this selection from the SCT, you would have been able to select all and then show them in the SCT. To find slots that have a different attribute (or multiple attributes) use any of the other filters. For example, you could enable the Slot Name Filter and find only slots that have a certain name.
Figure 8.10
Adding Objects to a Subbasin
Example 8.2
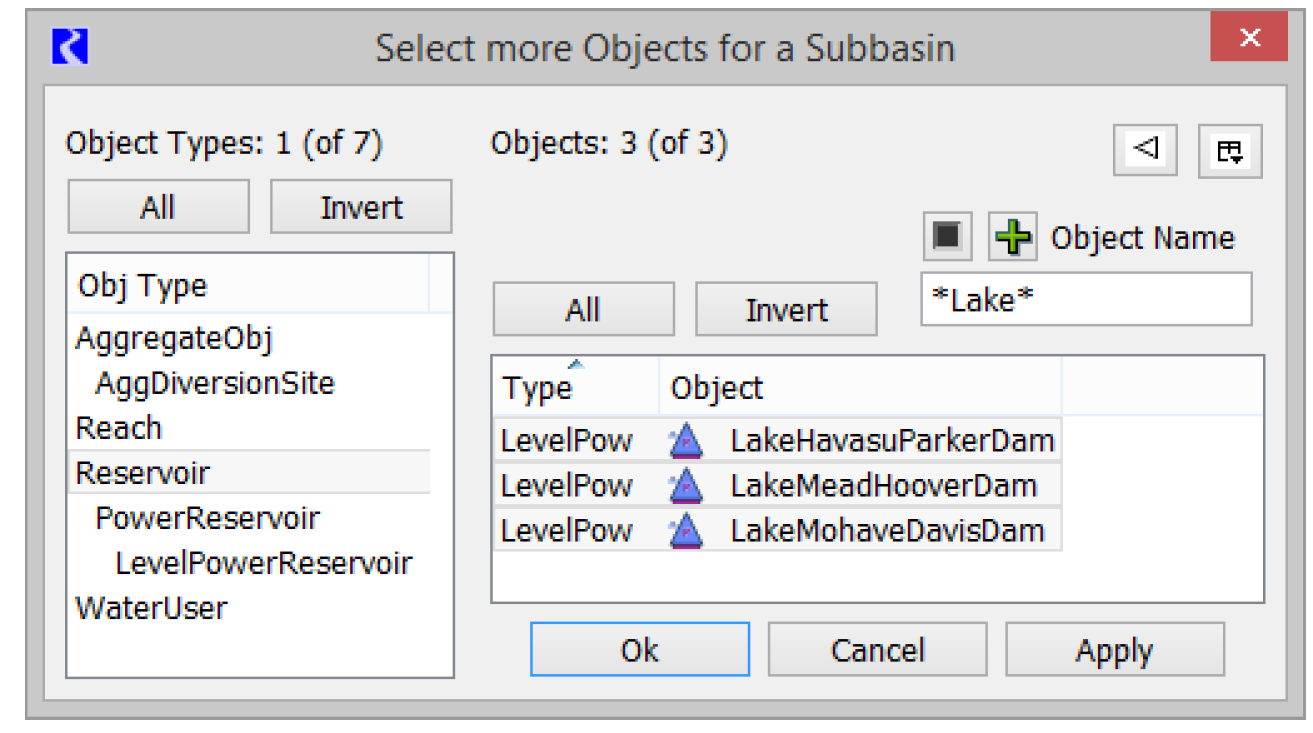
In this example, we will use the selector to create a subbasin of all of the reservoir objects with the word “Lake” in their name.
1. First, create a new subbasin from the subbasin manager (Workspace, then Edit Subbasins, Subbasin, then Append New Subbasin).
2. Then, from the subbasin manager, select Subbasin, then Invoke Member Selector to bring up the object selector.
3. In the left column select the Reservoir object type.
4. Next select the Filter button and select Object Name Filter.
5. In the text box, type “*Lake*” to specify that the word Lake can occur anywhere in the name.
6. Select the All button to select all of those reservoir and select OK.
You have just added those reservoirs to the subbasin. Figure 8.11 shows this selection.
Figure 8.11
Creating a Name Map of All Reservoir.Inflow Slots
Example 8.3
In the Database DMI interface, we want to create a name map that says that all of the Reservoir.Inflows are called RES-INFLOW in our database. See Name Mapping in Data Management Interface (DMI) for details.
1. First add a name map; see Configuring Name Mapping in Data Management Interface (DMI) for instructions.
When you select the Select Slot option, it brings up the slot selector.
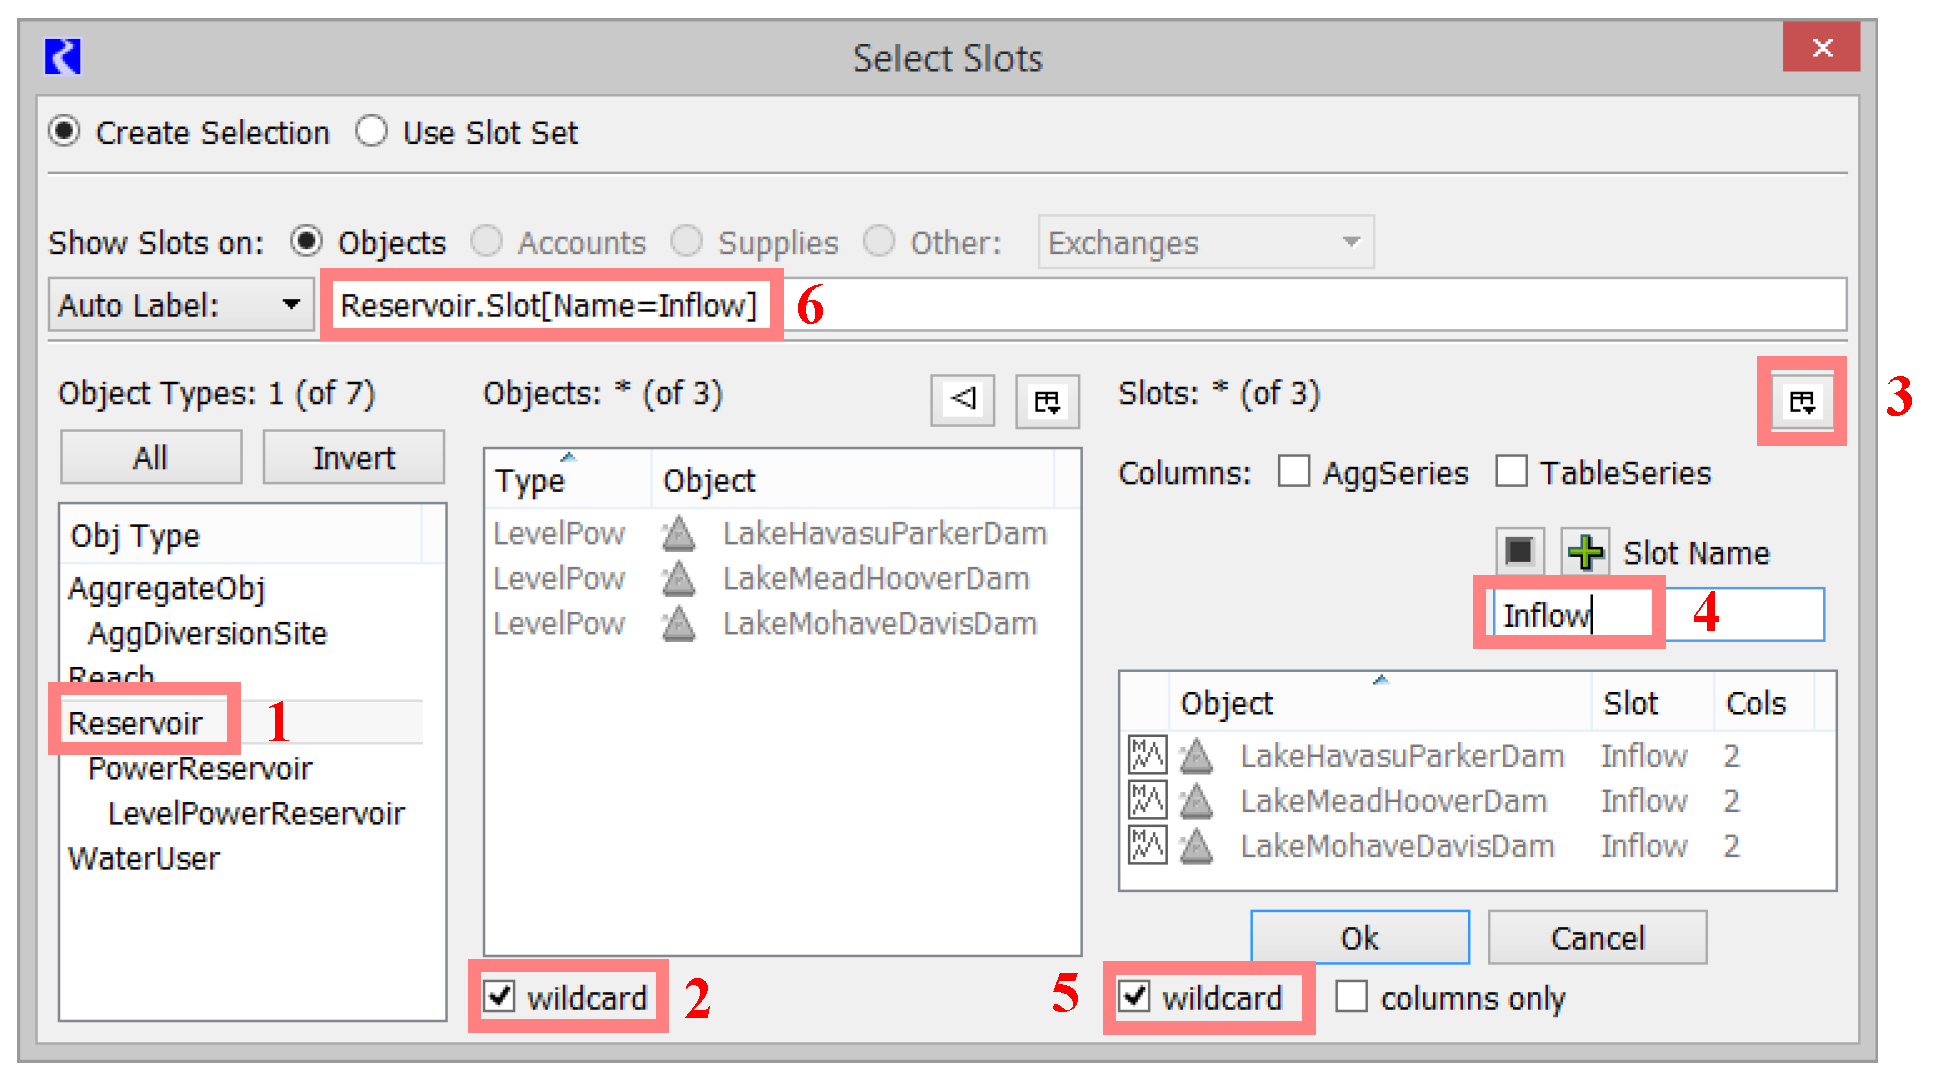
2. To select all Reservoir Inflows do the following; Figure 8.12 illustrates the steps.
1. In the left pane, Obj Type, select Reservoir (1).
2. In the center pane, Objects, select the Wildcard button on the bottom center (2). This specifies that we will do this for any reservoir.
3. In the right pane, select the Filter icon (3) and select Slot Name Filter. Type “Inflow” into the filter box (4).
4. Instead of selecting each slot or selecting All, select the Wildcard checkbox at the base of the dialog (5).
Note: Once you do this, the Name Map Auto Label becomes Reservoir.Slot(Name=Inflow) (6).
This indicates that this name map will apply to all Reservoir.Inflow slots. Figure 8.12 shows the selector for this application.
Figure 8.12
Revised: 01/10/2022