
Model Navigation
Large models can rarely be viewed in their entirety on the workspace, making it difficult to locate objects. There are, however, multiple ways of navigating through a model on the workspace or locating particular objects within a model. These methods are described in greater detail below.
Zooming on the Workspace
The zoom features can be accessed by selecting the Zoom buttons on the toolbar 
 or by right-clicking the workspace.
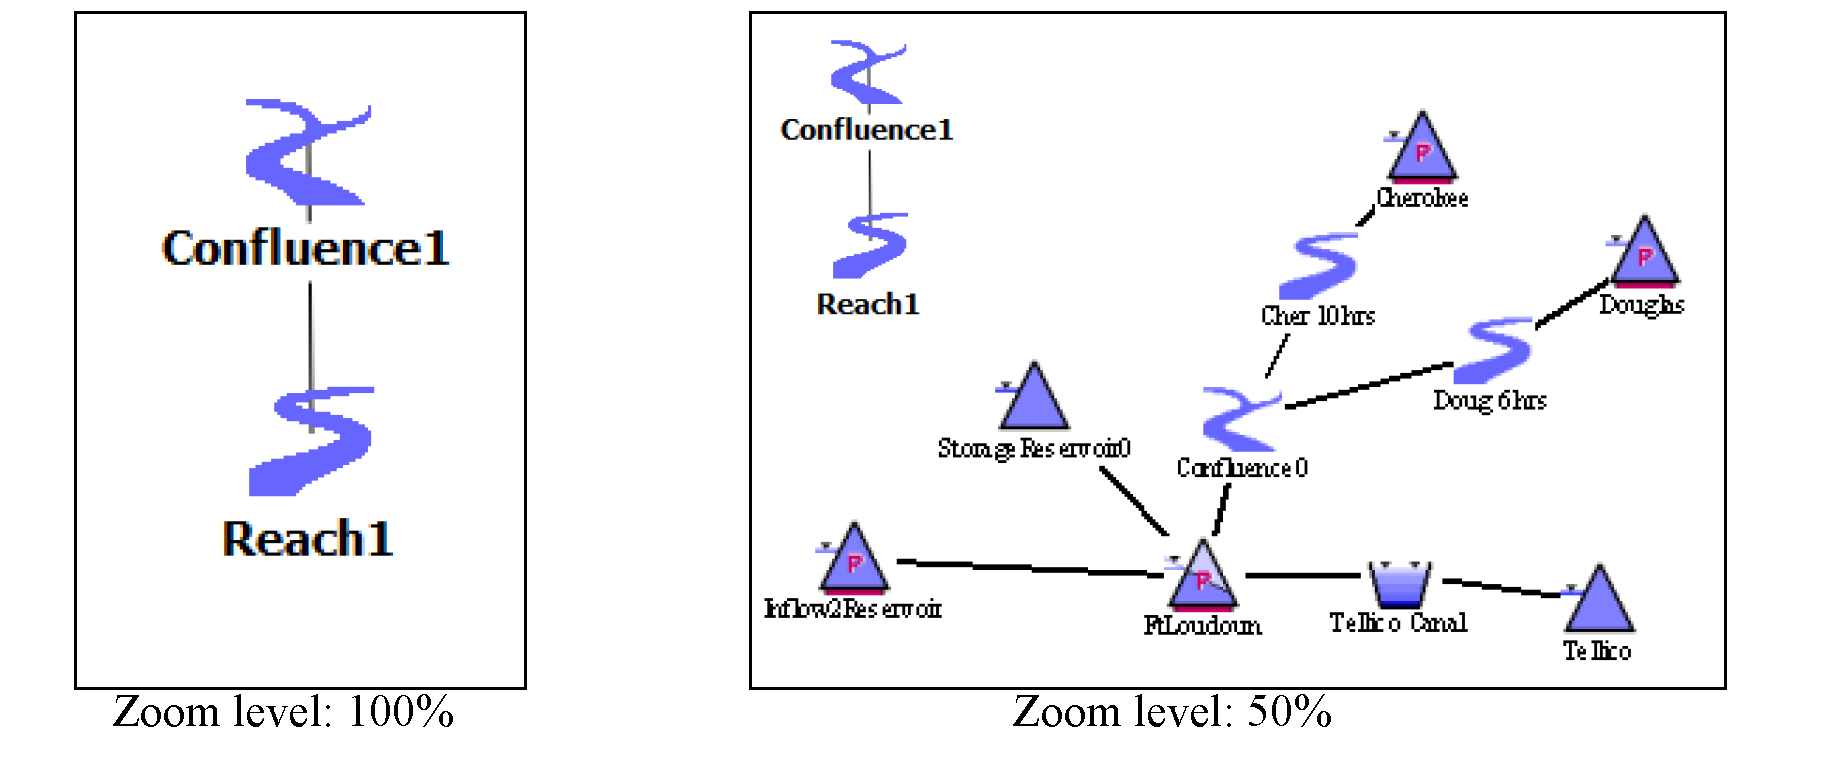
or by right-clicking the workspace. At 100% zoom level, object icons are shown in their natural size of 40x40 pixels. When zooming out, e.g. to 50%, to expose a broader area of the workspace, the object icons and labels are also zoomed out and their size is reduced. When zooming in beyond the 100%, icons, labels and links remain their natural size (100%) instead of becoming larger (or thicker links). This allows you to expose more detail of background images around closely clustered objects without showing large icons. This implementation of smart zooming affects only the Simulation and Geospatial views.
Figure 2.8
Locator View
On the Simulation and Accounting views, an overview of a model can be accessed with the locator view. The locator view displays the entire workspace on a miniature scale. The locator view is accessed as follows:
• Select the Locator button  from the workspace toolbar.
from the workspace toolbar. • Select Workspace, then Open Locator from the menu bar.
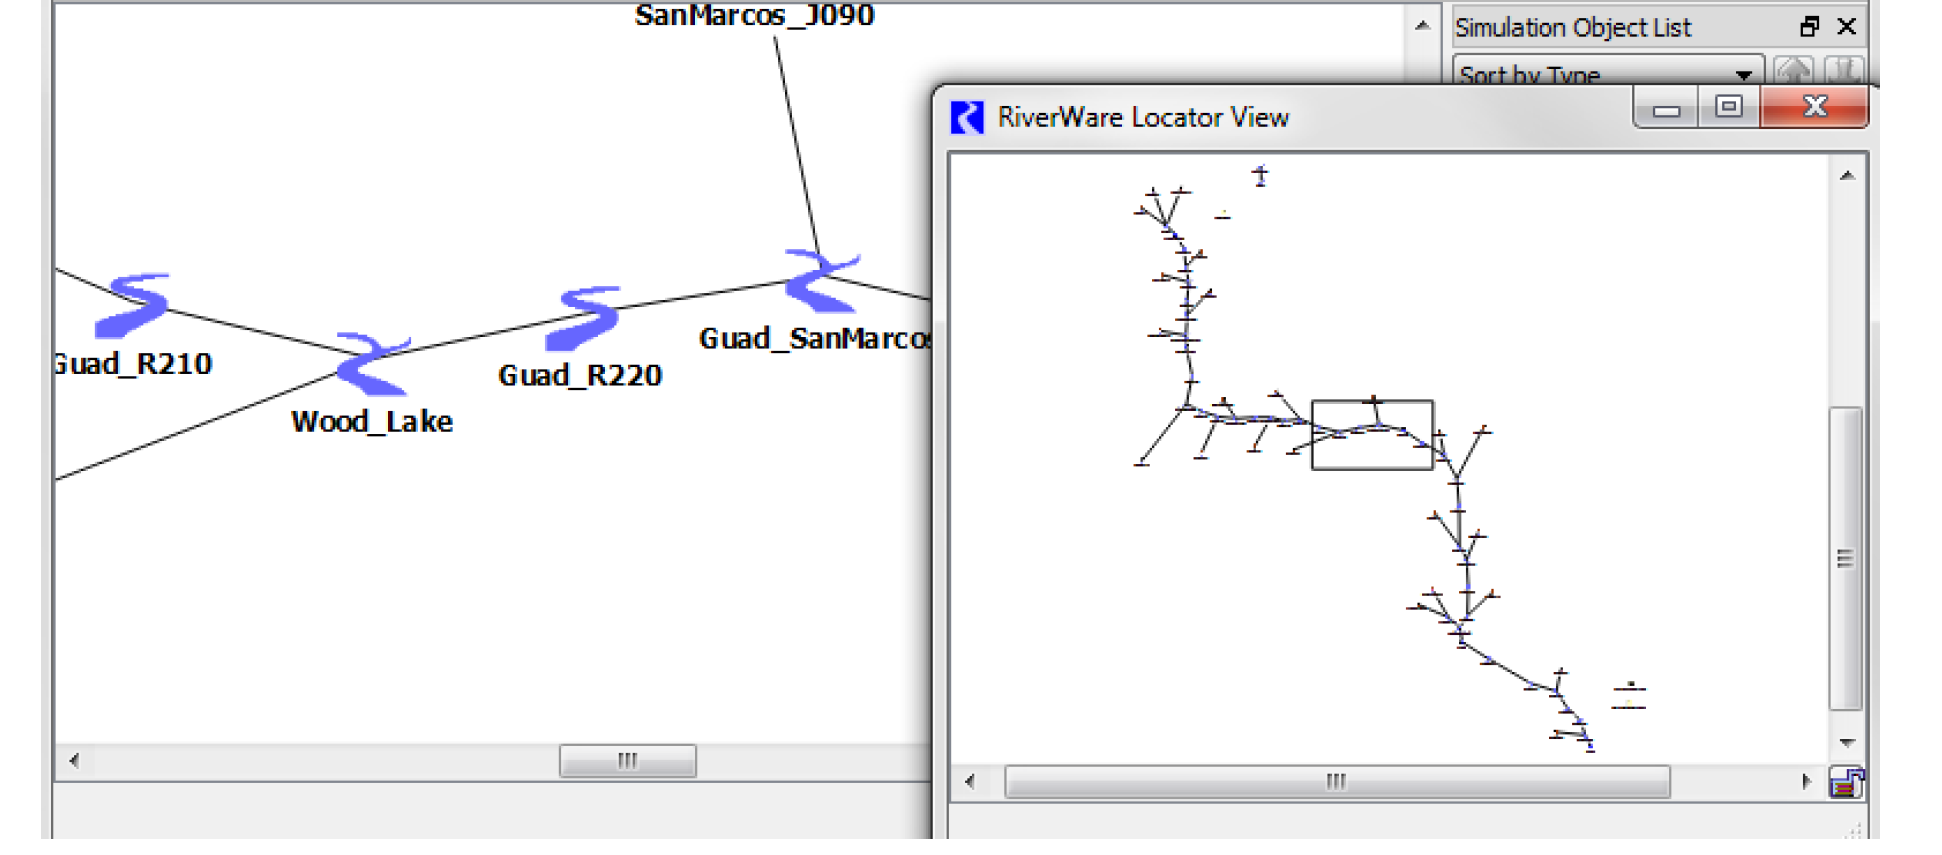
The rectangle represents the current displayed portion of the workspace. Dragging the rectangle to different regions of the model in the locator view will cause that region to be displayed on the workspace.
A status bar shows the name of the Simulation Object near the cursor. This functions even while dragging the inscribed rectangle.
The Locator View implements a Context Menu (right-click) with the following options:
• Center. Centers the inscribed rectangle at the clicked position. This is useful especially if the inscribed rectangle (representing the visible area of the workspace) is not visible within the Locator View—that would occur if the workspace is currently scrolled to an area which doesn’t contain any Simulation Object icons.
• Rescale. Recomputes the Locator View scale, e.g. if Simulation Objects have been added to the Workspace.
Note: There is a known limitation of the Locator Window. When the workspace view is zoomed in beyond 100%, object icons and their associated text labels, are unconditionally drawn at their normal size. This is unfortunately true also of those features, as they appear in the Locator Window and therefore look much larger then they should.
Figure 2.9
In-view Locator
The In-view Locator Mode is an alternative to the separate Locator View. It is also only available on the Simulation and Accounting views.

Selecting this mode causes the workspace to temporarily rescale to show the scope of all of the simulation objects on the workspace. The rectangular region of the normally visible area (at the currently set zoom level) is shown as a shaded rectangle. Drag the shaded rectangle to a new area and upon releasing the button, the workspace is positioned at the new area at the previous zoom level. This allows you to quickly snap to a different area in your model.
Figure 2.10

Scrolling
If a model is not particularly large or is familiar, it is possible to move to the desired region of the model using the scroll bars. By default, the scroll bars are located in the lower corners of the workspace. Adjusting the scroll bars will pan the model to the desired location. Also, you can use the middle button to temporarily enter Pan Mode to pan through the workspace.
Simulation Object List
The dockable object list window provides a convenient means of locating a specific object within a model. The object list window can be detached from the workspace and be positioned at a desired location. If you undock and/or close the object list, you can show it using the Utilities, then Windows, then Show Simulation Object List menu. Selecting the desired object in the listview window automatically selects the object on the workspace. Right-clicking an object allows you to open the object without scrolling the workspace.
Filtering Objects
At the top of the Simulation Object List, enter text into the text box to filter the object list.
Figure 2.11 Screenshot of the Object List Filter.
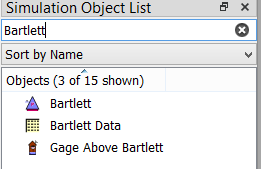
Objects are shown or hidden in the list as you type. For the object to be shown, the object name must contain the specified text. Case is not considered. The header for the list indicates how many results are found, for example, “3 of 15 shown”. Use the  button on the right to clear the filter.
Note: Only top level objects and clusters are considered in the filter. Accounts and objects contained within a cluster are not considered.
Organizing the Object Order
Objects in the list window can be organized by Name, Type, Position or a Custom Order. Objects are further organized in ascending or descending order by selecting the column label.
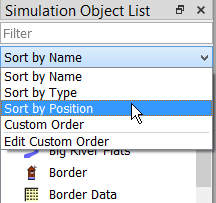
The Custom Order is defined using the Edit Custom Order menu. The Edit Custom Object Order dialog is shown:
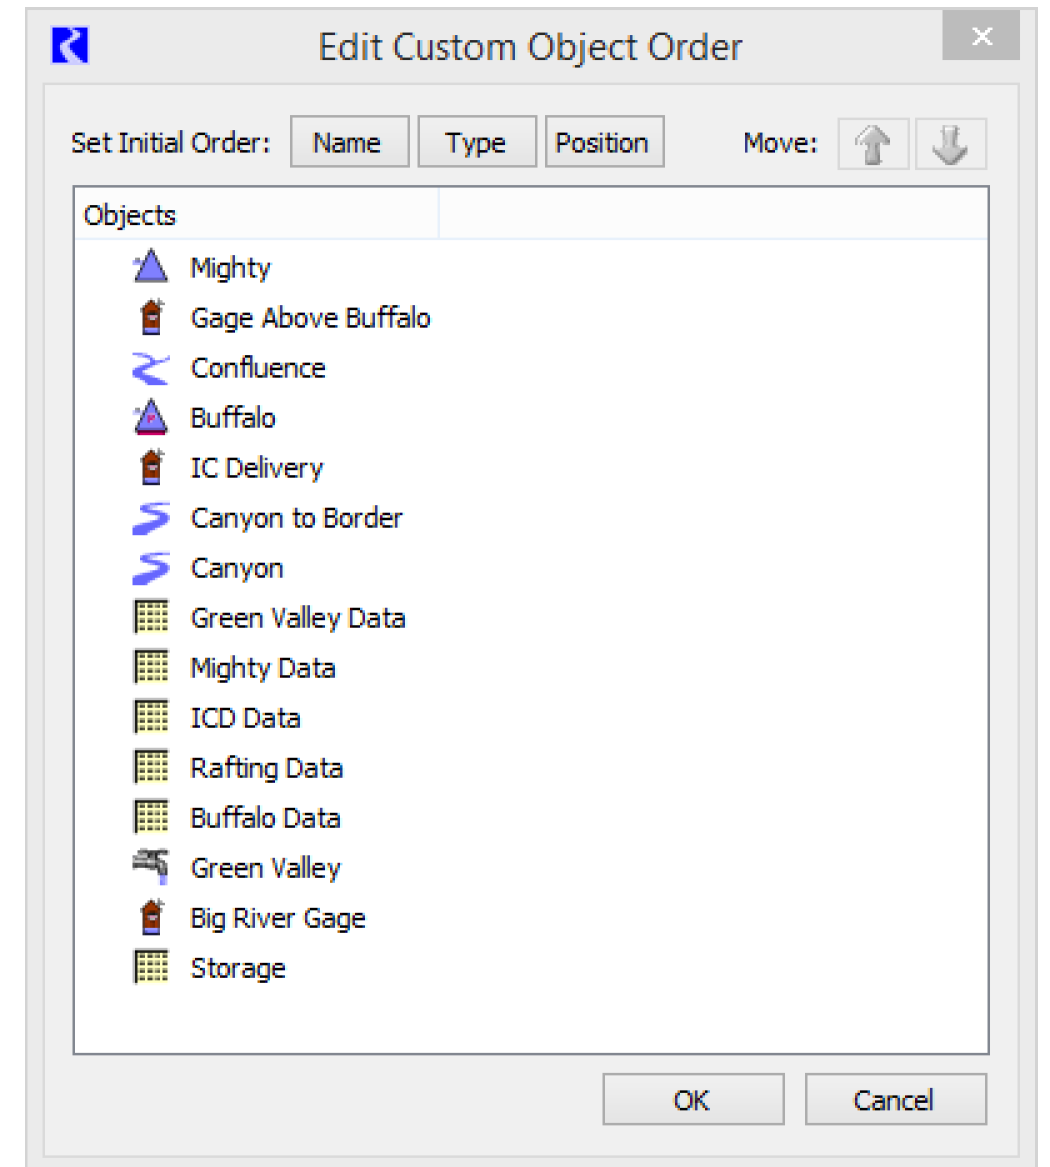
To use the Edit Custom Object Order dialog box, select an initial order using the Name, Type, or Position buttons. Then select one or more objects by selecting an object and then using Shift or Ctrl key and selecting another object. Drag and drop or use the up and down arrow buttons to rearrange. When you click OK, this order is preserved as the custom order and is shown on the Object List.
Note: This custom order can be used in the Model Run Analysis utility (see Sorting in Debugging and Analysis and Object Coordinate utility (see Object Coordinates). In those dialogs, choose the Custom from Workspace sort order.
Initial Workspace Appearance
You can configure the workspace appearance when the model is first opened in terms of the view, zoom, and scroll location. On the workspace, use the Workspace, then Initial Appearance menu. The Initial Workspace Appearance dialog opens.
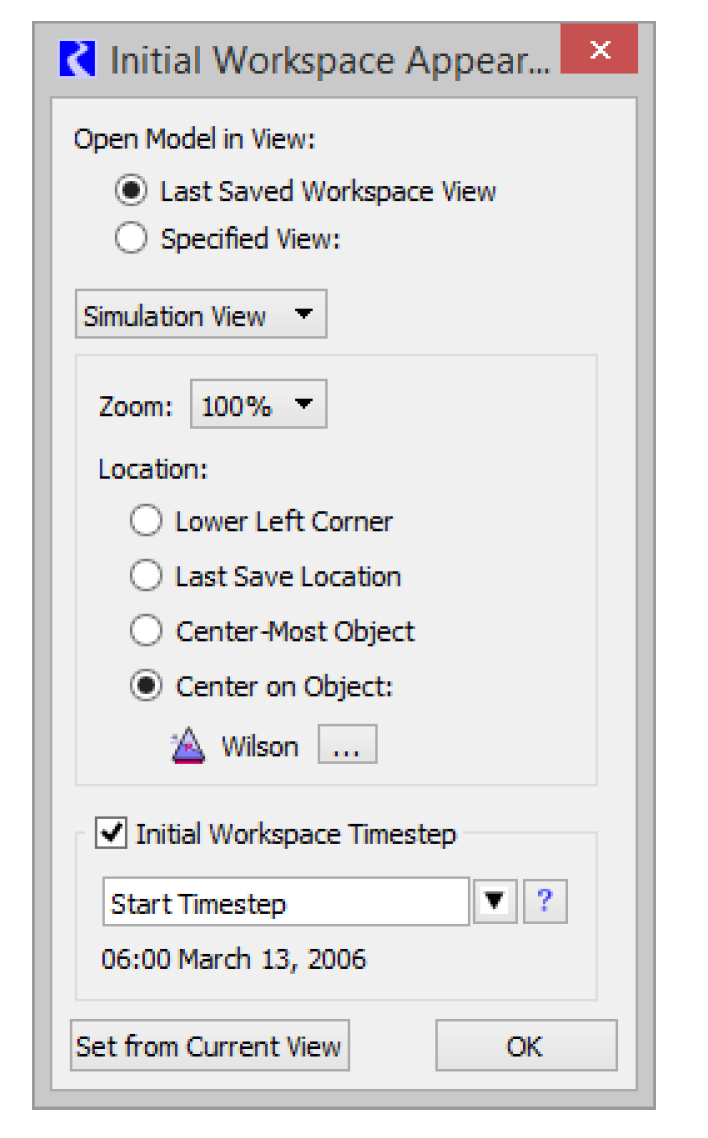
First, choose one of the following:
• Last Saved Workspace View (default). The view at the time of the last model save is shown on model load.
• Specified View: Specify a particular view to show when the model is opened.
Then, for each of the three workspace views, Simulation, Accounting (when enabled), and Geospatial, specify the zoom level and scroll location to use. Each view maintains these setting separately. For the location, select between one of the following methods to specify where to scroll:
• Lower Left Corner. Initially scroll to the lower left corner.
• Last Save Location. Initially scroll to the workspace coordinates (center of the visible area) as last saved.
Note: The size of the workspace window remains as is and is not affected by these options.
• Center-Most Object. Scroll to the center of the workspace objects, that is, the object which is closest to the average workspace view location of all object icons.
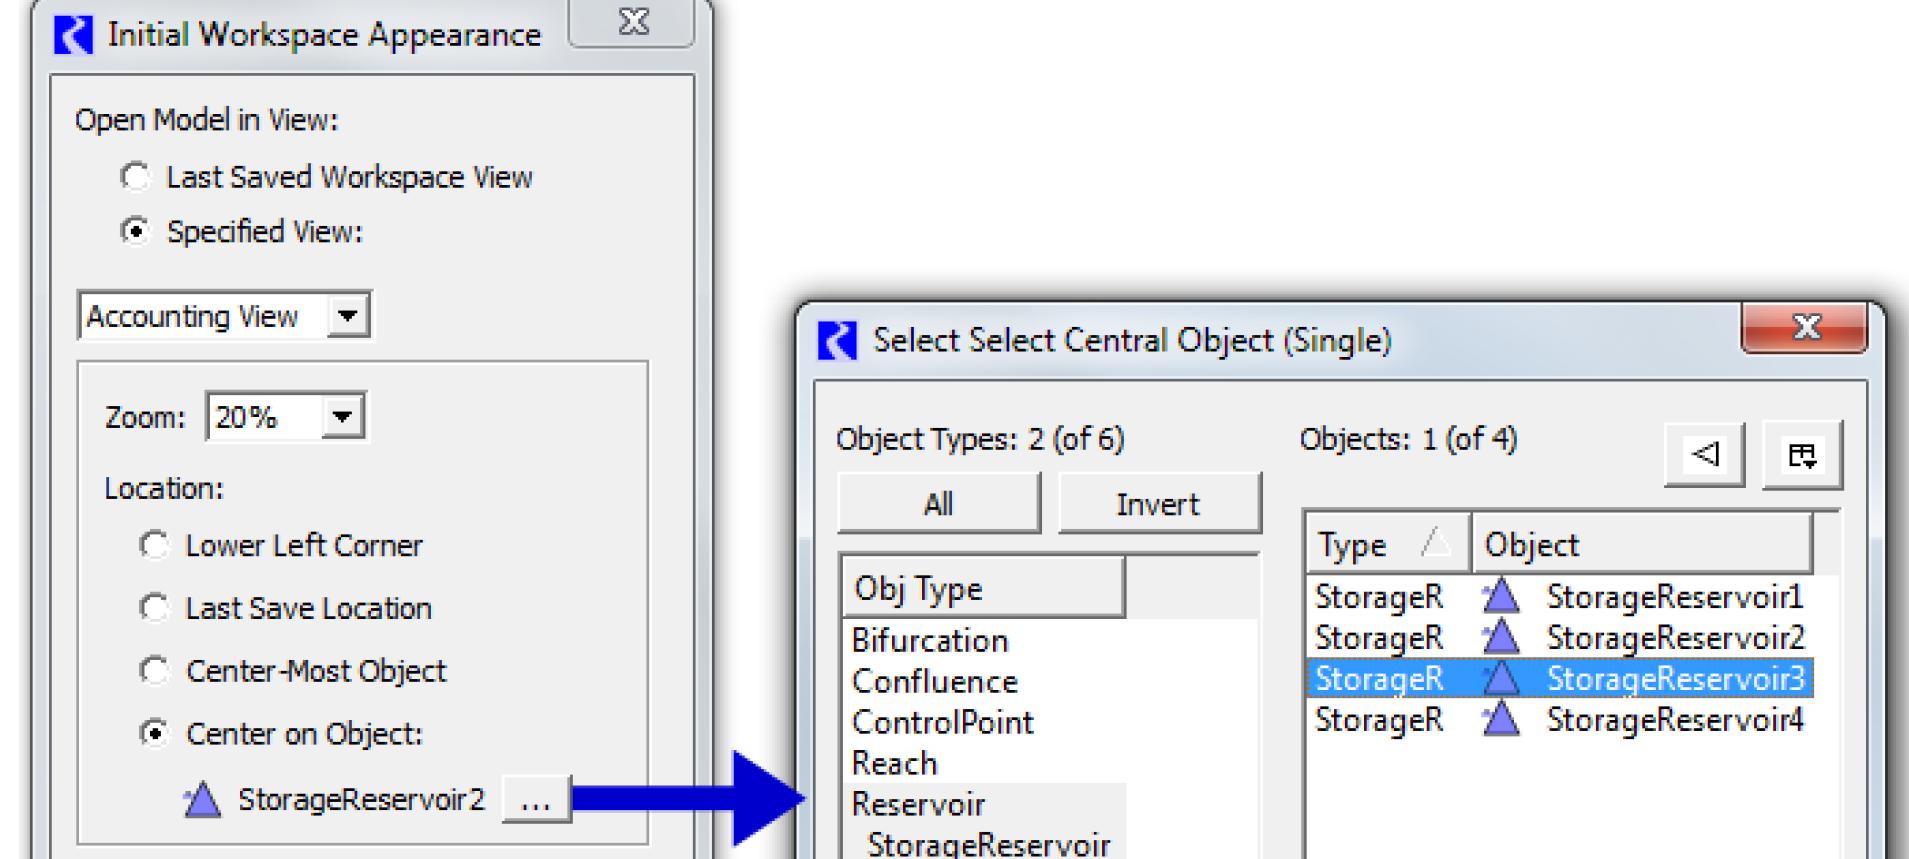
• Center on Object. Scroll so a specified object is at the center of the workspace. When this option is selected, use the button to bring up the object selector to specify the center object. Figure 2.12 illustrates.
Note: When centering on an object, if the object is near one of the edges, the view is scrolled such that the object is visible, but not actually centered.
Figure 2.12
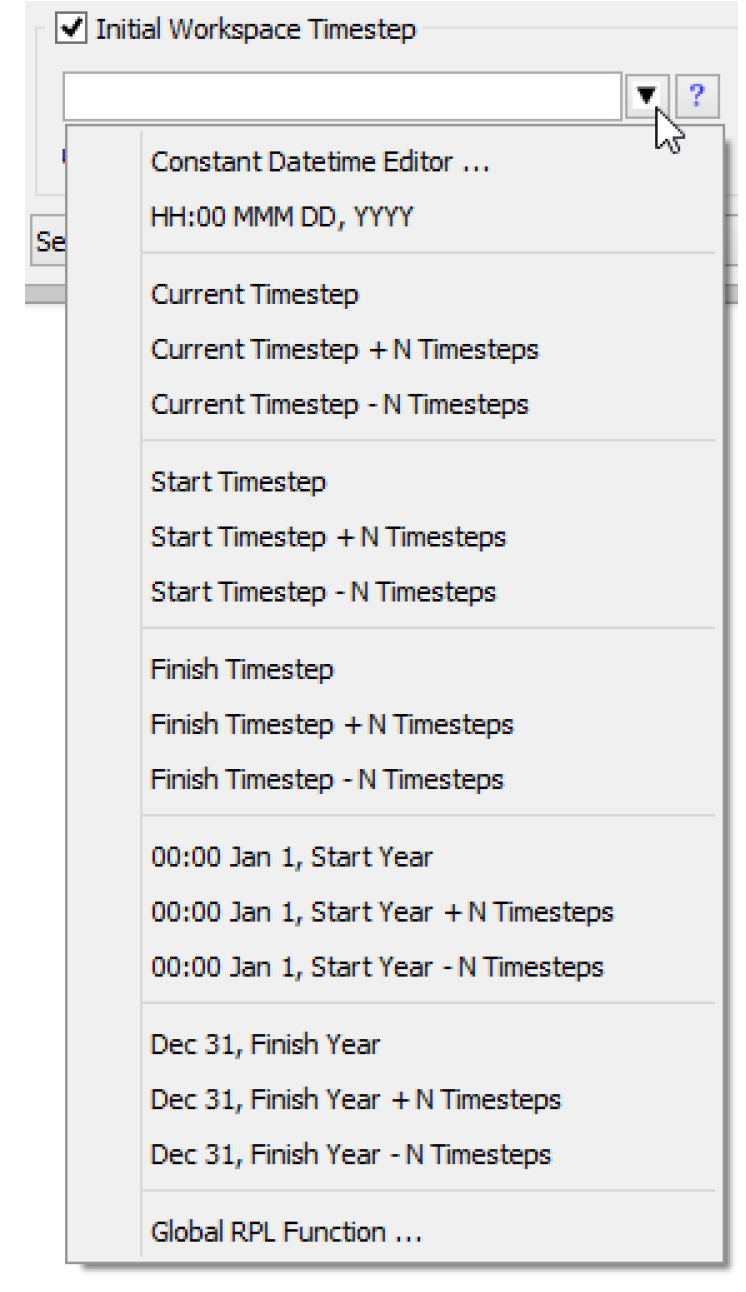
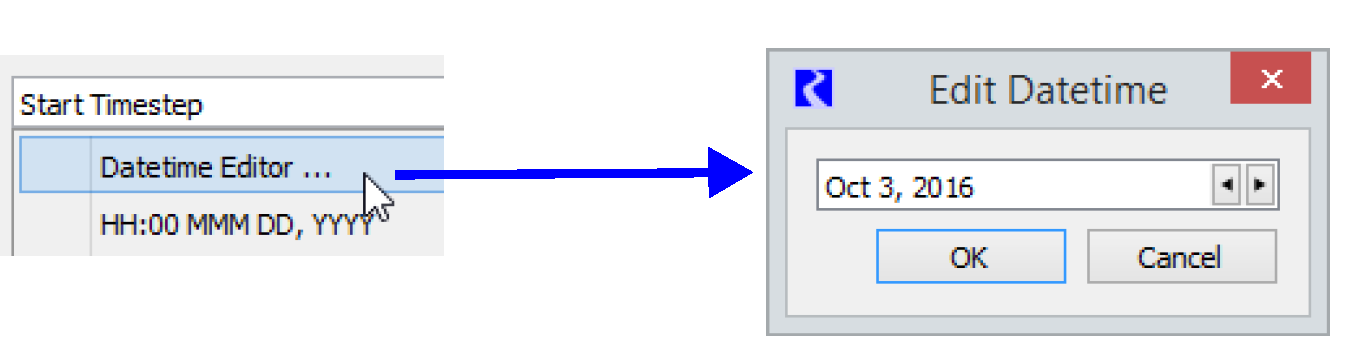
• Initial Workspace Timestep. The last option is the Initial Workspace Timestep. Define a constant or symbolic DateTime to which the model should scroll when first opened. When loading a model file containing this specification, the date is evaluated and all windows are Global Time Scrolled to that date.
The DateTime can be specified explicitly or symbolically as RPL DATETIMES; see DATETIME in RiverWare Policy Language (RPL) for details. Text below the editor field indicates the actual DateTime of the entered symbolic time text (if it is valid), or the status if it is not valid. You can also use the menu to specify one of the common DateTimes. Some of these are expressions which must be edited to become valid, e.g. by replacing “N” with a nonnegative integer and the HH:00 MMM DD, YYYY formula, where you substitute the hour, month, day and year.
The Datetime Editor option opens a separate dialog to specify the DateTime using a selector configured for the model's timestep size.
The Global RPL Function option opens a Function Selector to select a RPL function in the Expression Slot or Global Function Set.
Note: The selected function must have a return type of DATETIME, and must not have any arguments.
Select Help (question mark icon button) on the right side of the symbolic DateTime editor to show a description of symbolic DateTime representations.
• Set from Current View. Select the Set from Current View button to use the current workspace setting This has the following effects:
– The View Selection combo box is set to the workspace current view.
– The Zoom box is set the current view's zoom level.
– The Location setting is set to Last Save Location.
Select the OK button to apply changes and close the dialog. Shift-click the OK button to apply the currently shown settings in this dialog to the workspace.
Workspace Cursor Modes
The Workspace has two cursor selection modes. These define the effect of clicking and dragging on the workspace.
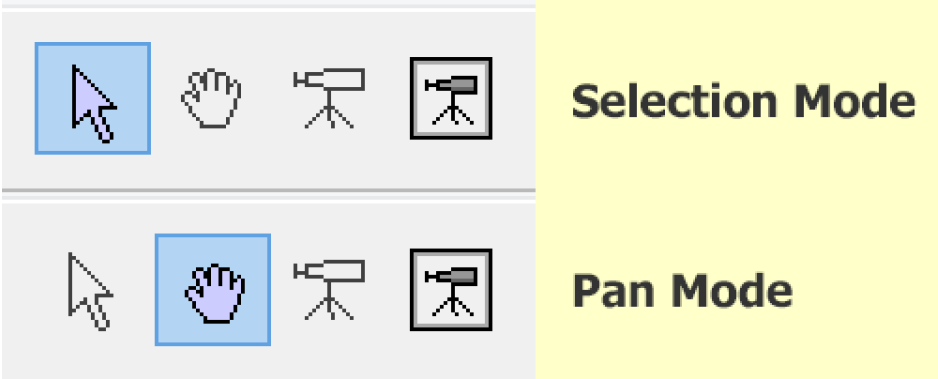
Selection Mode
Selection Mode is used for selecting and repositioning Simulation Object icons on the workspace.
Multiple icons can be selected by dragging a rectangle over the icons (with the drag operation started off any icon). Selecting an icon while holding down the Control key toggles the icon in or out of the selected set.
A set of selected icons can be moved together by starting the icon drag on one of the selected icons. An icon move operation can be aborted by hitting the Esc (escape) key before releasing the button.
Pan Mode
Pan Mode allows the user to move or pan the workspace canvas within the visible workspace area.
Use the middle mouse button to temporary enter Pan Mode from Selection Mode.
Closing All Dialogs
All opened dialogs can be closed at once using the Close Dialogs feature.  When this button is clicked, the Close Dialogs dialog opens. The dialog allows the user to select the types of dialogs that should be closed (all are selected by default) including the following:
When this button is clicked, the Close Dialogs dialog opens. The dialog allows the user to select the types of dialogs that should be closed (all are selected by default) including the following: • Object, Account, and Slots
• RPL Dialogs (the highest RPL Set editors do not close)
• DMI Dialogs
• SCT Dialogs
• Other Dialogs
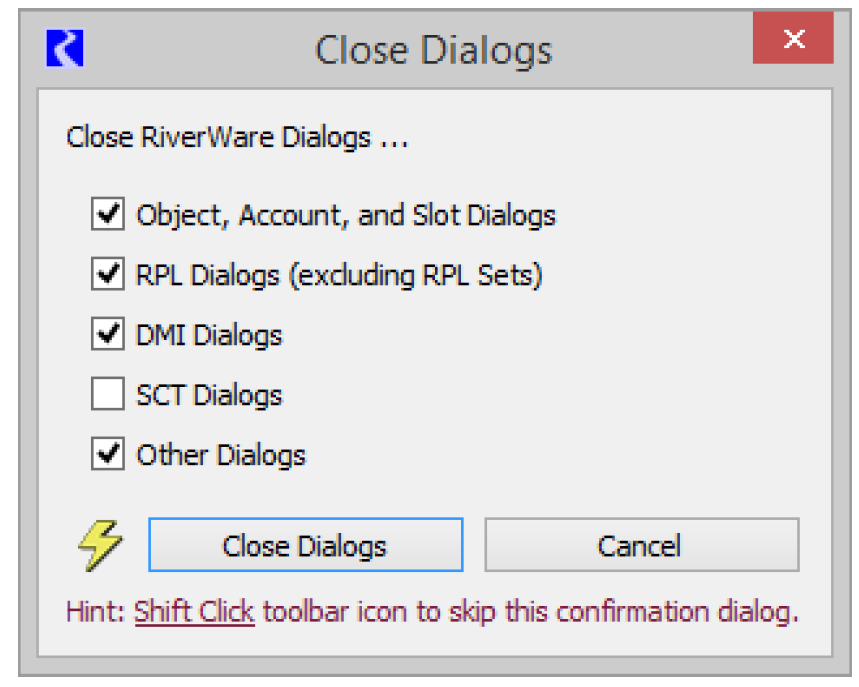
Then the Close Dialogs button closes the selected types. This utility never closes the Workspace. In addition, the following types of dialogs are just minimized instead of being closed:
• RPL Set editors. Actually closing those dialogs would also remove the RPL Sets from the RiverWare session.
• SCTs not yet associated with (that is, saved as) an SCT file.
As the text in the dialog shows, the user can also Shift-Click the  button and it will close all the dialogs without first seeing the Close Dialogs window.
button and it will close all the dialogs without first seeing the Close Dialogs window.Note: This tool is particularly useful when the user has opened many slot, object, or account dialogs and they wish to close all of them. If the user cannot even find the workspace in order to do this action, there is a menu option on most of those dialogs to File, then Show Workspace. Once the workspace is shown, the lightning bolt can be used to close all the dialogs.
Revised: 01/10/2022