
Display Groups
The appearance of links, objects, accounts, and supplies on the workspace can be manipulated using the Display Group Editor. The dialog is accessed as follows:
• Select Workspace, then Display Group Properties.
• Right-click the workspace and select Display Group Properties.
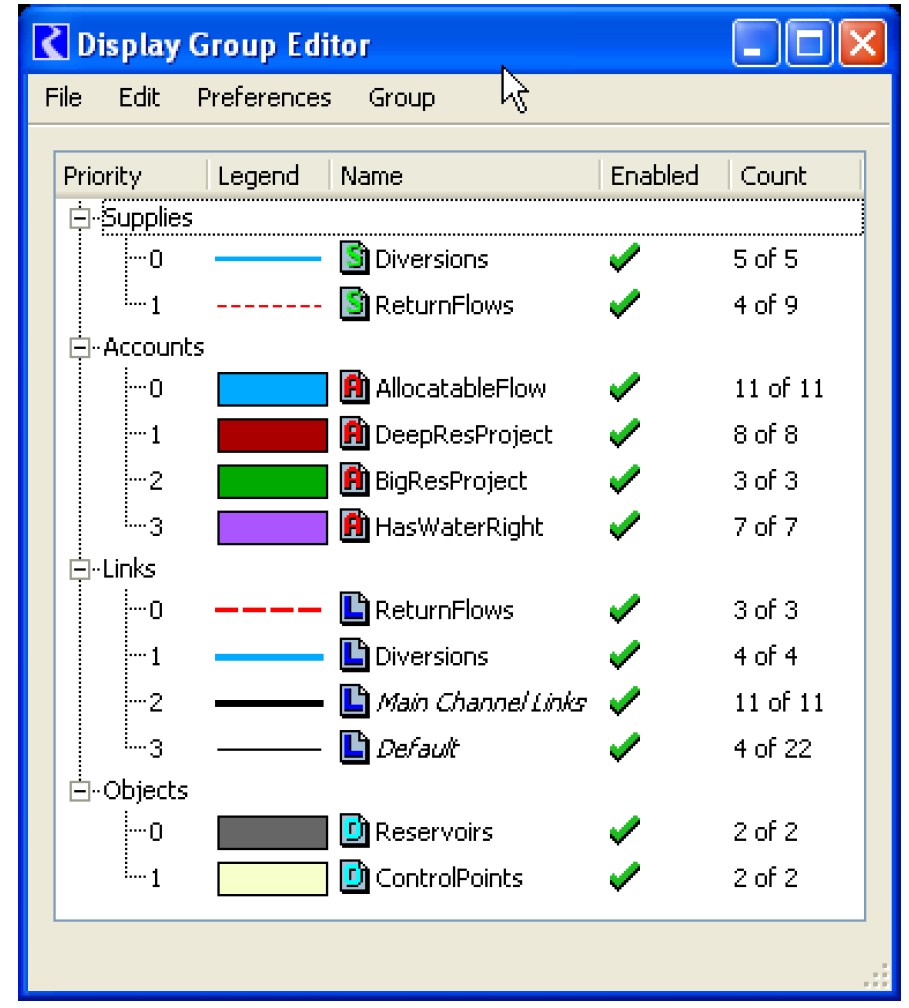
This brings up a window with the option to select Display Group Properties.The Display Group Editor provides the ability to create groups of links, groups of objects, and if accounting is enabled, groups of supplies and groups of accounts. The display properties and the membership of a group can be changed by double-clicking that group. The membership of the groups need not be mutually exclusive. The groups are prioritized. For example, if two link groups contain the same link, the group highest in the list (lowest priority number) will be used to set the display properties of that link. Display groups can be enabled and disabled by selecting the checkmark in the Enabled column.
The Count column provides information on the number of items in the group of the form XX of YY, where YY is the number of items in the group's set selection, and XX is the number of those items which are governed by that group (i.e. not currently governed by an enabled, superior group).
Note: The counts are not automatically updated if you delete objects, accounts, links, or supplies. The counts can be updated manually with the Groups, then Update Item Counts menu item. They are also updated when the Display Group Editor dialog box is redisplayed.
Link Groups
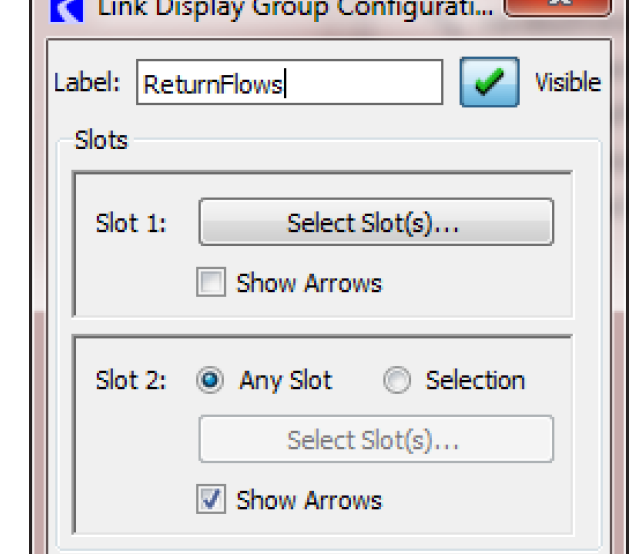
A link group can be created by selecting Group, then Add Link Group in the Display Group Editor. Double-clicking the new link group entry will bring up the Link Display Group Configuration dialog. Provide a name that will be shown in the Link Group Editor.
In the top part of the dialog, you specify the slots on either end of the links. Select Select Slot(s) in the Slot 1 area to specify the first set of slots. You can use filters and other selection mechanisms to quickly choose a large number of slots. Either leave the Slot 2 as Any Slot or specify slots using the selector. Example 2.1 provides an example. See Selector Features for details.
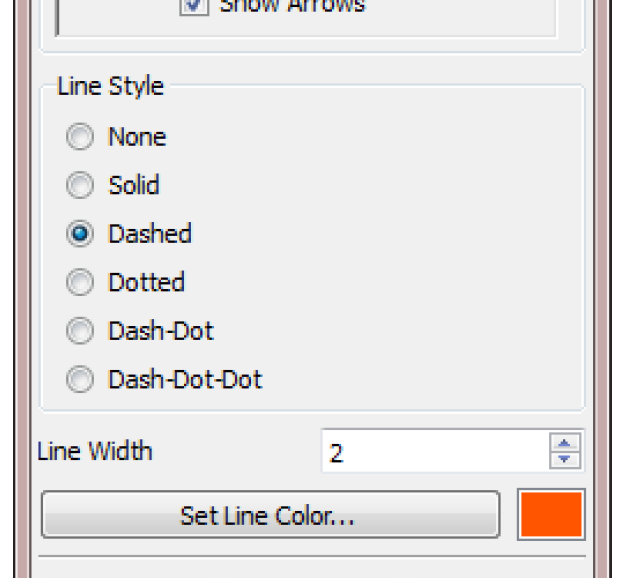
You can then choose to show arrow heads on either end of the links using the Show Arrows option.
Note: The ordering of the slot selections is important if want to show arrows.
Example 2.1
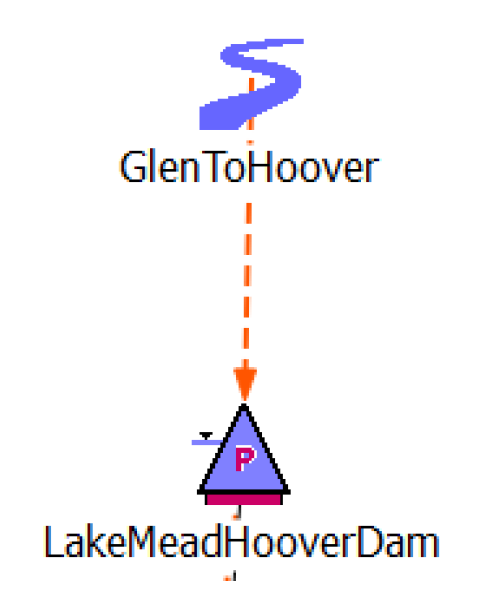
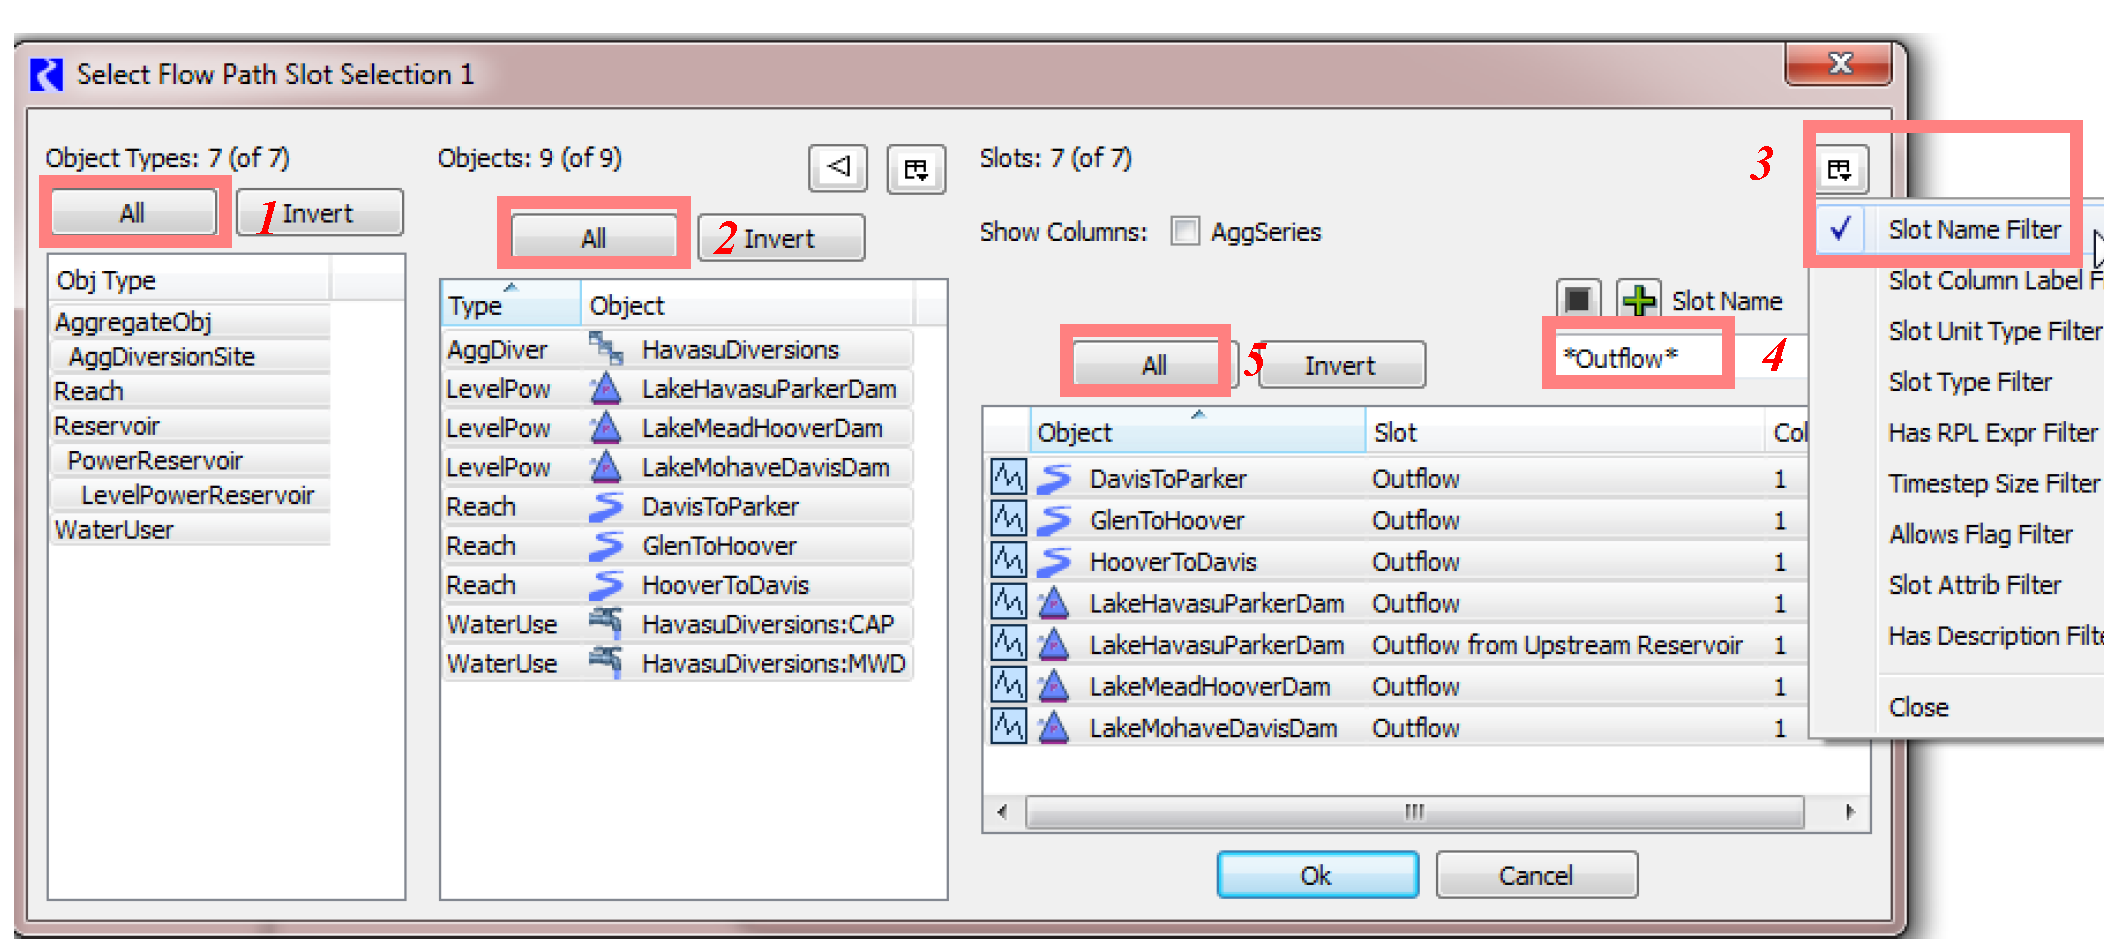
Use the following steps to show arrows from all Outflows to all Inflows (i.e. the flow path). Figure 2.28 illustrates.
1. Select All Object Types.
2. Select All Objects.
3. Select Slot Name Filter.
4. Enter *Outflow*.
5. Select All.
6. Select Ok. Use the Any Slot option or choose only Inflow slots.
Figure 2.28
In the bottom portion of the dialog, you can control the Line Style, Line Width, and Line Color of the links.
Selecting Links
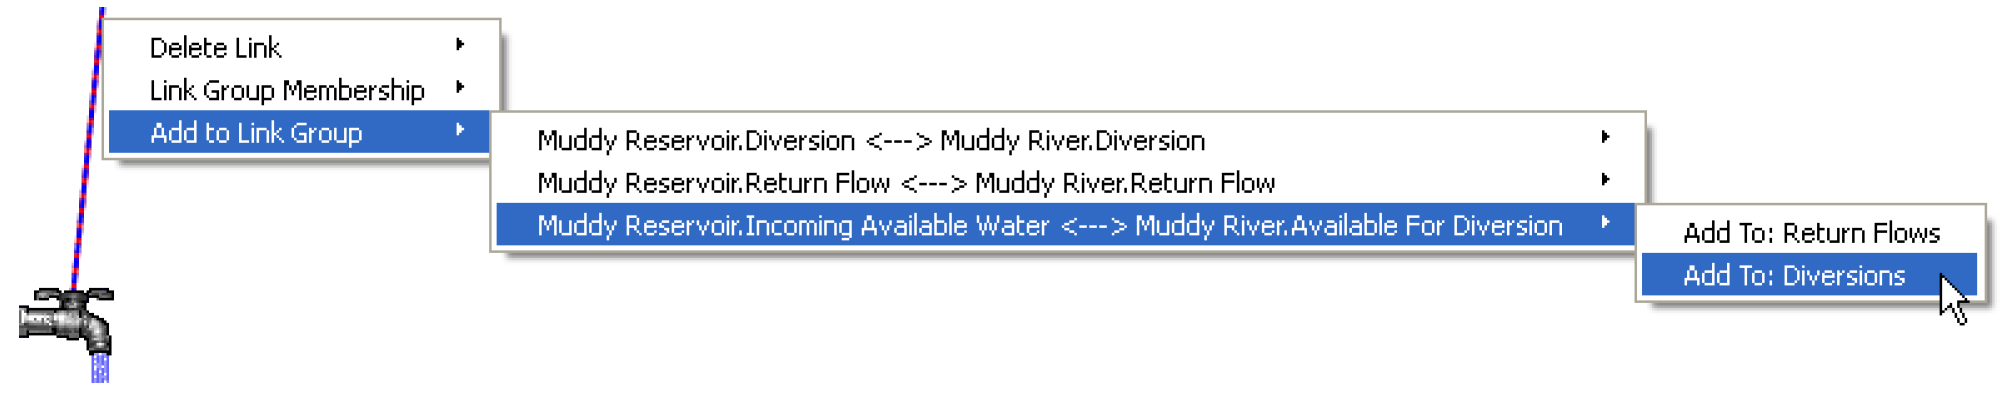
From the Workspace, a link can be added to link group by right-clicking the link(s) between two objects, hovering over the Add to Link Group option, hovering over the desired link (there can be multiple links on the same line between two objects), and selecting the desired Add to: <link group>.
Equivalently, links can be added to a link group within the Display Group Editor. This approach allows multiple links to be added to a link group at once. By double-clicking the desired link group, the Link Display Group Configuration window is opened. The slot on one end of the link is selected by selecting Select Slot(s) in the Slot 1 field. If the Any Slot toggle is selected in the Slot 2 field then all links to any of the slots listed in the Slot 1 field will be associated with the display group. While the Link Display Group Configuration dialog does not display the links associated with a particular group, the slot selector dialog remembers the selected links. Therefore, the user can view the links associated with a group by selecting the Select Slots(s) button. To make a more specific selection of links, slots can be selected in the Slot 2 field if the Selection toggle is enabled. Only those links that are connected to a slot in the Slot 1 field and the Slot 2 field will be associated with the display group.
Figure 2.29
Predefined Link Groups
Two predefined link groups are provided for all models: Main Channel Links, and Default. The Main Channel Links group contains all links between main channel upstream slots and main channel downstream slots. The Default link group contains all links on the workspace.
Supply Groups
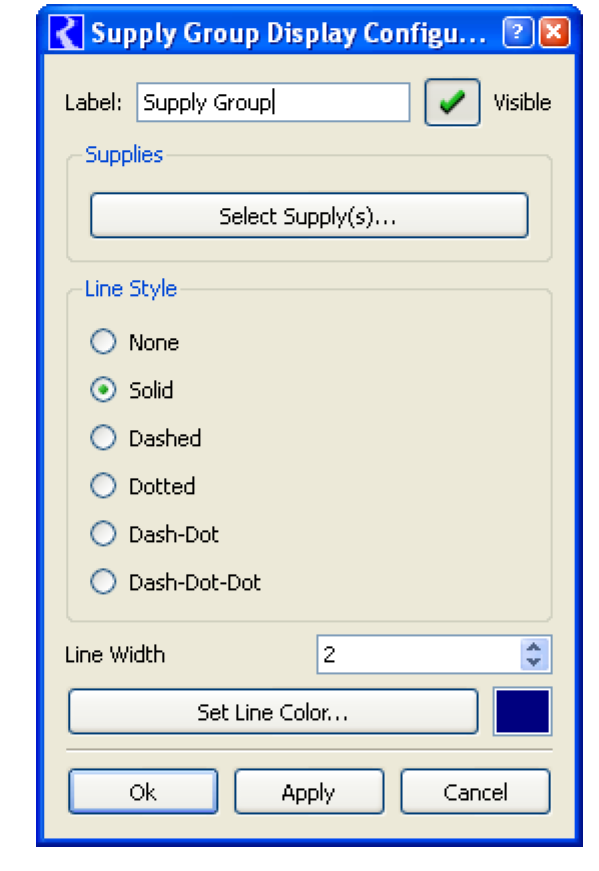
Supply groups are active only if accounting is enabled. A supply group can be created by selecting Group, then Add Supply Group in the Display Group Editor. Double-clicking the new supply group entry will bring up the Supply Display Group Configuration dialog. The membership of the group and the line style, color, and width of the group members can be set with this dialog. The membership of the group is controlled by selecting the Select Supply(s) button. See Supply Groups in Accounting for details on Supply Groups.
Account Groups
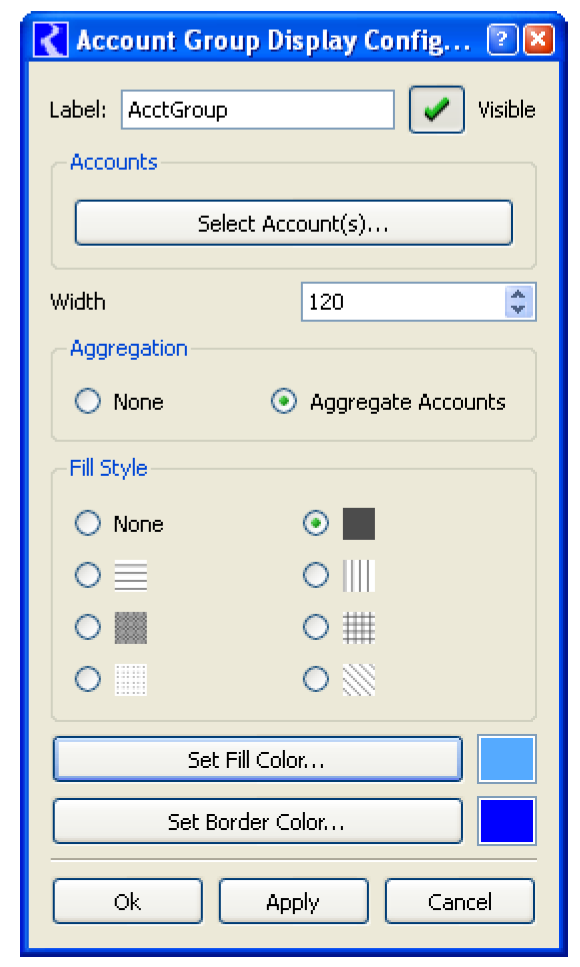
Account groups are active only if accounting is enabled. An account group can be created by selecting Group, then Add Account Group in the Display Group Editor. Double-clicking the new account group entry will bring up the Account Display Group Configuration dialog. The membership of the group and the fill style, fill color, account width, account aggregation, and border color of the group members can be set with this dialog. The membership of the group is controlled by selecting the Select Account(s) button. If account aggregation is selected, the selected accounts, on a particular simulation object, will be collapsed into one icon. The icon will appear as a stacked group of accounts to indicate the presence of more than one account. An account can also be added to an Account Display Group by right-clicking the account on the workspace, hovering over Add to Account Group, and selecting the desired Account Display Group. If the account is already a member of an Account Display Group, this option will be replaced with Account Group Membership. Hovering over this option will show the display group to which the account belongs. See Account Groups in Accounting for details on Account Groups.
Object Groups
The display options associated with object groups apply to both the Simulation View and the Accounting View of the RiverWare workspace (some options apply only to accounting). An object group can be created by selecting Group, then Add Object Group in the Display Group Editor. Double-clicking the new object group entry will bring up the Object Display Group Configuration dialog. The membership of the group and the fill style, fill color, visibility, drawing layer, and border color of the group members can be set with this dialog. The membership of the group is controlled by selecting the Select Objects(s) button.
An object can also be added to an Object Display Group by right-clicking the object on the workspace, hovering over Add to Object Group, and selecting the desired Object Display Group. If the object is already a member of an Object Display Group, this option will be replaced with Object Group Membership. Hovering over this option will show the display group to which the object belongs. The fill style, fill color, and border color apply only to objects in the Accounting View as indicated in the Object Display Group Configuration dialog. The Drawing Layer option is useful when simulation objects are stacked on top of each other on the workspace. The user can control the order of the layering or stacking by specifying the Drawing Layer. Objects with a higher priority Drawing Layer (lower numerical value) will be displayed on top of objects with a lower priority Drawing Layer.
Revised: 01/10/2022