Exchange User Interface
Following is a description of the exchange user interface.
Exchanges Manager
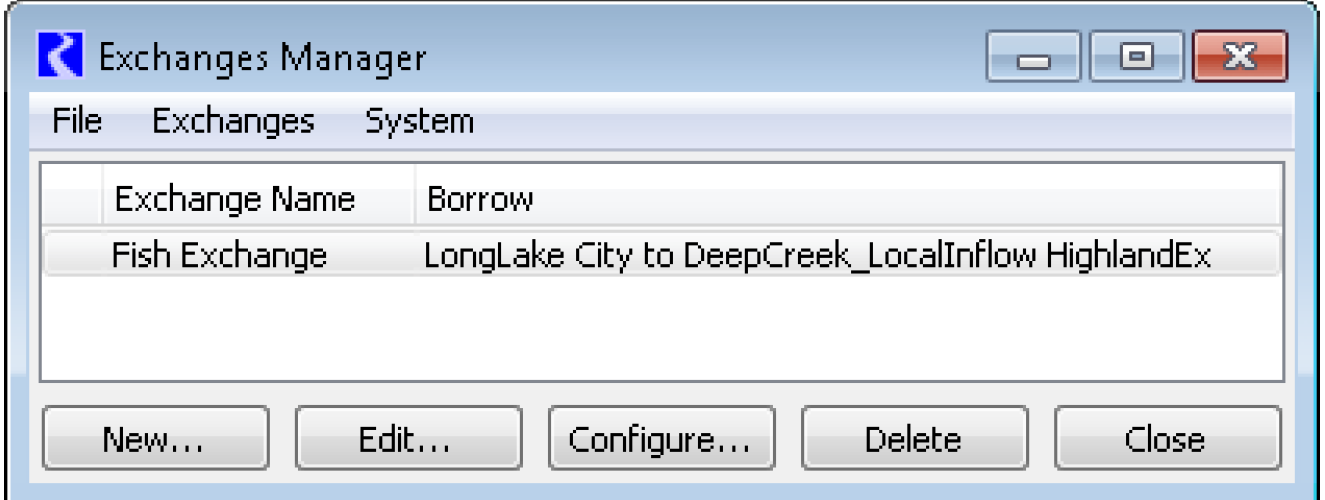
Exchanges are created through the Exchanges Manager dialog. This is accessed from the workspace through the Accounting, then Exchanges Manager. It can also be accessed from other locations such as the accounts manager and supplies manager. Figure 5.5 shows the Exchange Manager with one exchange defined. It lists each exchange and the Borrow supply (or user input) associated with that exchange. Items in this list can be sorted by selecting either column heading.
Figure 5.5

To edit data (or view) for an existing exchange, highlight the exchange and select Edit. This brings up the Exchange Balance dialog. We will explore this later. To create a new exchange select New and a blank Exchange Configuration dialog will open. To modify an existing exchange, select Configure to open the Exchange Configuration dialog.
Exchange Configuration Dialog
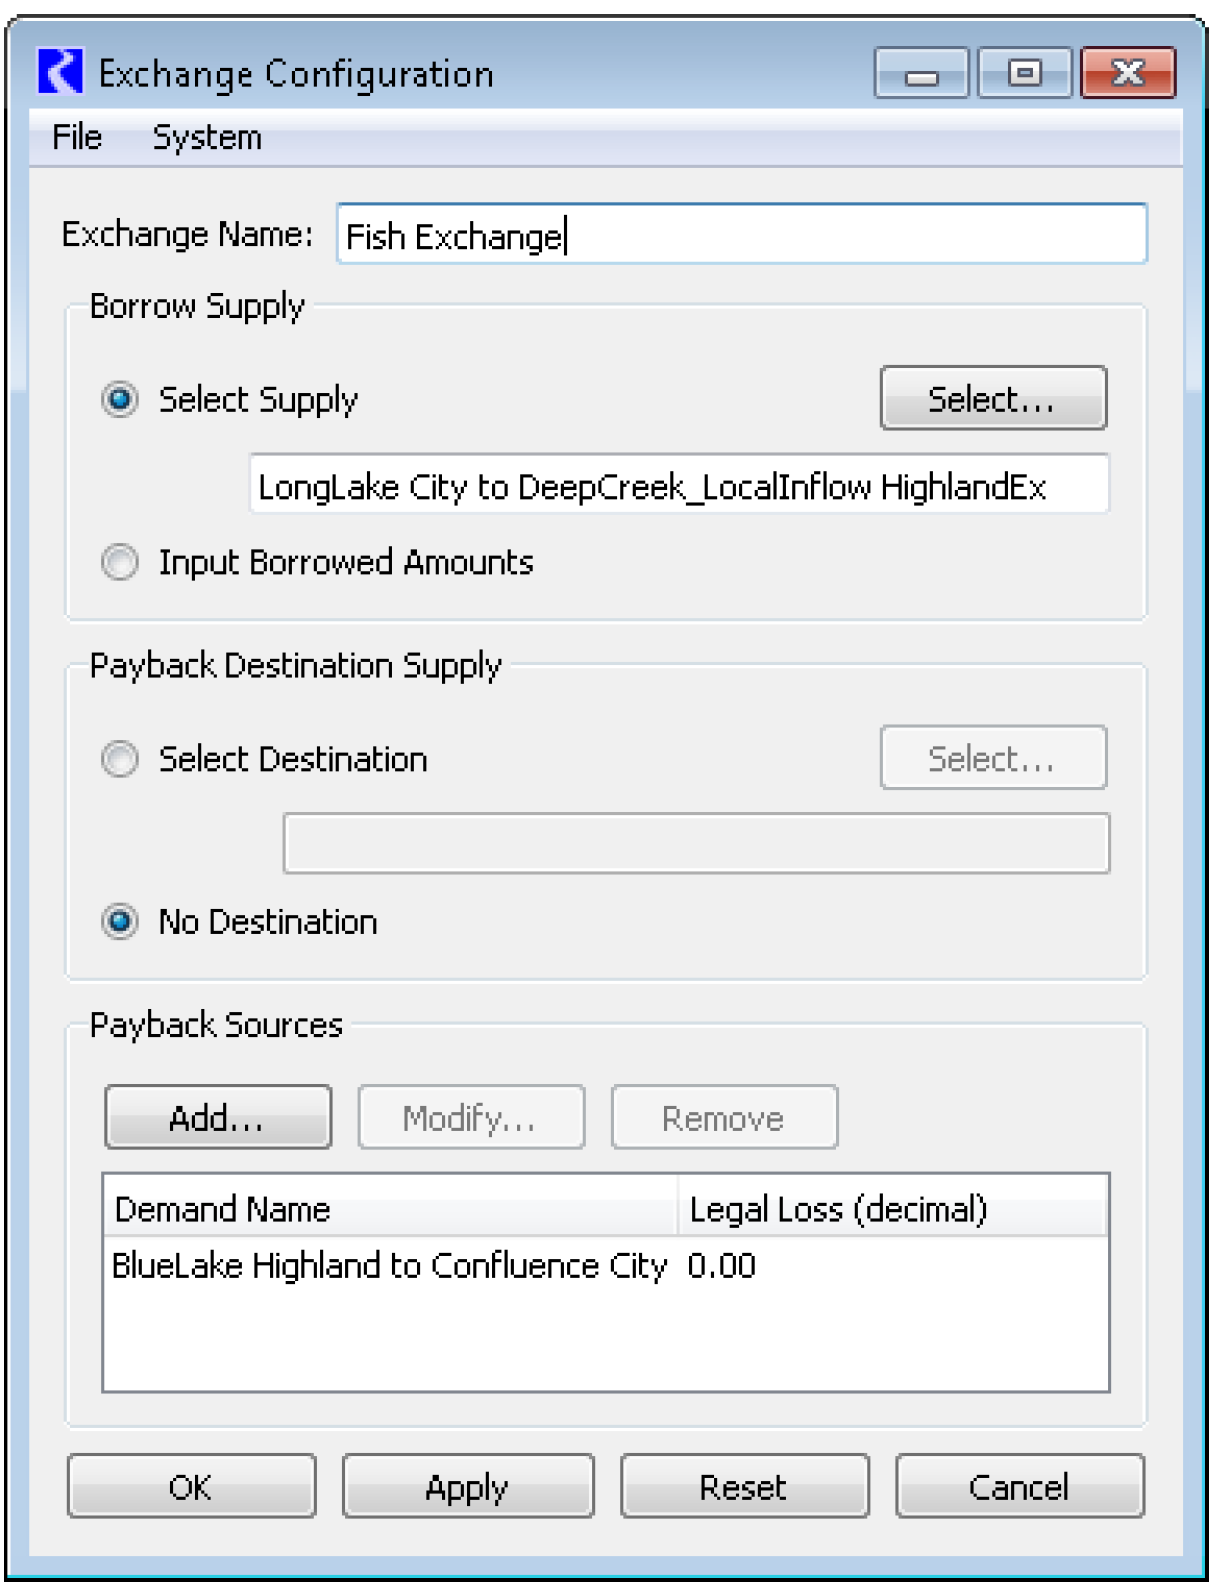
The Exchange Configuration consists of four areas: Borrow Supply, Payback Destination Supply, Payback Sources and Units. On the first line, the user can enter an Exchange Name in the text field.
The Borrow Supply can be specified using the radio buttons to select either that the user will use the Select button or that the user will Input Borrowed Amounts. If the Select option is used, the text field becomes active. The user can either type in the supply name (not recommended) or select the Select button to select the supply using the standard selection mechanism.
The user can then configure the Payback Destination Supply. To reiterate, either zero or one Payback Destination Supply is allowed. The user can select whether to Select Destination or have No Destination. Again, if the user chooses to Select Destination, the user can either type in the supply name (not recommended) or select the Select button to select the supply using the standard selection mechanism.
The third area, Payback Sources, allows the user to specify the Payback Sources which consist of one or more supplies and legal loss associated with each supply. To add a Payback Source, select the Add button and select the supply. Then enter the Legal Loss using a click-pause-click action to make the text field editable. It will default to 0.0 if not input. To replace (re-select) any of the existing supplies, first select the supply from the list, then select Modify to select a new supply or type in a new legal loss. Use the Remove button to delete the selected supply from the exchange.
Click OK or Apply to confirm the changes.

Exchange Balance Dialog
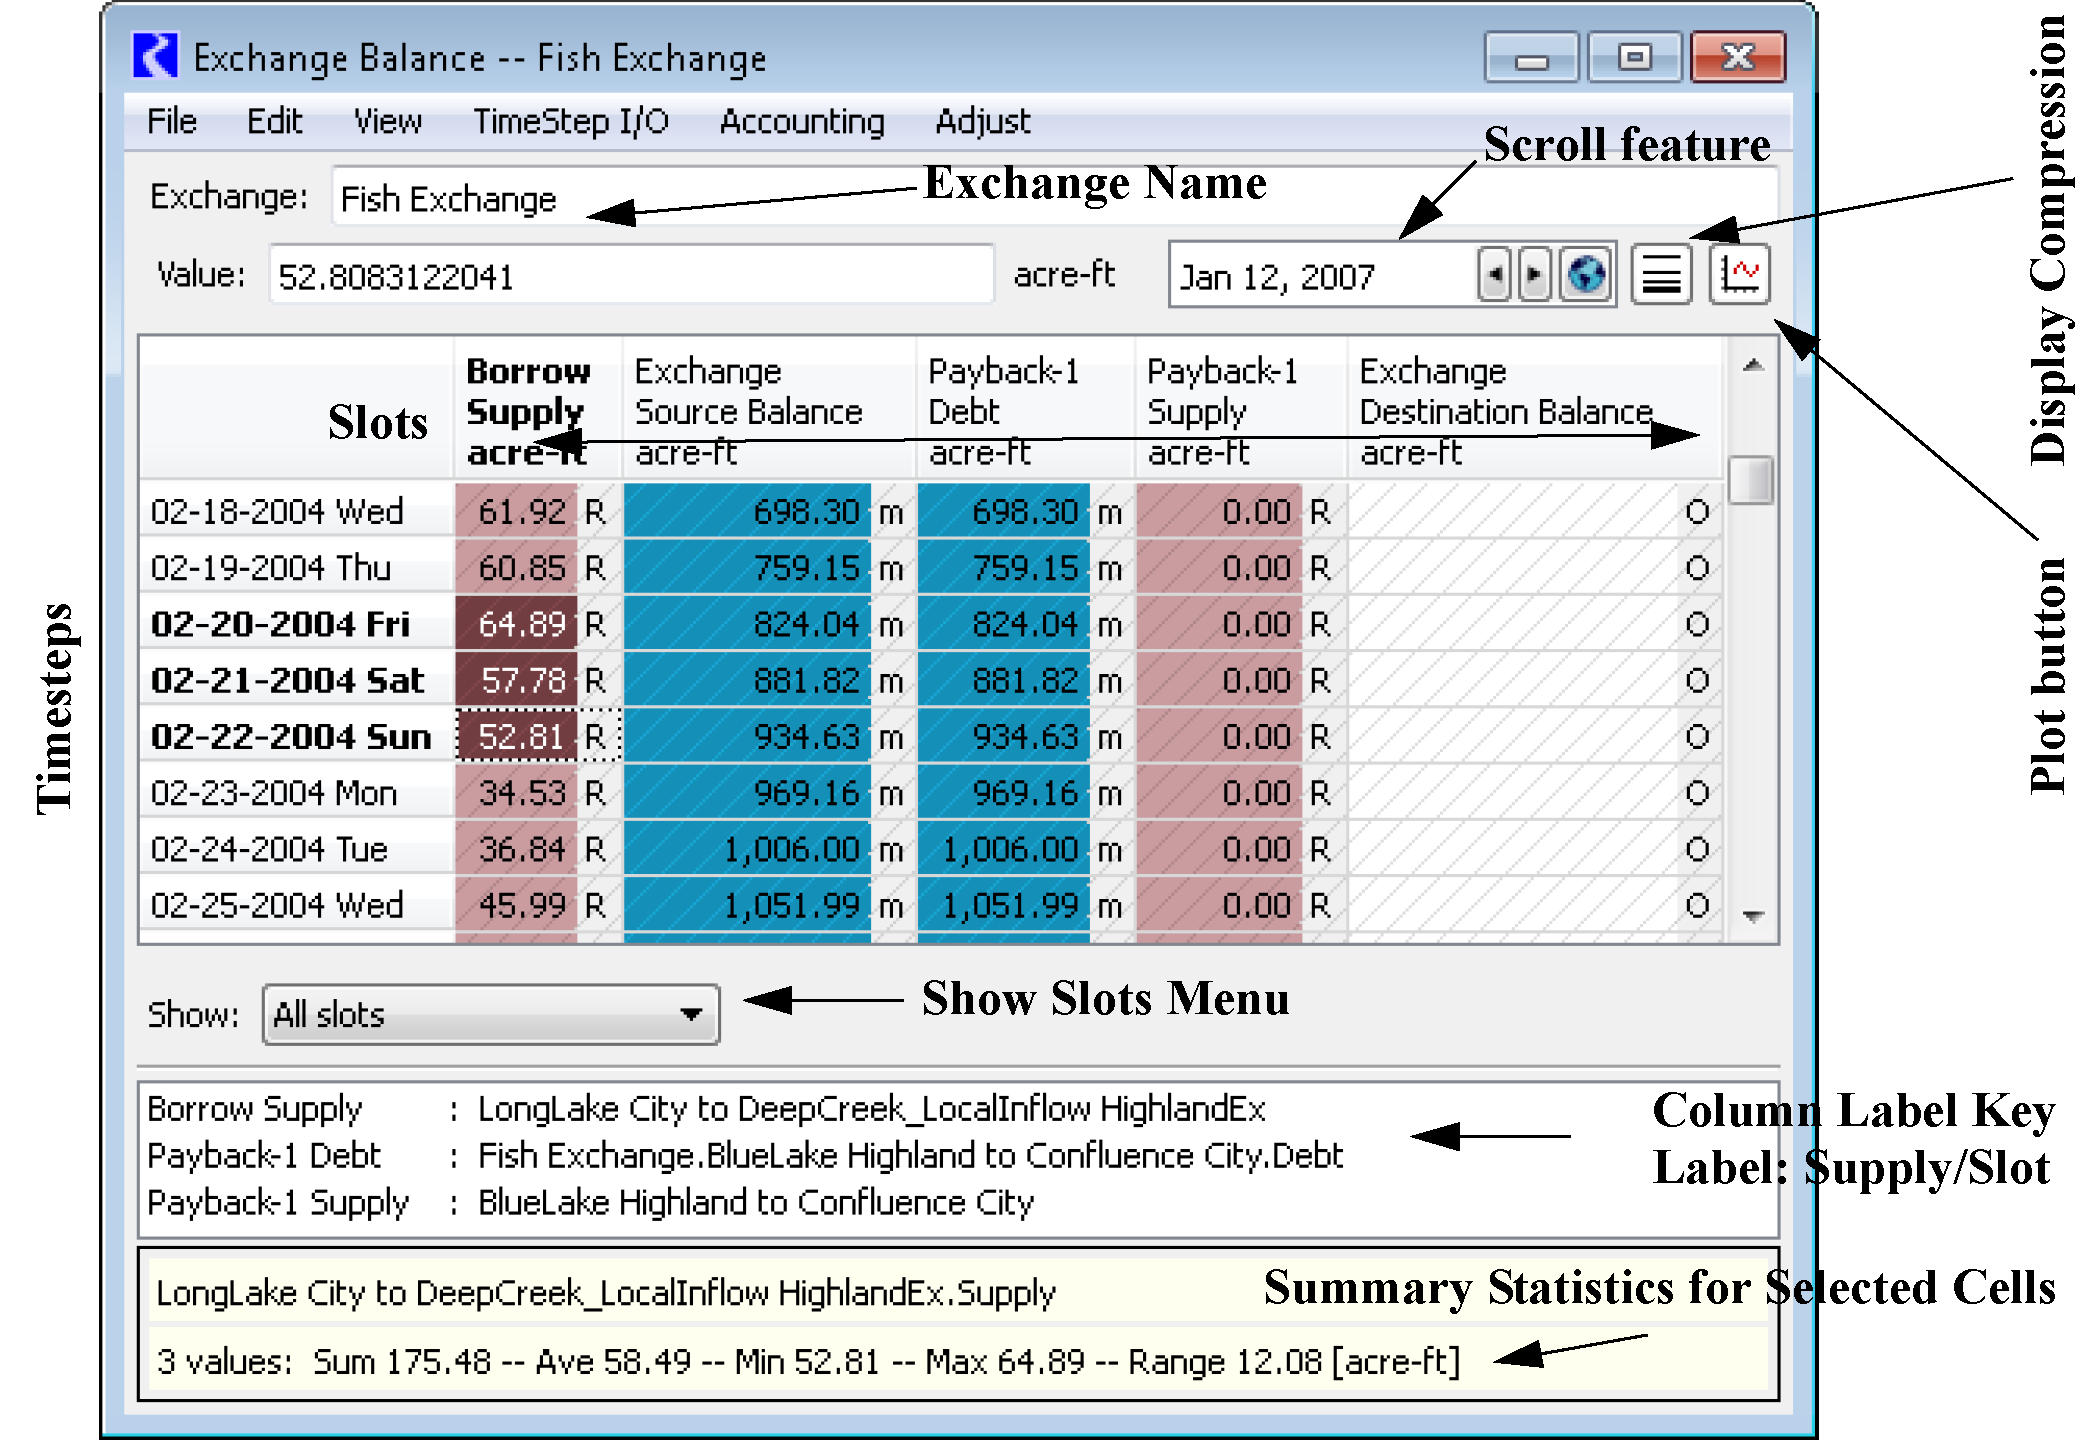
The Exchange Balance dialog shows the slots associated with the exchange. Depending on the exchange configuration, different slots will be shown. Figure 5.6 shows the Exchange Balance dialog with defined Borrow Supplies, Destination Payback Supplies, and Source Balance, Destination Balance, the Payback Debt, and the Payback Supply.
Figure 5.6

Each column represents a series slot. Those labeled as “Supply” reference a supply in the model. Those labeled as “Balance” or “Debt” are the exchange specific slots. The column labels provide a reference to the actual supplies. The key in the lower part of the window displays the full name of the supply. This allows the columns to remain relatively narrow but still have descriptive names associated with each component. The dialog has similar features to other accounting dialogs, including the scroll button, Plot button, and Show Slots menu. There is also the ability to hide or compress repeated values, a specified value, or NaNs. See Series Display Compression in User Interface for details about Series Display Compression. There is also the summary area where statistical information can be obtained for the highlighted selection.
In Figure 5.6, we see that when water goes through the Borrow Supply, the Exchange Source Balance increases as does the Exchange Destination Balance. The Payback Debt for each payback source also increases which includes the legal loss term. The debt is always larger than equal to the source balance. As water passes through the Destination Supply, the Destination Balance decreases. As water passes through the Payback Source Demand (shown as Payback-1 in the figure), the Source Balance and Debt decrease.
Typically the values in the Exchange Balance are read-only; any edits to input data must be made directly on the borrow or payback supplies. The Exchange Balance is a view of the data in those supplies. Also, any of the Balance or Debt columns are always read-only as they are outputs from the solution of the exchange equations.
The one exception to the read-only constraint is when the user has configured the exchange to “Input Borrowed Amounts” in the exchange configuration. Then, the borrow supply lives on the exchange, is labeled “Input Borrow” and is directly editable from the Exchange Balance dialog.
Note: When first created, the Input Borrow is empty, so the user must select the Show All menu to show this slot. Also remember that any Input Borrow amounts are always entered as a volume.
Revised: 01/05/2024