HDB Datasets
The HDB Dataset described in this section allows direct connections to and from an HDB database.
Note: To import from the HDB web server, use a Web Server dataset and then select the HDB web server. See HDB Web Service for more information.
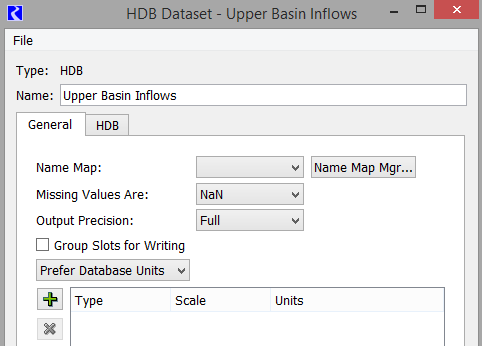
Double-clicking an HDB dataset in the Dataset Manager opens the HDB Dataset editor. In this dialog, the dataset can be renamed and configured. It has two tabs, one for general configuration and one specific to the HDB implementation.
General Tab
This section describes the general tab for the HDB dataset dialog box.
Name Map
Mappings of RiverWare names to HDB IDs are contained in database tables, so Name Maps are not needed for configuring a dataset for HDB. Specifying which database mapping to use is described later in the HDB tab of the configuration dialog.
Missing Values
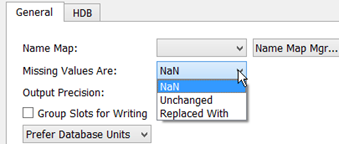
You specify how missing values are handled when exchanging data with HDB. In general, a NaN in RiverWare is not represented as a data record in HDB. The current choices are as follows:
• NaN. On export, no data record is created in HDB for NaNs in RiverWare, and any corresponding existing data record in the real tables is deleted (there would be no existing data record in the model tables). On import, missing values in HDB are made NaNs in RiverWare.
• Unchanged. On export, any existing data in the HDB real tables is left unchanged for a corresponding NaN value (there would be no existing data record in the model tables). On import, RiverWare data is left unchanged for a missing value in HDB.
• Replaced With. User provides an input value that is substituted for NaNs on export or missing values on import.
Output Precision
For Output DMIs, specify the precision of values that are sent to the database, that is, the number of digits to the right of the decimal point. The options are:
• Full. Output all available digits of precision.This is the default.
• Slot. Use the slot's display precision from the active unit scheme. Note, changing the active unit scheme could affect values sent out via the DMI.
• Specified. Use the specified precision.

Values are converted to the specified units, as described in Units, before rounding.
The rounding algorithm is: round(value * 10^N) / 10^N where value is after unit conversion, N is the number of digits of precision, and round() is a standard function which rounds its argument to the nearest integer value, rounding halfway cases away from zero.
Caution: With this approach you could potentially see misleading results. For example, if a slot shows 1.23cfs, you export it using specified dataset units of cms, it becomes 0.0348cms. If you then reduce the precision to 2 digits, it will send 0.03cms as the output. If you then show the value in your database viewer using cfs and 2 digits of precision, it shows it as 1.06cfs. The value in the database does not match the value in RiverWare due to conversions and rounding. Be careful!
Also, to be clear, all values exported from a Database DMI are floating point numbers regardless of precision. For example, an expression slot might compute a value of 7538.21. Exported with 0 digits of precision, this would appear to be 7538, but technically, it was exported as a floating point number, 7537.9999999974 to 15 significant digits. This fact is really only important if you database displays 15-17 digits.
Group Slots for Writing
The Group Slots for Writing check box configures the DMI to group slots together when writing to the database. This option is particularly useful when you have many slots but few values in those slots. Grouping the slots minimizes the network traffic. This can significantly improve performance over a network.
Units
A menu in the Dataset dialog allows you to specify how units should be handled for a dataset. The choices are as follows:
• Use Database Units
• Prefer Database Units
• Use Dataset Units

Units are defined in HDB for each piece of data, so Use Database Units is always applicable. If the unit type of the data in HDB does not match the unit type of the slot in RiverWare and the units cannot be converted, the slot is skipped and a warning message is given. The exception is if the unit type of the slot in RiverWare is NOUNITS. Here the unit type matching between HDB and RiverWare is skipped and the data is allowed to be exchanged with no conversions being applied.
In addition, to improve performance you can configure slot units in the Dataset and Use Dataset Units. This prevents additional calls across the network to get the units from the database.
Configuration specific to the HDB database is specified in the HDB tab of the HDB Dataset editor.
HDB Tab
HDB Database
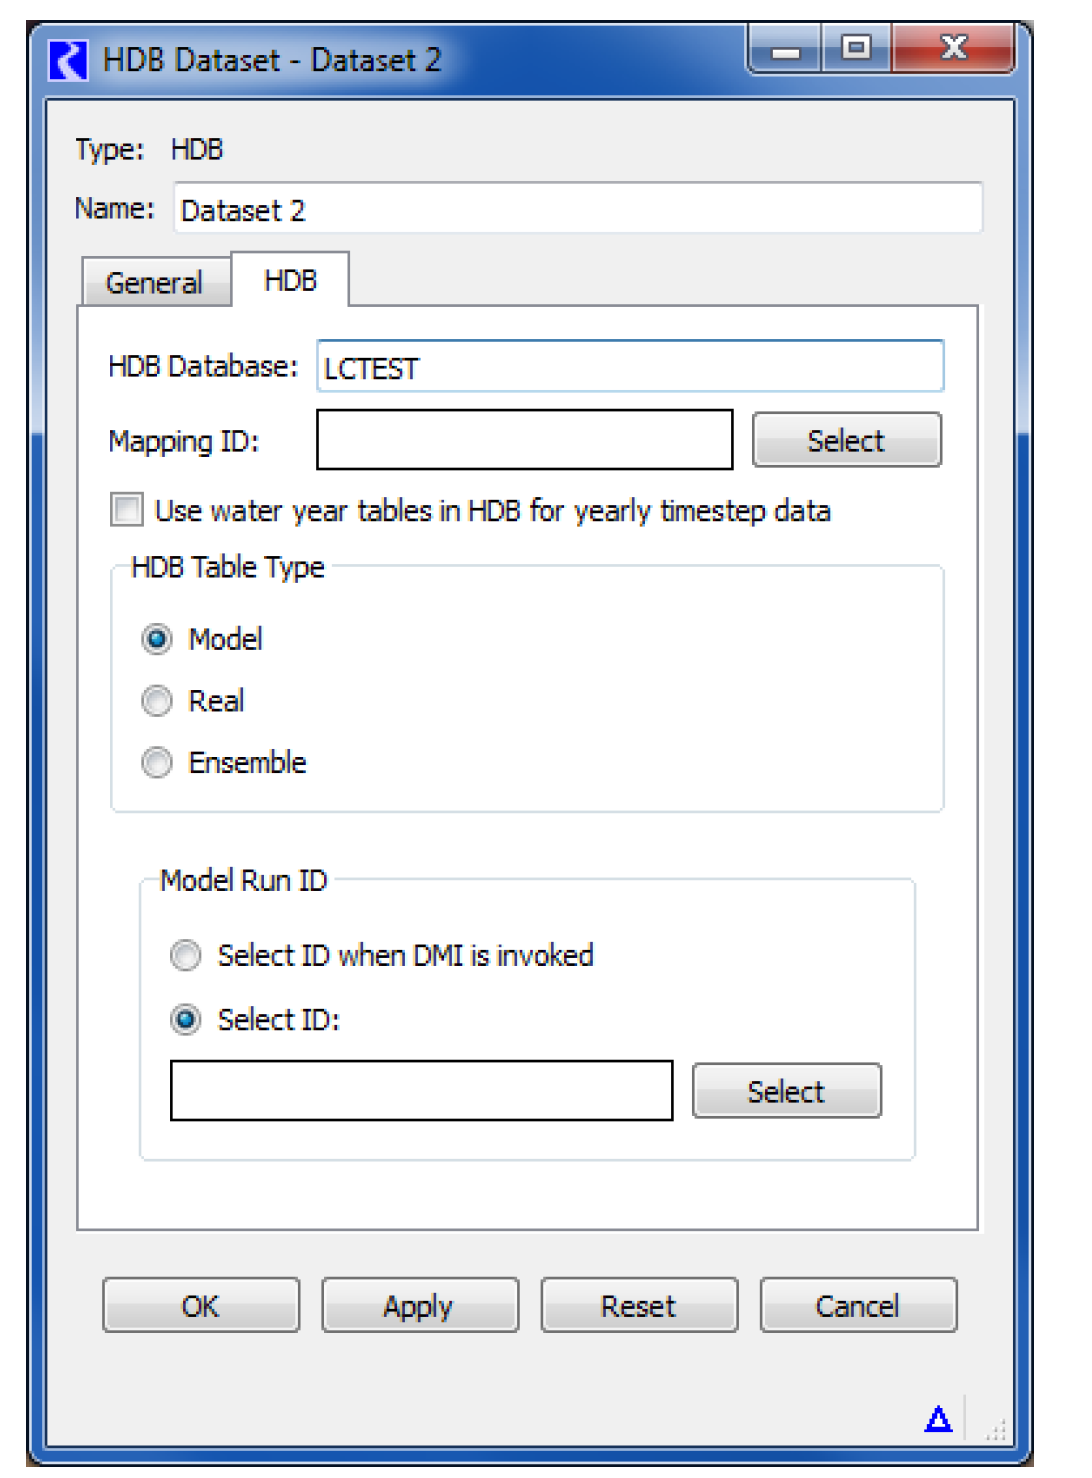
The HDB Database field specifies which database the dataset will interact with. The entry in this field should be a TNS name or connect string that will allow connection through Oracle Networking Services (SQL*Net) to the desired database. You need to have Oracle networking available on your computer through Oracle Client or a full Oracle database installation.
Note: The HDB Database DMI connectivity requires either Oracle Client 19 or Oracle Instant Client 19. CADSWES tested with Oracle Client 19.3 and Oracle Instant Client 19.15.
The first time in a RiverWare session that a specified database is connected to, you are prompted to provide a user name and password to log in. For a user to retrieve metadata or read and write data to HDB, they must be granted the roles model_priv_role and app_role in the database to have the necessary permissions.
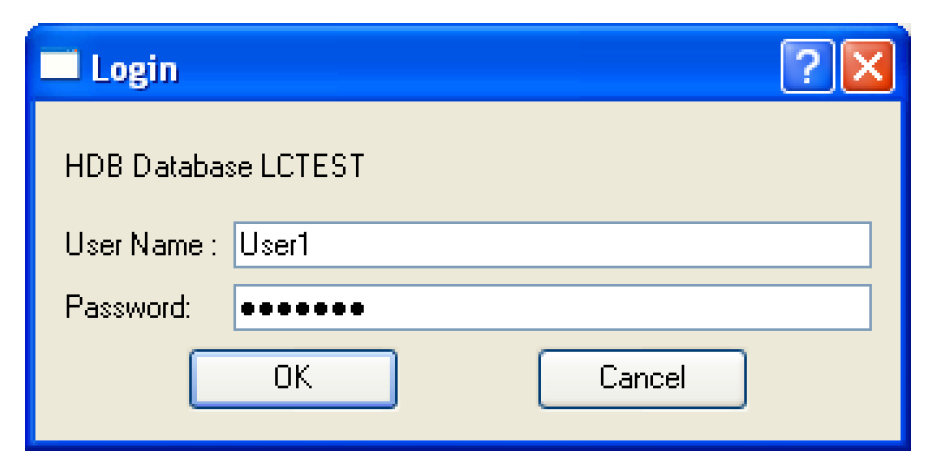
To run in batch mode, the login information must be provided in a file. The code looks for a file named.dblogins in your home directory, which is specified by the HOME environment variable on Solaris, and the combination of the automatically defined HOMEDRIVE and HOMEPATH environment variables on Windows. The format of the file should be a line for every database, with that line containing the database name, login, and password separated by whitespace (blanks or tabs). Blank lines and comment lines starting with # are permitted in the file. If you want to set up a different file, the DBLOGINS environment variable can be defined as a full path (directory and file) where the code will look for the login information.
Mapping ID
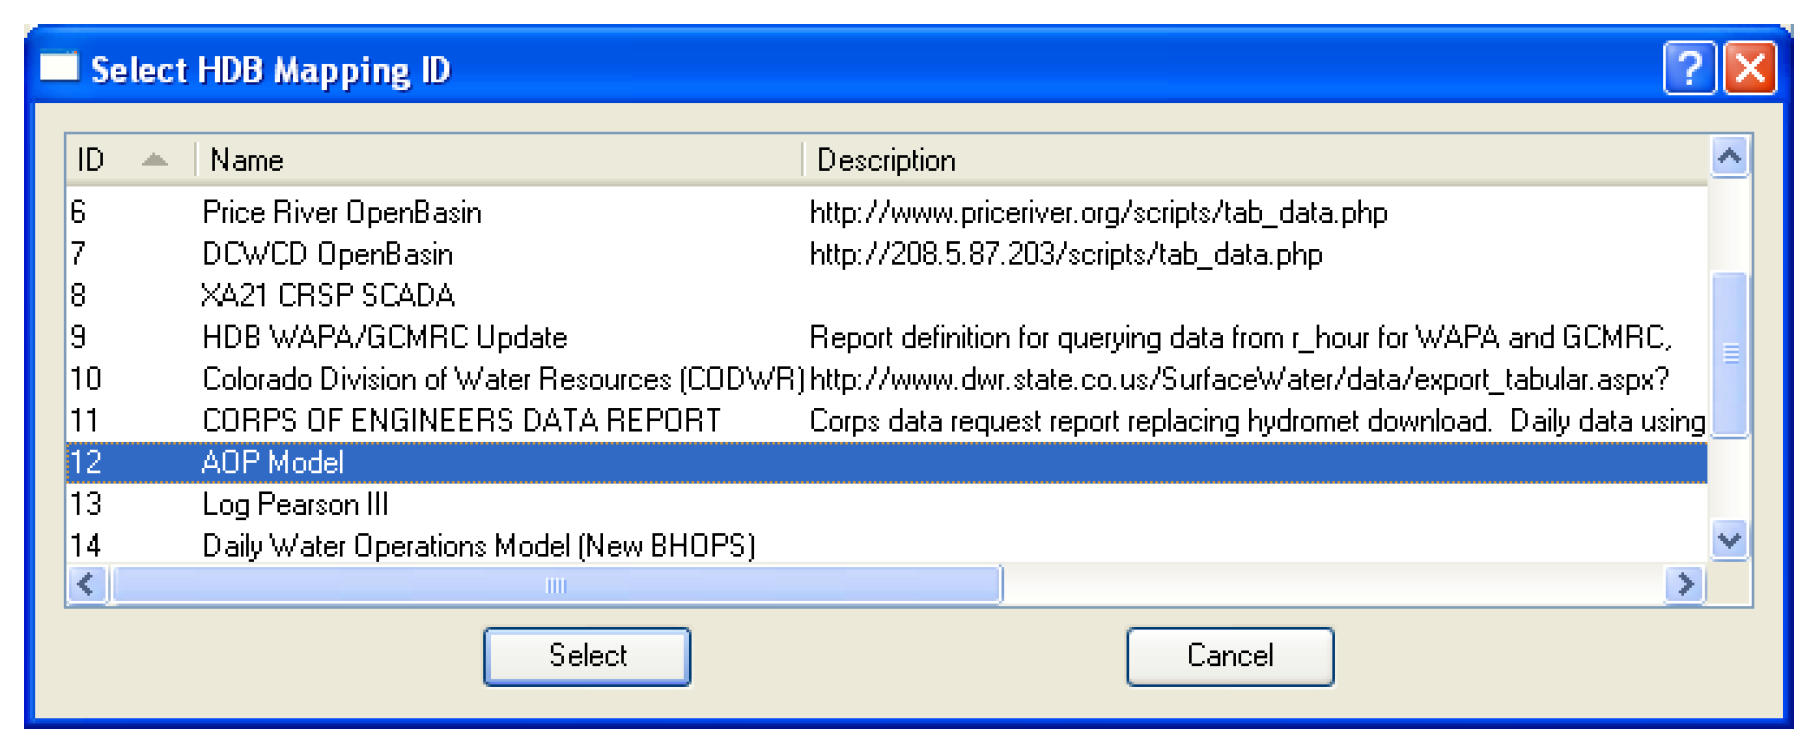
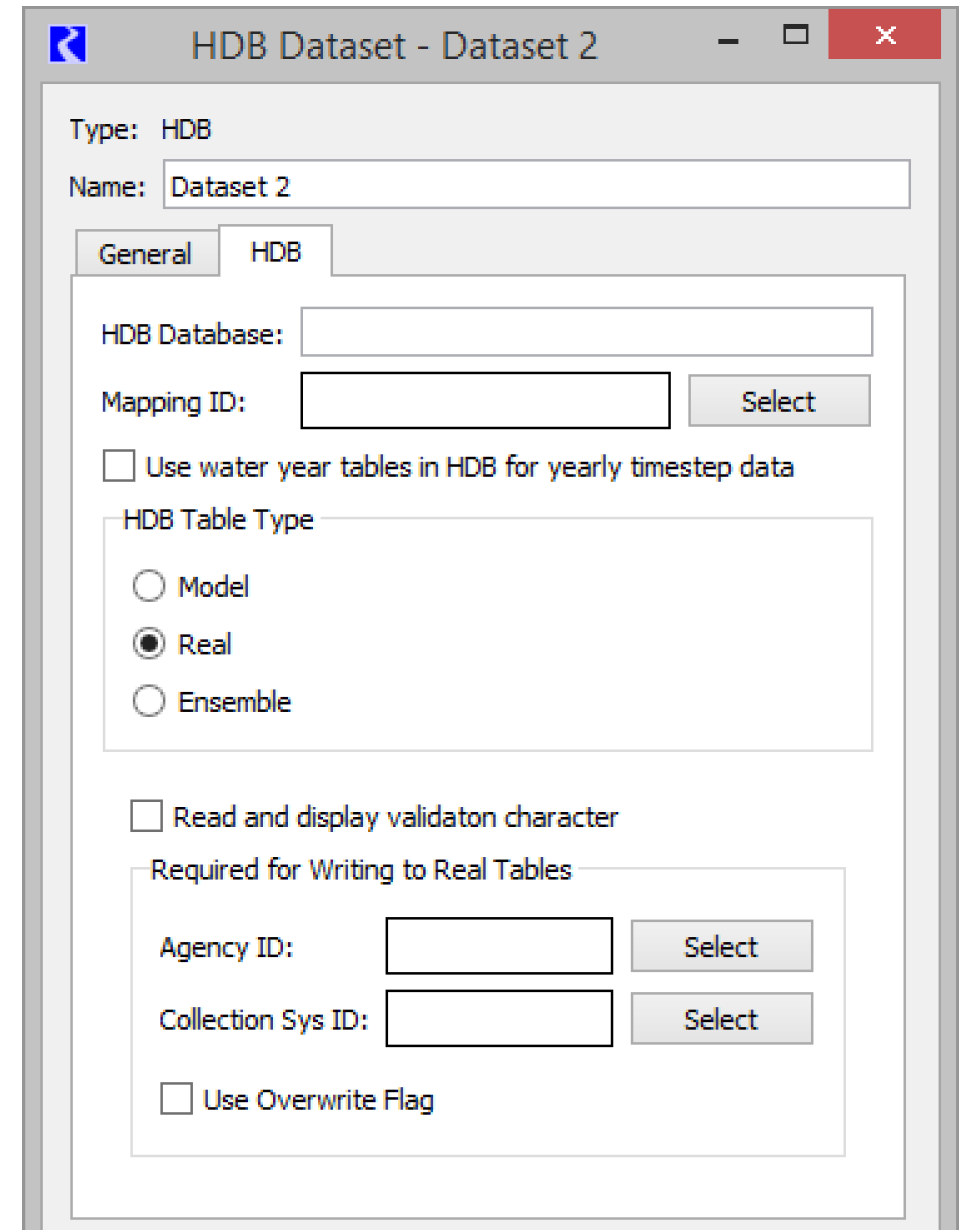
The Mapping ID field specifies what mapping will be used in the database to map RiverWare objects and slots to HDB sites and data types. You must select the adjacent Select button to pick a mapping from the database.

The Select button brings up the Select HDB Mapping ID dialog populated with all the available mapping IDs, their names, and descriptions from the HDB_EXT_DATA_SOURCE table in the database. You can then select a mapping, which populates the Mapping ID field on the HDB tab of the dataset dialog with the ID and the name of the mapping.
HDB maintains different tables for data of differing intervals (timesteps). Slots of varying timesteps can be freely intermixed in a list that is associated with a dataset, and the correct tables for each timestep will be automatically accessed in HDB. One case that does need specification is for the water year tables in HDB. There is no corresponding water year timestep in RiverWare, although some users have used slots with a 1 Year timestep to hold water year data in some of their RiverWare models. To handle this case, an option box on the dataset dialog to Use water year tables in HDB for 1 Year timestep data has been provided. If a user checks this box, all 1 Year timestep data read and written with the dataset will be moved to and from the water year tables in HDB instead of the year tables.

HDB Table Type
The HDB Table Type frame on the dataset dialog specifies which of the tables in HDB the dataset will interact with. The selection of Model, Real, or Ensemble determines the configuration options that become available in the rest of the dialog.
HDB Table Type—Model
A selection of Model in the HDB Table Type frame of the dataset dialog means that any data moved using the dataset will be read from or written to the model (m_ xxxx) set of tables in HDB. Model data is typically forecasted data, although there are no restrictions on its dates being future or historic. There can be multiple forecasts made for a piece of data at the same date and time, so data in the model tables must be associated with a model run ID that indicates from what run of a model the data originated. If data is written to a model run ID with a DMI, any previous data that was associated with that ID will be deleted from the model tables. Therefore, only the data from one particular run of a model is represented in a single model run ID. Reading or writing of model data requires metadata selection in the Model Run ID frame that appears with the selection of Model in the dataset dialog.
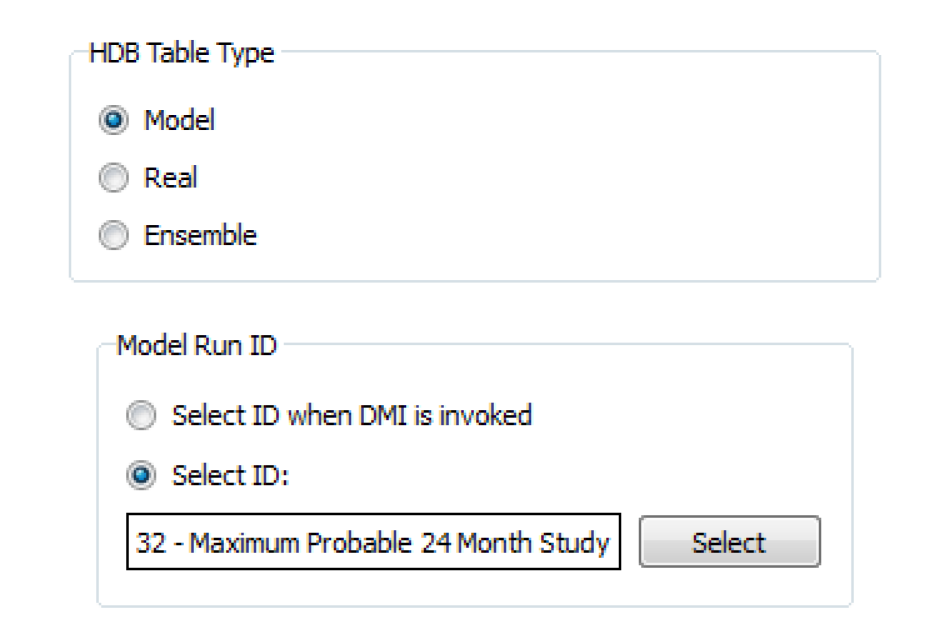
The Model Run ID frame allows you to select either Select ID or Select ID when DMI is invoked. The Select ID option allows you to preselect a model run ID to associate with the dataset for reading and writing data with the model tables. To select a model_run_id, you must select the Select button adjacent to the model run ID field. This brings up the Select HDB Model Run ID dialog.
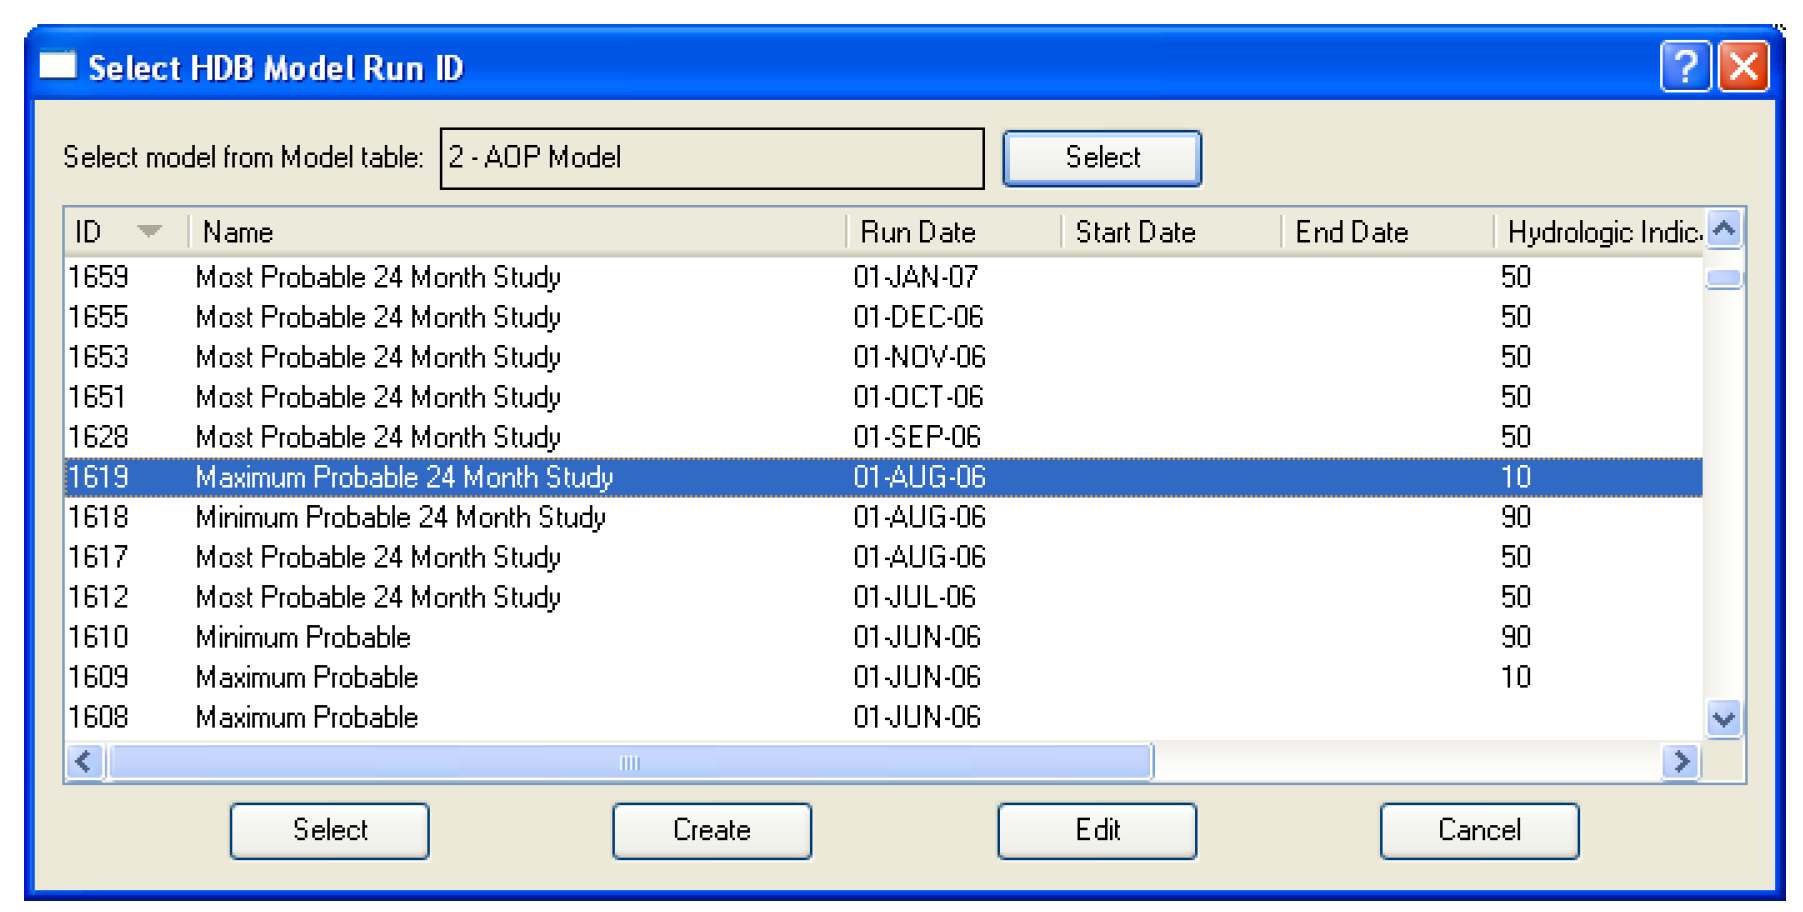
All model run IDs are associated with a particular model as defined in the database. The model run ID dialog is designed to display all the IDs in the database for a specified model. The model is selected via the Select model from MODEL table field at the top of the Model Run ID dialog. Selecting the Select button adjacent to the field brings up the Select HDB Model ID dialog populated with all the models defined in the HDB_MODEL table in the database.

You can then select a model, which populates the Select model from MODEL table field on the model run ID dialog with the model ID and name, as well as populating the model_run_id list in the dialog with information for all the model_run_ids defined for the model. You can then select an existing model run ID from the list, which closes the dialog and populates the model run ID field in the Model Run ID frame of the dataset dialog with the model run ID and name.
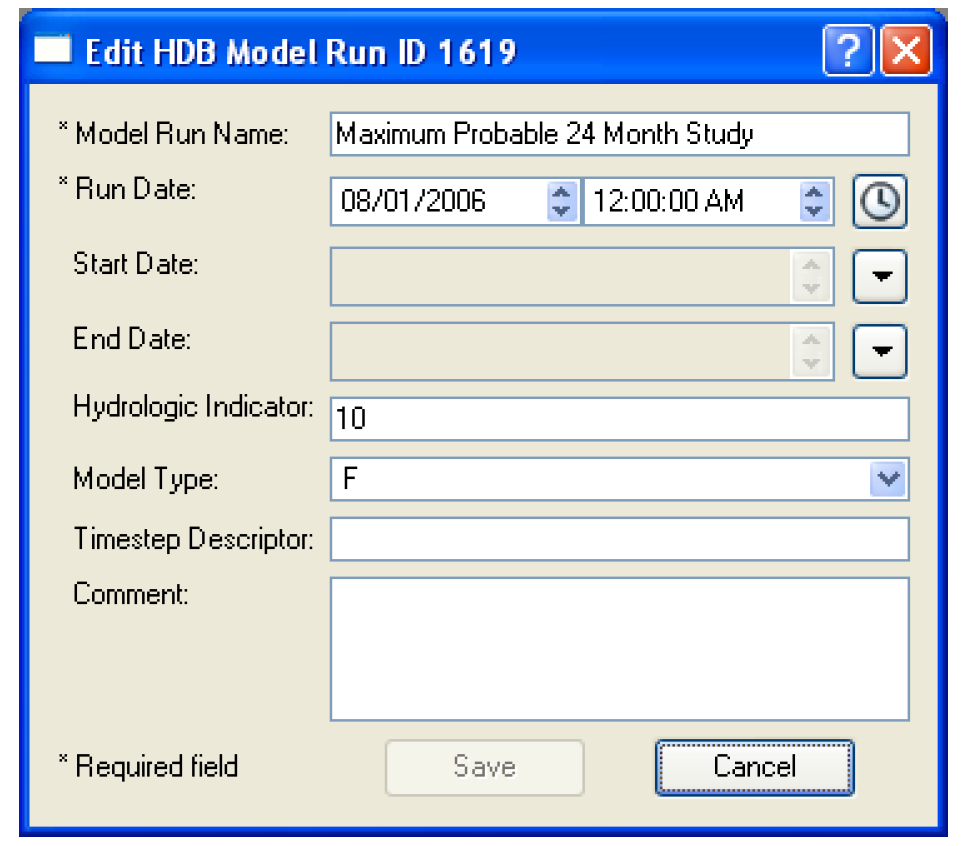
There are two other options for Model Run IDs on the Select HDB Model Run ID dialog. Instead of just selecting an existing ID, you can also edit an existing ID or create a new one. To edit or create a model run ID you still must have selected a model at the top of the dialog. An existing ID that is displayed can then be highlighted and edited by selecting the Edit button at the bottom. This brings up the Edit HDB Model Run ID dialog, which displays all the information fields for the model_run_id and allows you to edit these fields. Selecting the Save button will then save the edited information for this model run ID to the database.
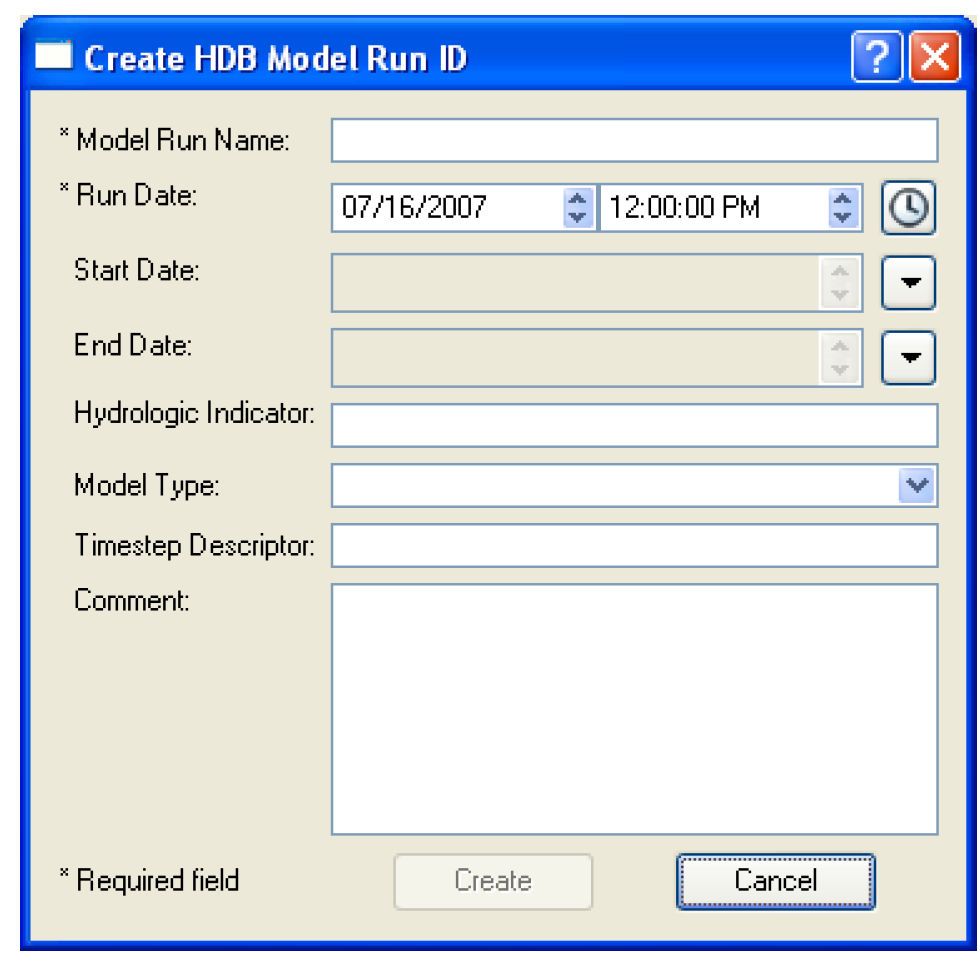
The Create button at the bottom of the Select HDB Model Run ID dialog allows you to create a model run ID that is associated with the model shown in the Select model from MODEL table field at the top of the dialog. Selecting Create brings up the Create HDB Model Run ID dialog, which contains fields where information can be entered for the new model run ID. The Run Date field is populated with the start time of the run, but can be changed by selecting any portion of the date and typing or using the spinners. At least the required fields marked with an asterisk must be filled out. Selecting the Create button will then save entered data to the database as a new model run ID where it will be assigned the next available model run ID number. The new ID will then be added to the list and highlighted back on the Select HDB Model Run ID dialog.
The Model Run ID frame of the dataset dialog has a second option for specifying model run IDs by selecting Select ID when DMI is invoked. When this option is selected, you do not preselect a model run ID that is always used with the dataset, but rather you are prompted for one when a DMI containing the dataset is executed. This option could be useful in a case where the DMI is run to record forecast data on a regular basis with the data always being preserved in separate model run IDs in the model tables. To limit the potential for you to accidentally overwrite the previously saved data by forgetting to change the ID; you must select the ID each time the DMI is run.
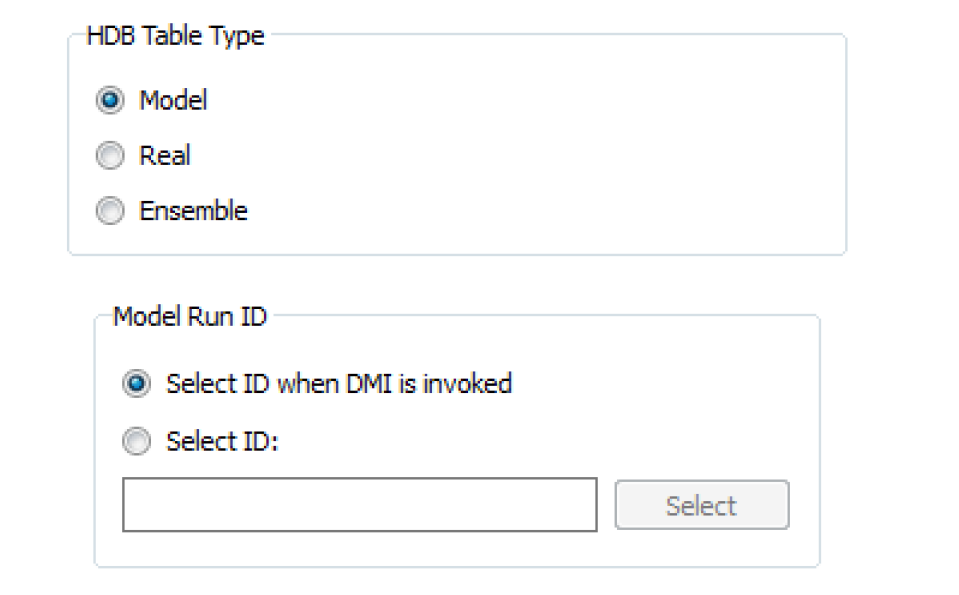
Selecting an ID under the Select ID when DMI is invoked option utilizes the same dialogs as does the preselect ID option. The Select HDB Model Run ID dialog appears where you can select a model and see its existing IDs. An existing ID can then be selected, an existing ID can be edited and then selected, or a new model run ID for the model can be created then selected.
Note: If the same dataset is used multiple times in a DMI, you are only prompted once to associate a model run ID with the dataset; the same dataset cannot be used with multiple model run IDs in a single DMI or DMI group execution.
HDB Table Type—Real
A selection of Real in the Table Type frame means that any data moved using the dataset will be read from or written to the real (r_ xxxx) set of tables in HDB. Real data are typically current or historical observed values; future data cannot be loaded into the real tables. A write of real data to HDB requires that some other metadata be selected by you in the Real frame that appears with the selection of a Real table type in the Dataset dialog.
Validation Characters
HDB has a per-value Validation field in the R_DAY, R_HOUR and R_INSTANT tables which typically indicates whether the data is provisional or approved. The field is a 1 byte character which is usually a “P” for provisional and an “A” for approved.
The Read and display validation character option allows you to import validation characters from HDB into Notes on Series Slot, which are then shown on slot and SCT dialogs. The Notes Manager dialog enables you to easily see all slots and timesteps with a particular note, for example to easily see all provisional slots and timesteps. See Notes on Series Slots in User Interface for details on Notes.
When the Read and display validation character is checked, the Validation field values are also imported through the DMI and set on a Series Slot Note, associated with the particular slot and timestep. The Series Slot Note Group which holds the validation characters is named “HDB Validation Group”. The group's name is fixed; you can't edit it. In the Edit Note Group, the label above the name is Fixed Note Group Name and the name is read-only. You can edit the group's color.
Required For Writing to Real Tables
The remainder of the controls for the Real table type are described in this topic.
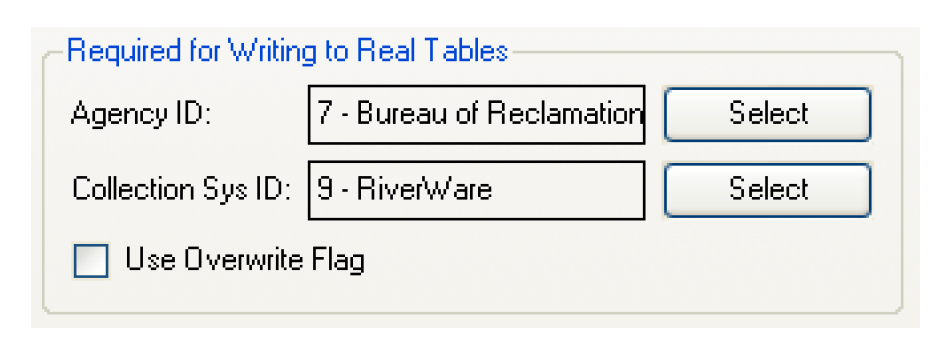
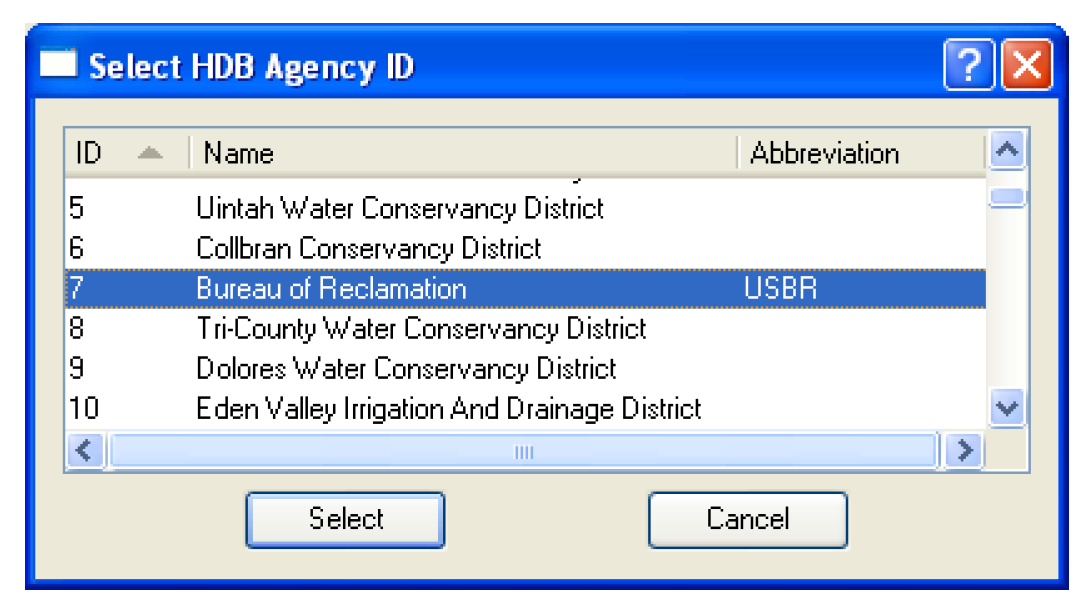
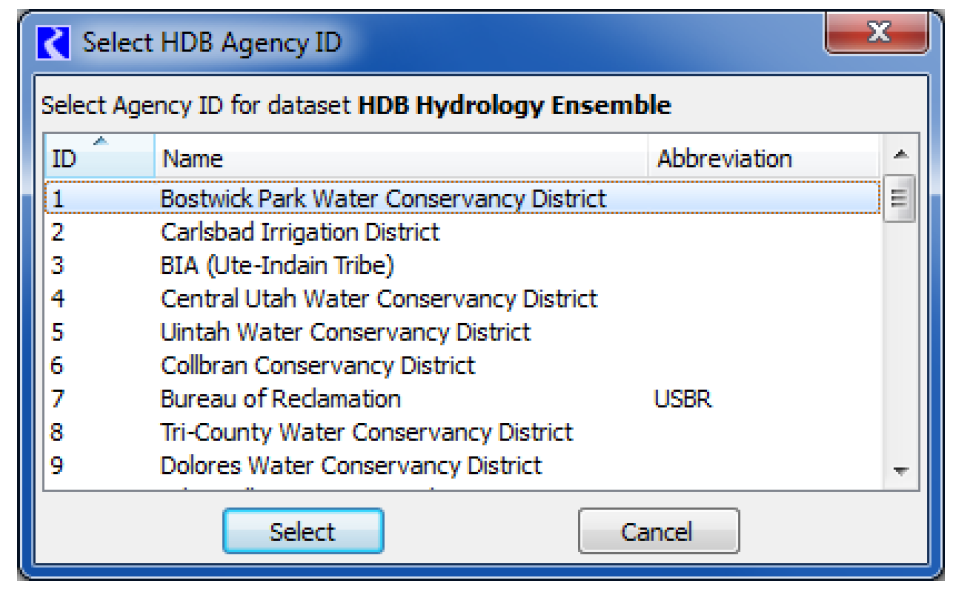
The Agency ID field specifies what agency ID will be associated with the data when it is written to the real tables. You must select an agency ID by selecting the Select button adjacent to the field. This will bring up the Select HDB Agency ID dialog populated with all the available agency IDs, their names, and abbreviations from the HDB_AGEN table in the database. You can then select an agency, which populates the Agency ID field on the dataset dialog with the ID and name of the agency.
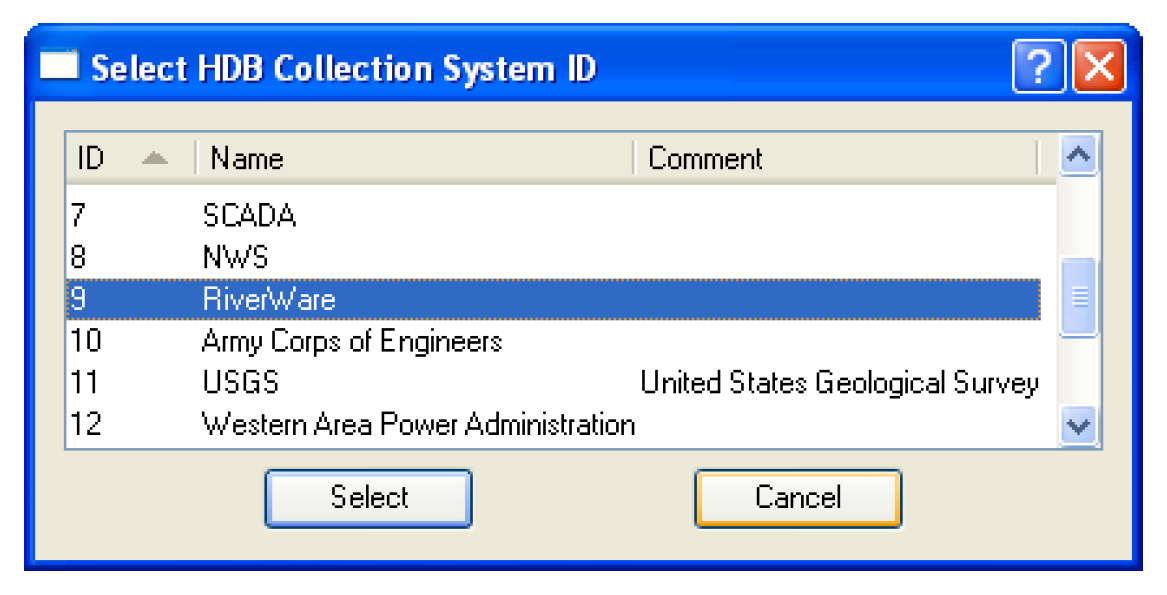
The Collection Sys ID field specifies what collection system ID will be associated with the data when it is written to the real tables. You must select a collection system ID by selecting the Select button adjacent to the field. This will bring up the Select HDB Collection System ID dialog populated with all the available collection system IDs, their names, and comments from the HDB_COLLECTION _SYSTEM table in HDB. You can then select a collection system, which populates the Collection Sys ID field on the dataset dialog with the ID and name of the collection system.
The Use Overwrite Flag check box specifies whether or not data is written to the real tables with an overwrite flag. This flag has some special meaning for how the data is handled in the database, namely that when the value is written to its real table, it cannot be overwritten by aggregations of data from a shorter interval. Normally this box would not be checked.
HDB Table Type—Ensembles
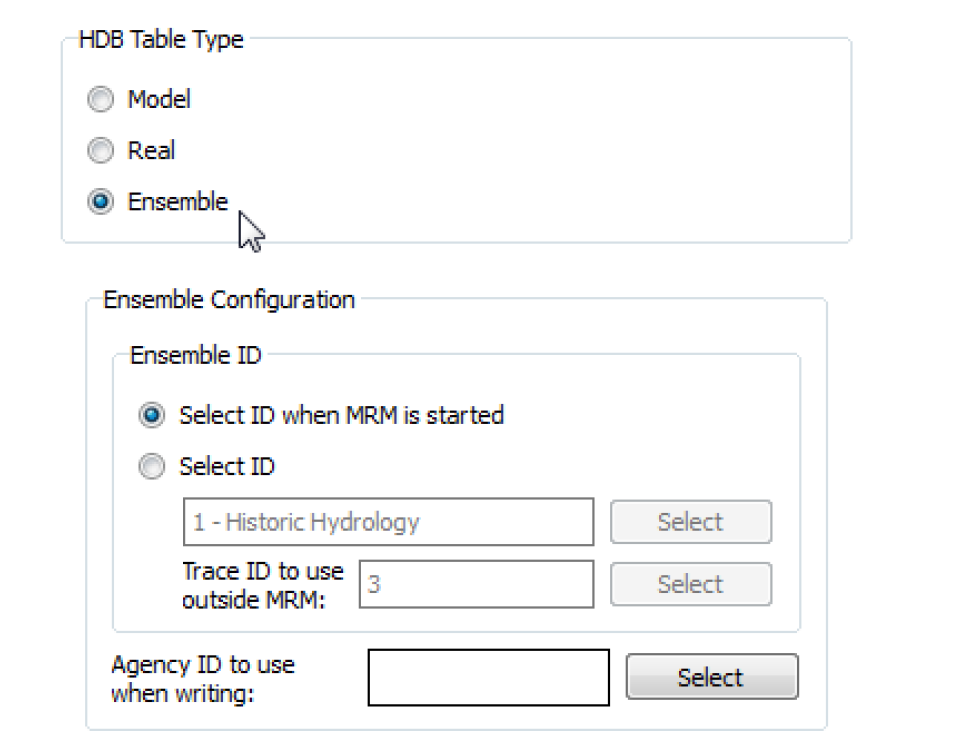
A selection of Ensemble in the Table Type frame means that any data moved using the dataset will be determined through the REF_ENSEMBLE table in the database. An ensemble has a number of traces associated with it, and each trace has an associated model run ID. An ensemble would be used with MRM so that each run of the multiple run would correspond to a trace in the ensemble, and the data for that trace would reside under the trace’s model run ID in the model (m_ xxxx) set of tables in HDB. See HDB Ensemble Configuration in Solution Approaches for details.
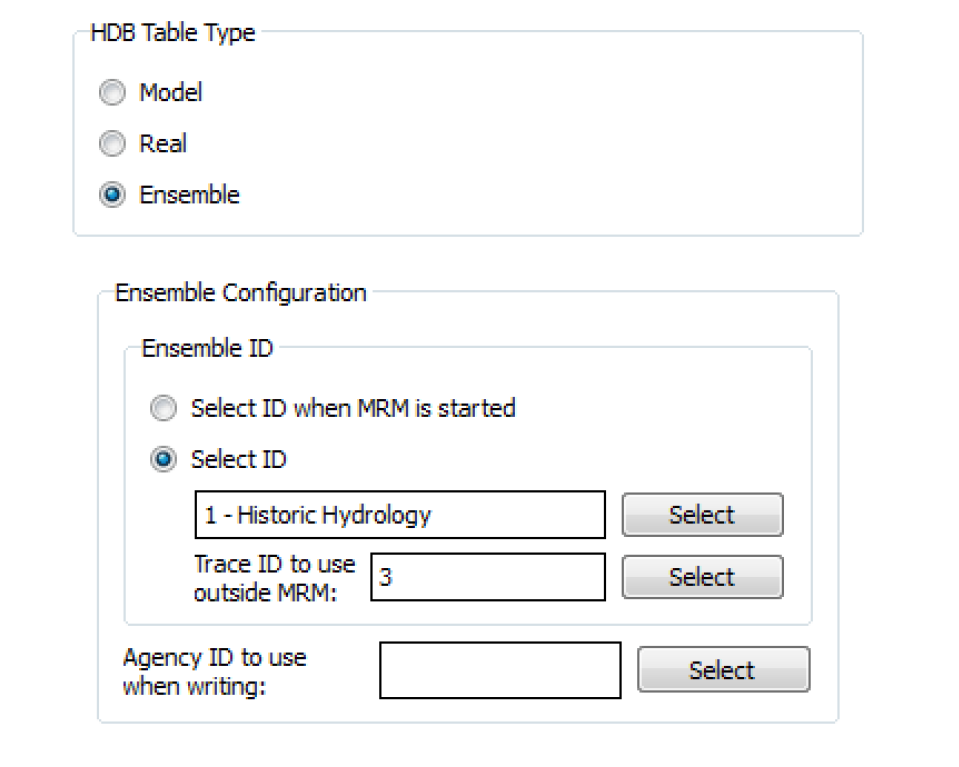
The Ensemble ID frame has options for you to Select ID or Select ID when MRM is started. The Select ID option allows you to preselect an ensemble ID to associate with the dataset for reading or writing data with the model tables. You must select an ensemble ID by selecting the Select button adjacent to the ensemble field. This will bring up the Select HDB Ensemble ID dialog populated with all the available ensemble IDs, their names, the agency, the domain for the traces, and comments from the REF_ENSEMBLE table in the database. You can then select an ensemble, which populates the Ensemble ID field on the dataset dialog with the ID and name of the ensemble.
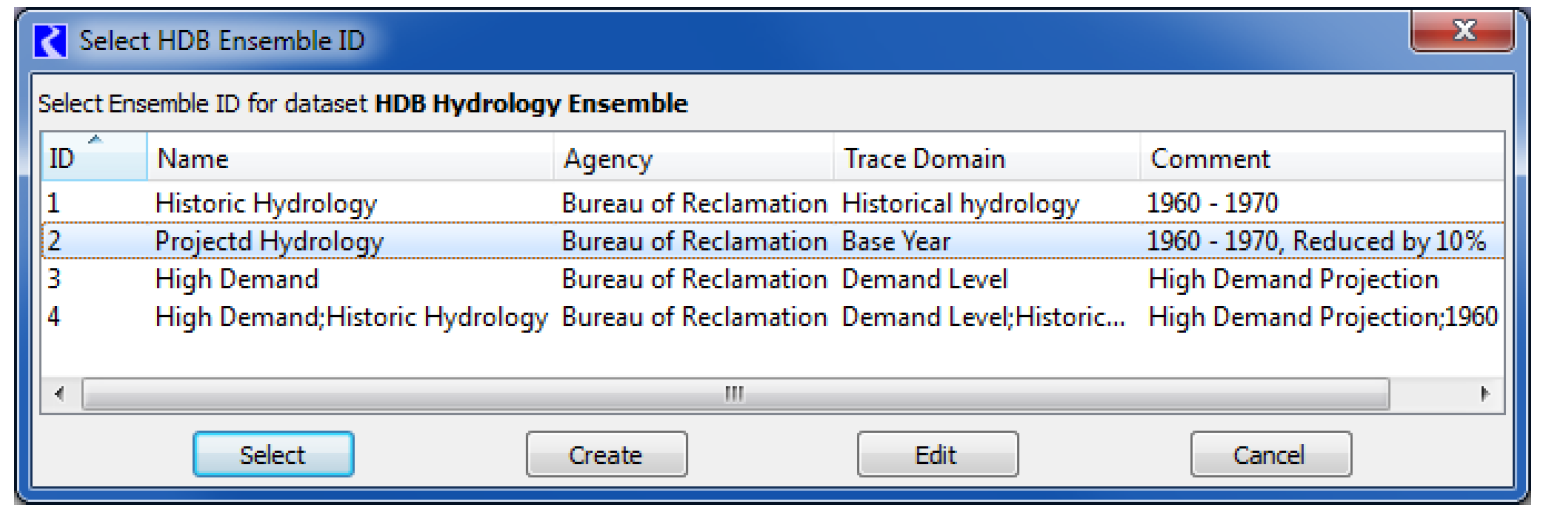
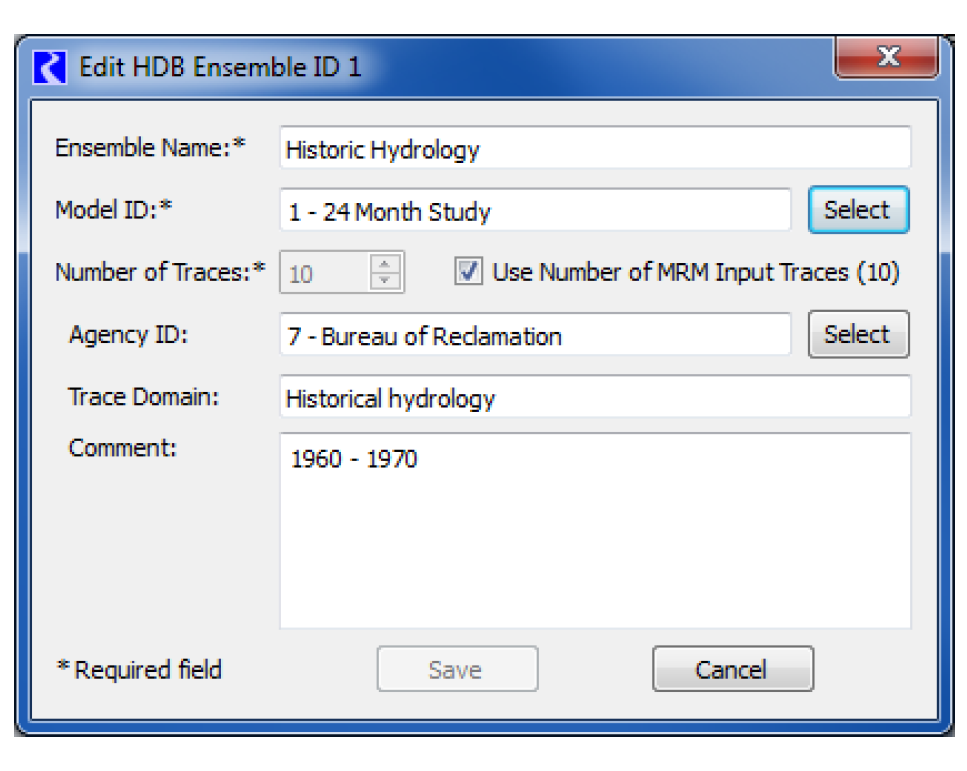
There are two other options for ensemble IDs on the Select HDB Ensemble ID dialog. Instead of just selecting an existing ID, you can also edit an existing ID or create a new one. An existing ID that is displayed can be highlighted and edited by selecting the Edit button at the bottom. This brings up the Edit HDB Ensemble ID dialog, which displays all the information fields for the ensemble id and allows you to edit these fields. Selecting the Save button will then save the edited information for this ensemble ID to the database.
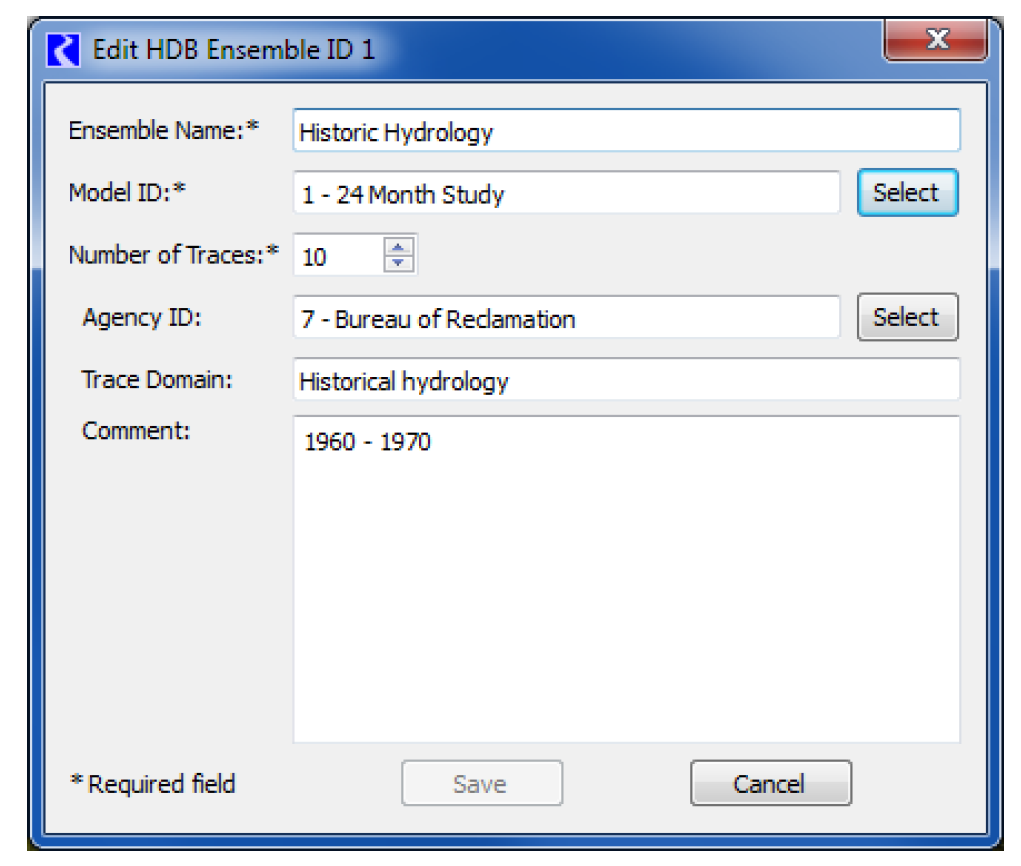
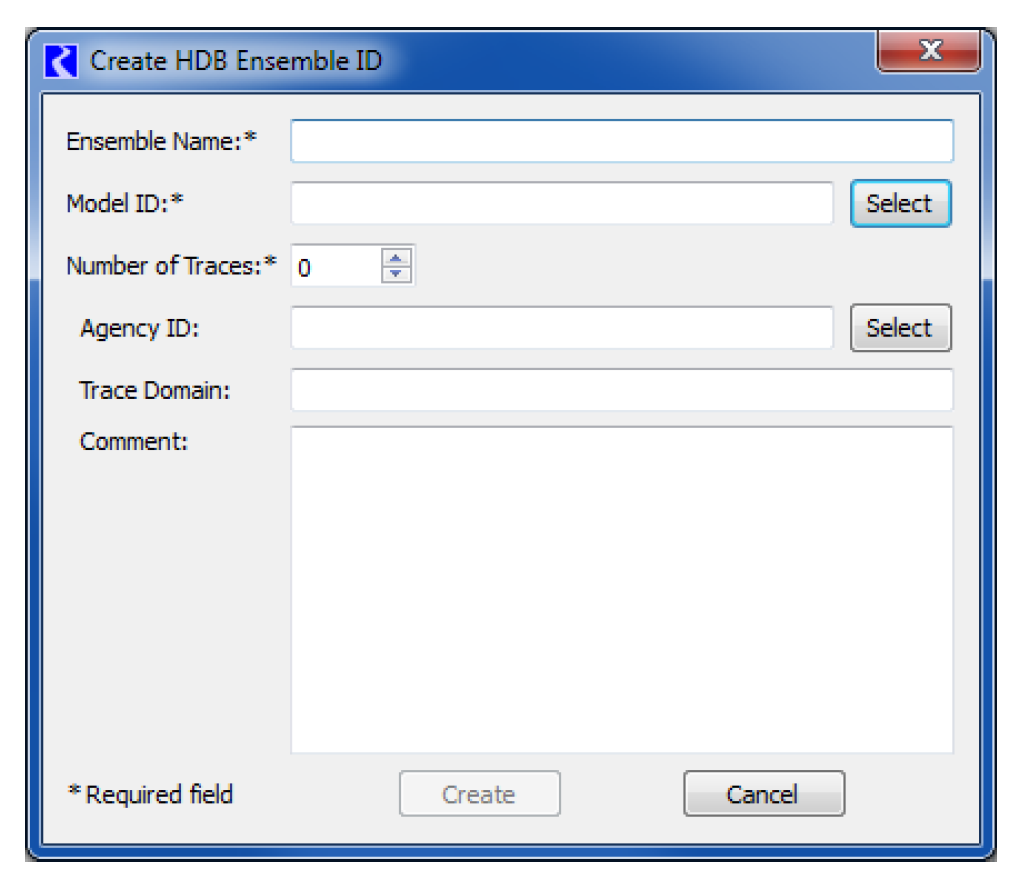
The Create button at the bottom of the Select HDB Ensemble ID dialog allows you to create an ensemble ID. Selecting this brings up the Create HDB Ensemble ID dialog, which contains fields where information can be entered for the new ensemble ID. At least the required fields marked with an asterisk must be filled out. Selecting the Create button at the bottom will then save entered data to the database as a new ensemble ID. The new ID will then be added to the list and highlighted back on the Select HDB Ensemble ID dialog.
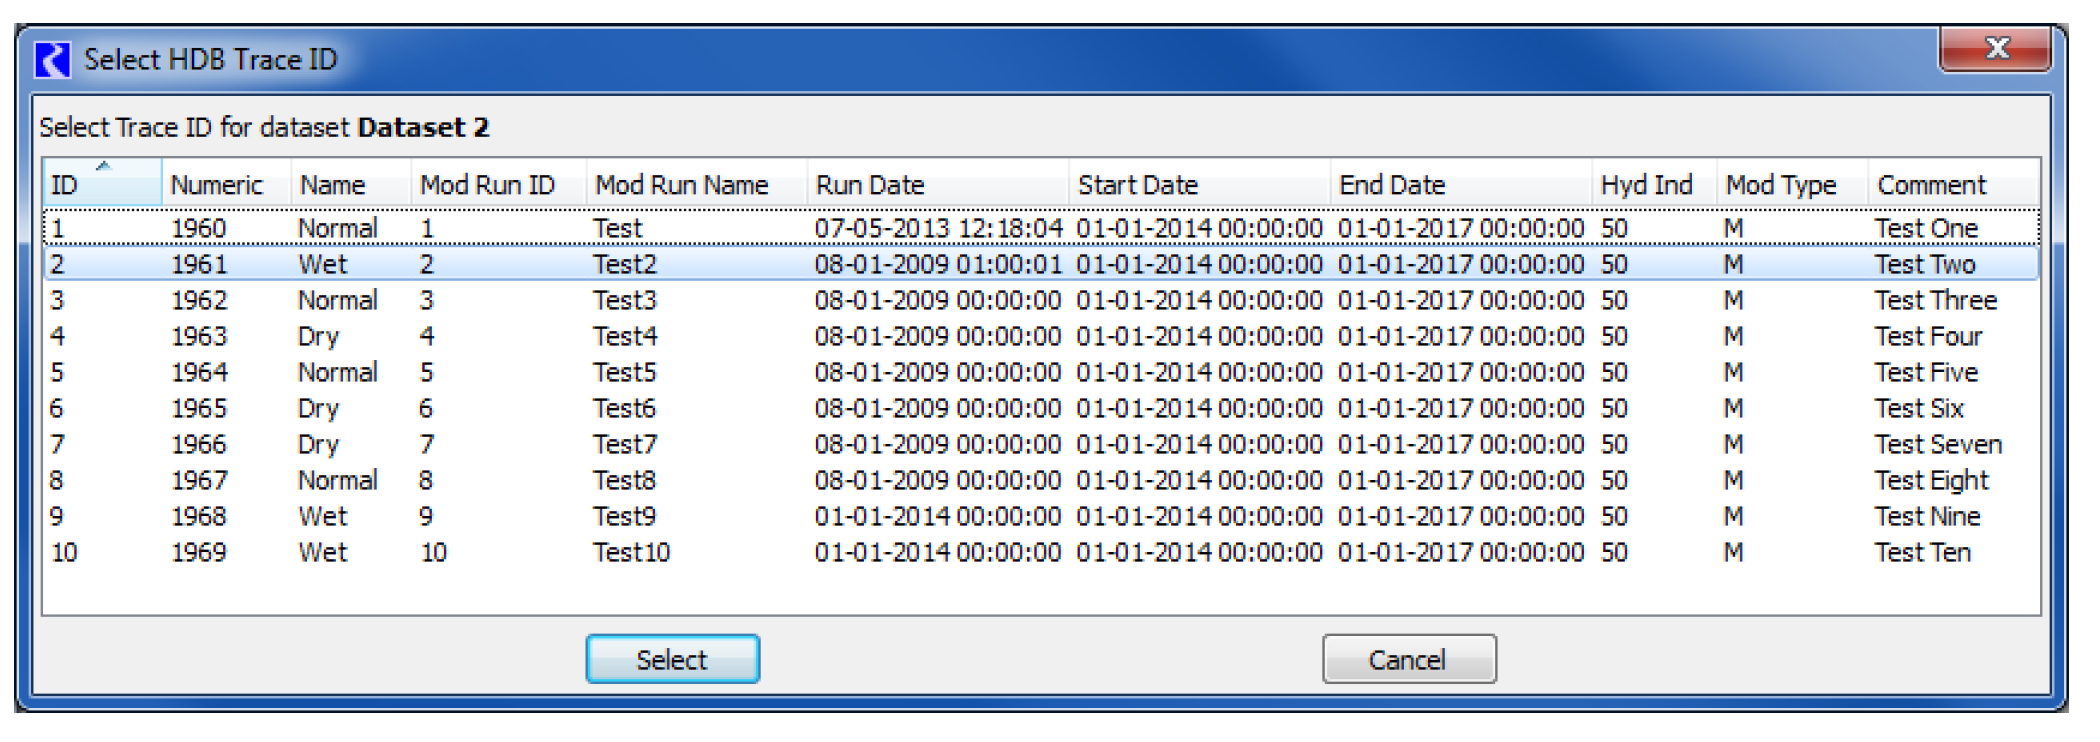
It may be convenient to use an ensemble dataset outside of a multiple run to pull a particular trace from the ensemble for use in a single run or to manually test a DMI. Selecting the Select button adjacent to the Trace ID to Use Outside MRM field will open the Select HDB Trace ID dialog that is populated with all the traces for your selected ensemble ID specified for the dataset. The dialog shows descriptive information for each trace from the REF_ENSEMBLE_TRACE table and also information for the trace’s model run ID from the REF_MODEL_RUN table. You can then select a trace, which populates the trace ID into the dataset dialog.
The Ensemble ID frame of the dataset dialog has a second option for specifying ensemble IDs by selecting Select ID when MRM is started. When this option is selected, you do not preselect an ensemble ID that is always used with the dataset, but rather you are prompted for one when an MRM run containing this dataset in an input or output ensemble is started. This option could be useful, for example, where you want to select a different output ensemble for each execution of the multiple run so that data from earlier runs is not overwritten.
Selecting an ID under the Select ID when MRM is started option utilizes the same dialogs as does the preselect ID option. The Select HDB Ensemble dialog appears when you start the multiple run where you can see existing ensemble IDs. An existing ID can then be selected, an existing ID can be edited and then selected, or a new ensemble ID for can be created then selected.
Note: If an ensemble id is being chosen for an output ensemble, the edit and create ensemble dialogs in this case have an additional trace control to Use Number of MRM Input Traces (xx), where xx indicates that number of traces. This provides an easy way for the edited or newly created output ensemble to contain the correct number of traces to hold the run data as defined by the input ensembles.
In addition to the ensemble id options discussed above, there is also an option under the Ensemble Configuration frame to select an Agency ID to use when writing. Selecting Select will open the Select HDB Agency ID dialog where one of the agency ids defined in HDB can be chosen. If chosen, that agency id will be written to the dataset ensemble when that dataset is executed as part of an output ensemble. If one is not chosen, the behavior will be to preserve any agency id that is already defined in the database for the output ensemble.
An HDB ensemble can have metadata that describe the ensemble as well as metadata that describe each trace. Metadata is a keyword associated with a value, such as “comment”/”Historic Hydrology”. In the HDB database, values for the “domain”, and “comment” keywords are held in the trace_domain, and cmmt fields of the REF_ENSEMBLE table. Other keyword/value pairs to describe ensembles are held in the REF_ENSEMBLE_KEYVAL table.
For trace metadata, the values for the “name” and “numeric” keywords are held in the trace_name and trace_numeric fields of the REF_ENSEMBLE_TRACE table. Other keywords to describe traces are held in the REF_MODEL_RUN_KEYVAL table.
See HDB Ensemble Configuration in Solution Approaches for details on using Ensembles in MRM.
Revised: 01/05/2024