
Multi-Windows
The Multi-Window is a general window into which other RiverWare windows can be docked. When using RiverWare, you may need to open many windows, and it can be challenging to manage each of the windows individually. The Multi-Window allows you to place windows in a fixed location in a larger window where they can then be moved together, minimized, maximized and maintain their spatial relationship to one another.
Multi-Windows are managed through the Window Manager. For more information on accessing the Window Manager, see Window Manager.
Overview
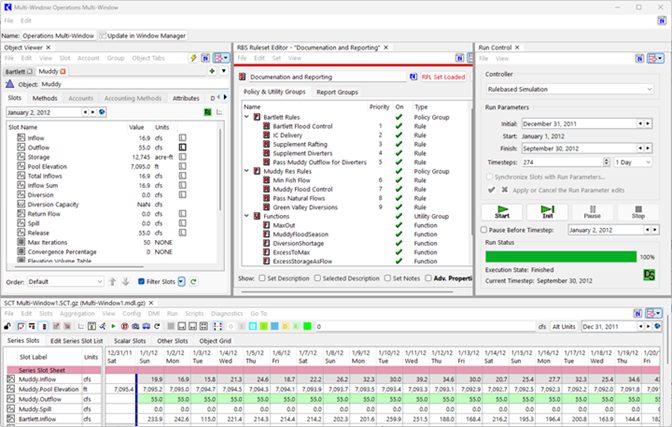
The Multi-Window allows you to create a customized view by docking and arranging selected windows within in a single window. Figure 2.9 shows an example of the Multi-Window with four commonly used windows.
Figure 2.9 Multi-Window containing the Object Viewer, RPL Set Editor, Run Control, and SCT
Open vs Persistent Multi-Windows
There is an important distinction when dealing with Multi-Windows.
• Open Multi-Windows have been created but not yet saved.
• Persistent Multi-Windows are managed by the Window Manager and saved in the model file
Open Multi-Windows are not saved by default, but must be added to the Window Manager to become persistent. Any changes to an open Multi-Window must be updated in the Window Manager. There are Multi-Window operations that allow the user to add an open Multi-Window to the Window Manager or update the description of a managed Multi-Window. See Preserving a Multi-Window for more information.
Tip: A window can only exist in one Multi-Window at a time. Opening two Multi-Windows that reference the same window, will remove it from the first before opening it in the second window.
Tip: If you open a window from the workspace or other locations and that window is part of an Open Multi-Window, the Multi-Window will open. If that window is part of a persistent, but not open Multi-Window, the window will open free floating.
Supported Window Types
Not all RiverWare windows can be added to the Multi-Window, but most of the primary windows are supported. The list of supported windows is the same as the list of windows supported by the Window Layouts (see Supported Window Types) with three exceptions: The Workspace, Workspace Object List, and Diagnostic Output Window cannot be added to the Multi-Window.
Using the Multi-Window
This section describes how to customize the Multi-Window by adding windows and arranging their positions.
Adding a Window to the Multi-Window
To add a window to a Multi-Window, select the Add to Multi-Window button at the top right of the window.
Figure 2.10 Add to Multi-Window Button
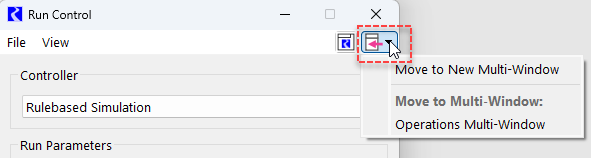
Then, select the Multi-Window in which it should be added. Use the Move to New Multi-Window option to create a new Multi-Window. Alternatively, select an existing Multi-Window from the list.
When a window is added to the Multi-Window, it is added as the top-most window. The first window added will appear to occupy the entire space of the Multi-Window. Once added, a window can then be moved to the desired location in the Multi-Window (see Relocating a Window in the Multi-Window).
Relocating a Window in the Multi-Window
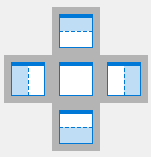
Once added to the Multi-Window, a window can be relocated by clicking on the tab of the window, dragging to the desired location, and then releasing. While dragging the window, indicators show where the window can be placed upon release. The center diamond indicators are shown in Figure 2.11. There are also additional up/down/left/right indicators as well.
Figure 2.11 Multi-Window Relocation indicators
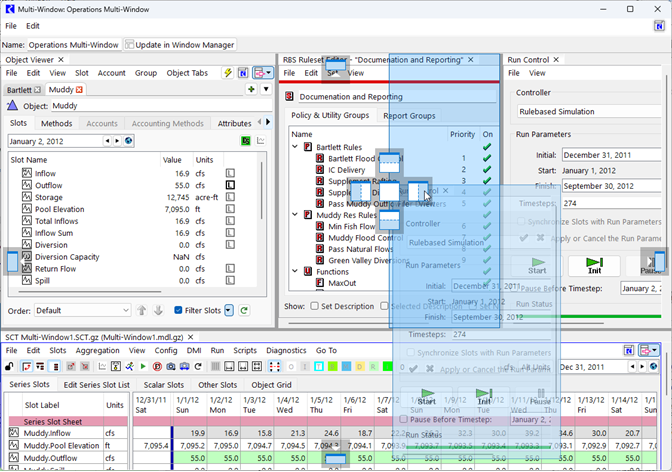
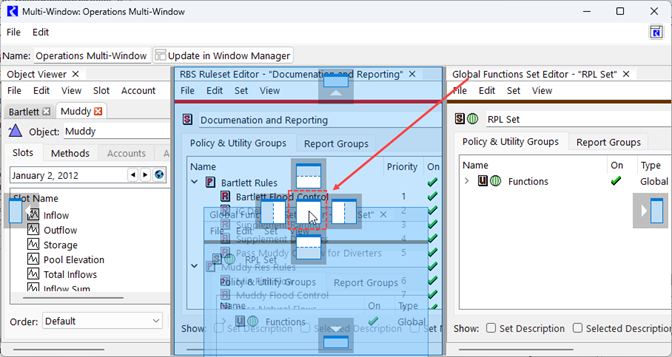
A drag operation is shown Figure 2.12. Dropping the Run Control on the indicator will put it just to the right of the RPL set.
Figure 2.12 Screenshot of Relocating a Window in the Multi-Window
Combining Windows in a Tabbed View
Multiple windows can share the same space in the Multi-Window in a tabbed view. When relocating a window, drag it over an existing window in the Multi-Window and drop it on the center indicator as shown in Figure 2.13.
Figure 2.13 Screenshot of Moving a Window to Create a Tabbed View
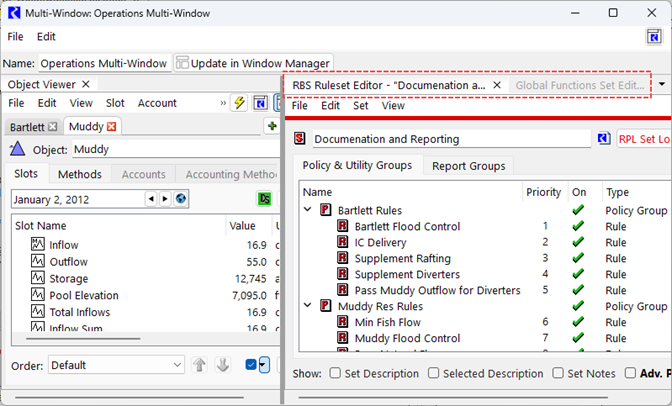
Once multiple windows are shown in the same area of the Multi-Window, tabs appear at the top of that area for each window, as shown in Figure 2.14. Select the desired tab to bring that window to the front. The tabs can be re-ordered by clicking and dragging.
Figure 2.14 Tabbed windows in the Multi-Window
Resizing Windows in the Multi-Window
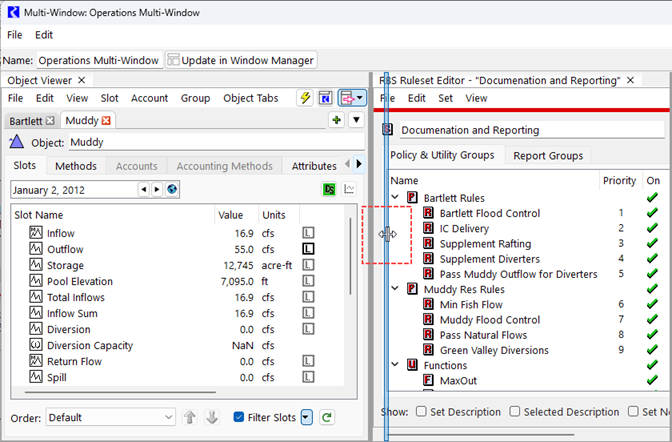
To resize windows in the Multi-Window, hover over the area between two adjacent windows. The cursor will change to a “splitter.” Then click and drag to resize the windows.
Figure 2.15 Screenshot of Resizing a Window in the Multi-Window
Note: In some cases, the size of a window in the Multi-Window may be restricted by the minimum dimensions of adjacent windows.
Removing Windows from the Multi-Window
There are multiple ways to remove windows from the Multi-Window.
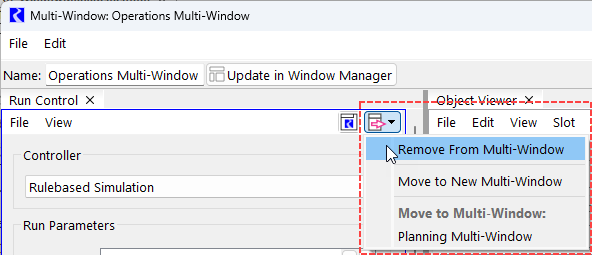
• Select the “Remove from Multi-Window” button at the top right of the window and select the desired location. This will remove the window from the given Multi-Window.
• Double-click on the tab for the window. This will remove the window from the Multi-Window and leave it open.
• Click on the tab for the window, drag it off of the Multi-Window, and release. This will remove the window from the Multi-Window and leave it open.
• Click on the black X at the top right of the window. This will remove the window from the Multi-Window and close it.
• Close a window by any other means, such as from the File menu on the window.
• From the Edit menu of the Multi-Window, select one of the following two options.
– Detach All Windows
– Close All Windows
Note: If you close the Multi-Window by selecting File then Close Window or by clicking on the X at the top right of the Multi-Window, it does not empty the Multi-Window of its contents. It just hides the Multi-Window. If you bring up the Multi-Window again, it will still have all of its contents.
Preserving a Multi-Window
The contents and layout within the Multi-Window are not automatically saved within the model. However, the Multi-Window can be preserved by giving it a name and adding it to the Window Manager as follows:
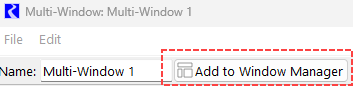
1. Specify a name at the top of the Multi-Window and select Add to Window Manager.
Figure 2.16 Add to Multi-Window Button
2. Once added, the button now says Update in Window Manager.
3. Save the model file (see Saving Models).
Tip: Multi-Windows can also be part of a Window Layout.
Updating a Multi-Window
To modify the persistent state of a Multi-Window perform the following steps:
1. Open the Multi-Window.
2. Add, remove, rearrange, or resize windows.
3. Select the Update in Window Manager button
Figure 2.17 Update in Multi-Window Button
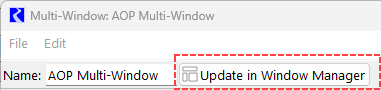
4. The Multi-Window is now updated in the Window Manager with the edits.
5. Save the model file as needed.
Open a Multi-Window
You can open a persistent Multi-Window in the following ways:
• From the main workspace, use the Windows menu and then select the desired Multi-Window from the list as shown in Figure 2.18.
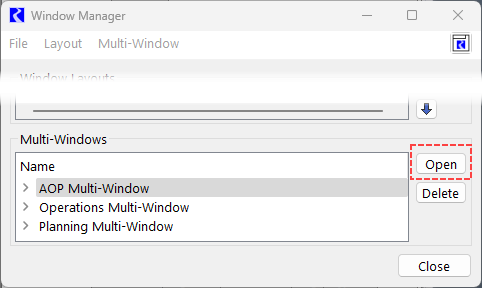
• From the window Manager, select a Multi-Window from the lower list and then select Open, as shown in Figure 2.19.
Figure 2.18 Window Menu to Open a Multi-Window
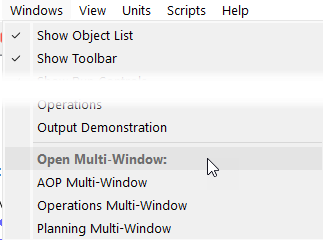
Figure 2.19 Open Multi-Window from the Window Manager
Revised: 07/03/2024