Global Slot Configuration
The Configure Existing Slots utility enables you to configure the following parameters on multiple slots at once:
• Convergence
• Unit Type for Custom Slots
• Rename Custom Slots
• Time Sync for Custom Slots
• Upper and Lower Bounds on Series Slots
• Upper and Lower Limits for Table Verification
Note: Configuration settings such as units, scale, format and precision are set through Unit Schemes; see Unit Schemes.
Note: The slots available include both physical and accounting slots including accounting supplies.
To access the Configure Existing Slots dialog, select the Workspace, then Slots, then Configure Slots menu item from the main workspace dialog in RiverWare. The dialog is used in the following general sequence:
1. Add slots to the list.
2. Select one or more of the slots from the list.
3. Select new bounds or convergence, change the unit type for custom slots or rename custom slots.
4. Apply the changes to all or selected slots.
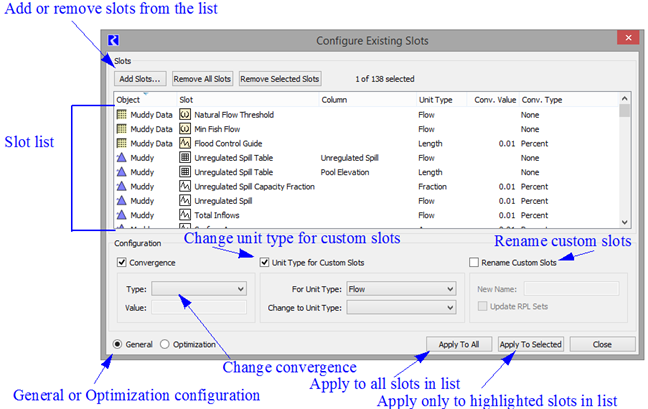
These steps are described in the following sections. Changes are immediate and are reflected in the dialog. Changes only apply to relevant slots, e.g. changes to convergence only apply to slots that have convergence (i.e. Series Slots). Figure 4.47 highlights the main areas of the dialog.
Figure 4.47 Annotated screenshot of the Configure Existing Slots dialog box
Selecting Slots to Configure
Add the slots you wish to change to the slot list by selecting the Add Slots button. This opens RiverWare’s slot selector. See Selecting Slots for details on using the selector. The selector can be used to add all or a subset of the existing slots in the current model.
After making a selection of one or more slots, those slots are added to the list. These slots, or a subset, are the slots you wish to modify.
Note: If a slot has multiple columns that can be configured independently, an entry is created in the list for each column. For tables where data in any column must have the same units, only one list item is shown. If some configuration item, like convergence, is not applicable to an item, that column is left blank in the list display.
To remove specific slots from the dialog, first select them. Then select the Remove Selected Slots button or use the corresponding context menu item available with a right-click in the slot list view. All slots can be removed using the Remove All Slots button or its corresponding context menu item. Double-clicking an item in the slot’s list view will bring up the Open Slot dialog for that slot.
Note: The label above the list view indicates the number of items selected and the total number in the list.
Global Slot Configuration Options
The configuration depend on whether the General or Optimization option is selected. The resulting options are described in the following sections.

General
The configuration panel at the bottom of the dialog has checkboxes for the following configuration options.
Specifying Convergence
To change convergence, select the Convergence checkbox and enter a Type and/or Value.
Specifying a new Unit Type for Custom Slots
To change the unit type of a custom slot, select the Unit Type for Custom Slots checkbox and specify the old unit type and the new unit type. These changes only apply to custom slots; you are not allowed to change the unit type of a simulation slot. Display units can be set from the slot itself or from the Unit Scheme.
Rename Custom Slots
To change the name of all selected slots to a new name, select the Rename Custom Slots checkbox and specify the new name. Also, optionally select the Update RPL Sets option to search all opened RPL sets for the existing slots names and change the references to the new name. This is analogous to opening the RPL Search and Replace dialog for each slot and selecting to replace all occurrences. See the screenshot below:
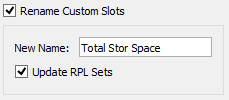
Changing custom slot names must be done independently of other changes in the dialog. When Rename Custom Slots is selected all other configuration operations are disabled.
Changing slot custom names applies to all slots in the list. The button Apply To All is enabled; you cannot Apply To Selected.
Warning: There is no undo to this renaming operation!
Time Synch
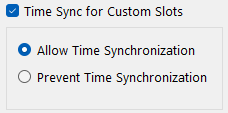
Change the Time Synch setting for all or selected slots. This affects the Time Synchronization settings described in Time Series Range—Series Slot in User Interface. The controls look like this:
Optimization
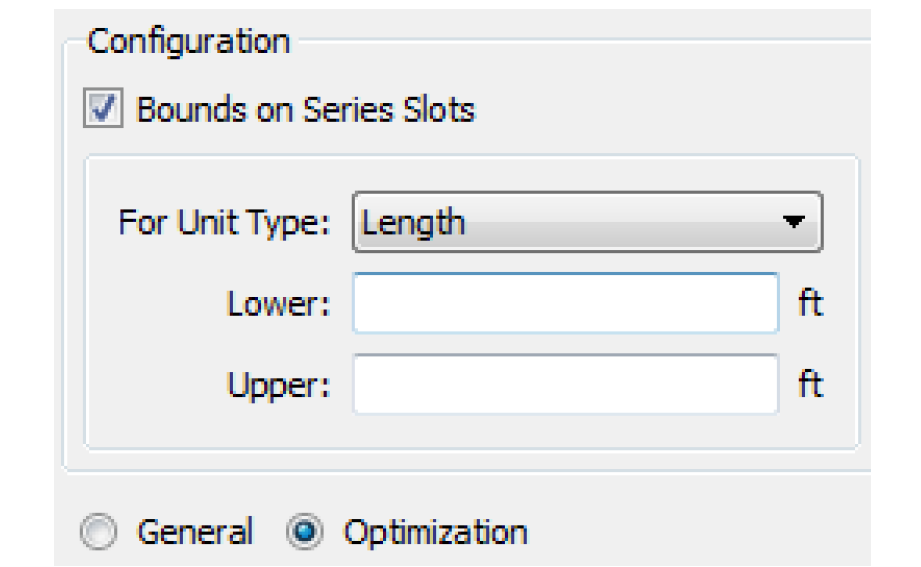
When the Optimization option is selected, the bottom of the dialog switches to show the Optimization Bounds and Limits regions.
Specifying Bounds on Series Slots
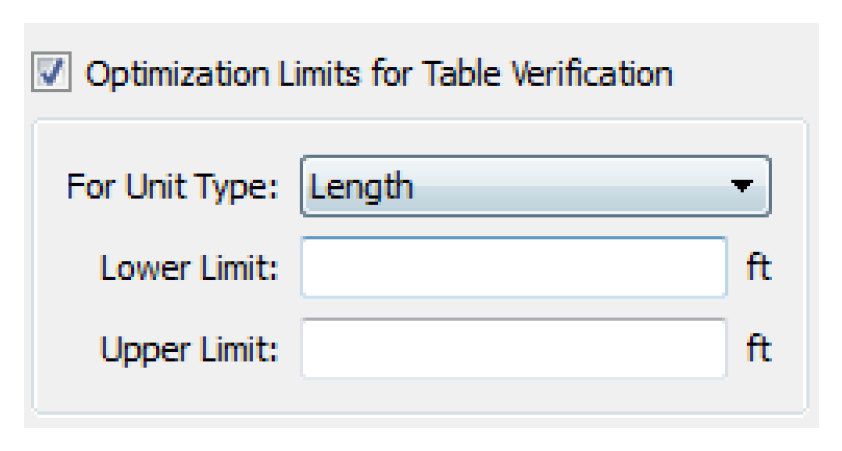
To set the Lower and Upper bounds, check the box, then choose a unit type from the For Unit Type menu. Specify a new Lower or Upper Bound.
Optimization Limits for Data Verification
Configure the Lower and Upper Limits for Table slots that are verified in optimization. To find these slots, use the Supports Opt Limits filter in the Selector; see Selecting Slots for details.
Applying Global Slot Changes
When all desired configuration changes have been made, they can be applied in two ways, Apply to Selected or Apply to All. To apply changes only to selected items in the slot’s list view, select the Apply To Selected button at the center bottom of the dialog. This will change only those slots highlighted in the list view.
Note: The desired items should be selected before entering the configuration information because changing selections clears the configurations.
Configuration changes can be applied to all slots in the slot list, whether selected or not, by selecting the Apply To All button at the left bottom of the dialog.
If changes are applied to a slot where they are not applicable, the changes will be ignored for that slot. For example, if convergence is configured to be changed and is applied to a slot that does not have convergence, it will be ignored.
Note: Changing custom slot names must be done independently of other changes in the dialog. Also, changing slot names only applies to all slots in the list.
Global Slot Configuration Example
Example 4.1 Changing convergence on specific slots
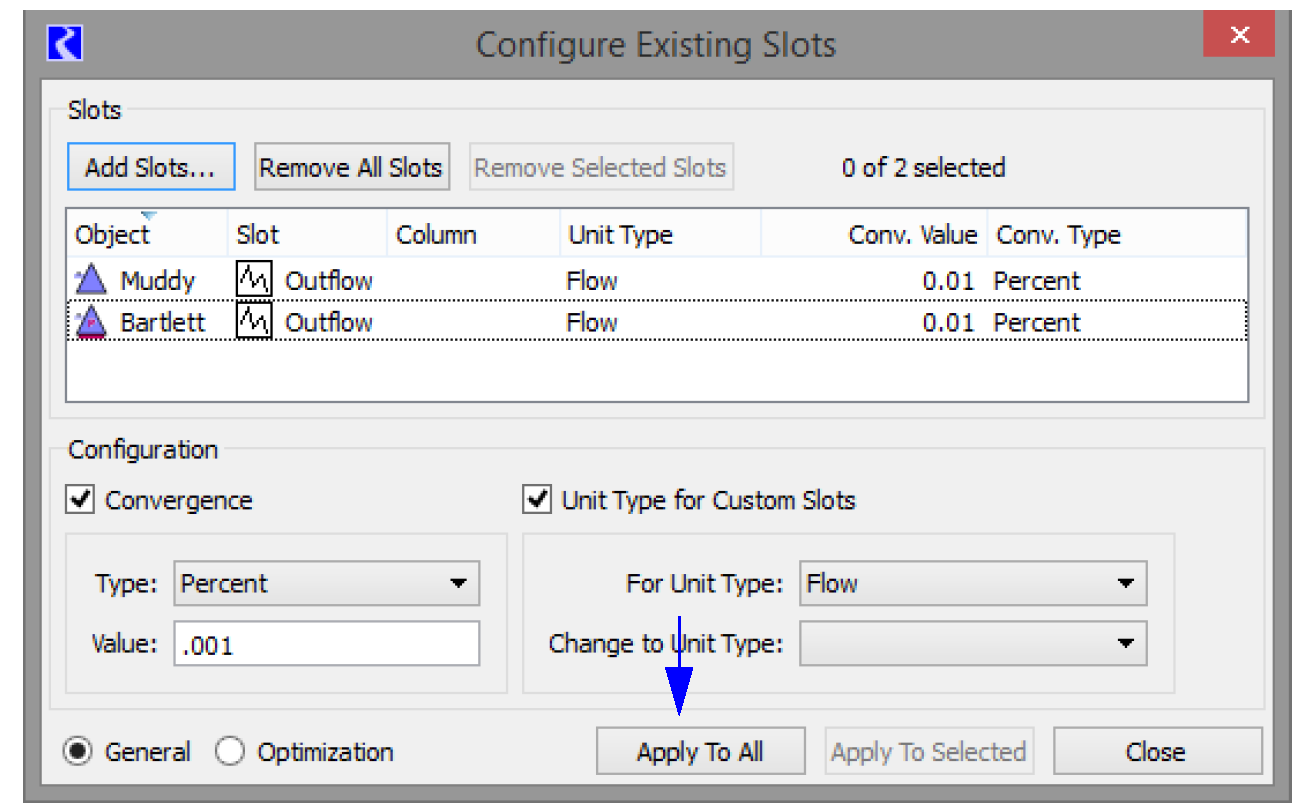
In this example, you decide that for debugging purposes, you need to decrease convergence on all reservoir outflows. There are two approaches for using the Configure Existing Slots dialog to make these changes:
• Add only the Reservoir Outflow slots to the list using the slot selector. A Name Filter can be applied in the selector to filter only the desired slots. In the Configure Existing Slots dialog, check the Convergence box, select Percent for the Type, then enter a new value (like 0.001) in the Value box. Then select Apply to All to commit the changes.
• Add all of the reservoir slots to the list. Highlight only the desired Outflow slots, check the Convergence box, select Percent for the Type, then enter a new value (like 0.001) in the Value box. Select Apply To Selected button to commit the changes.
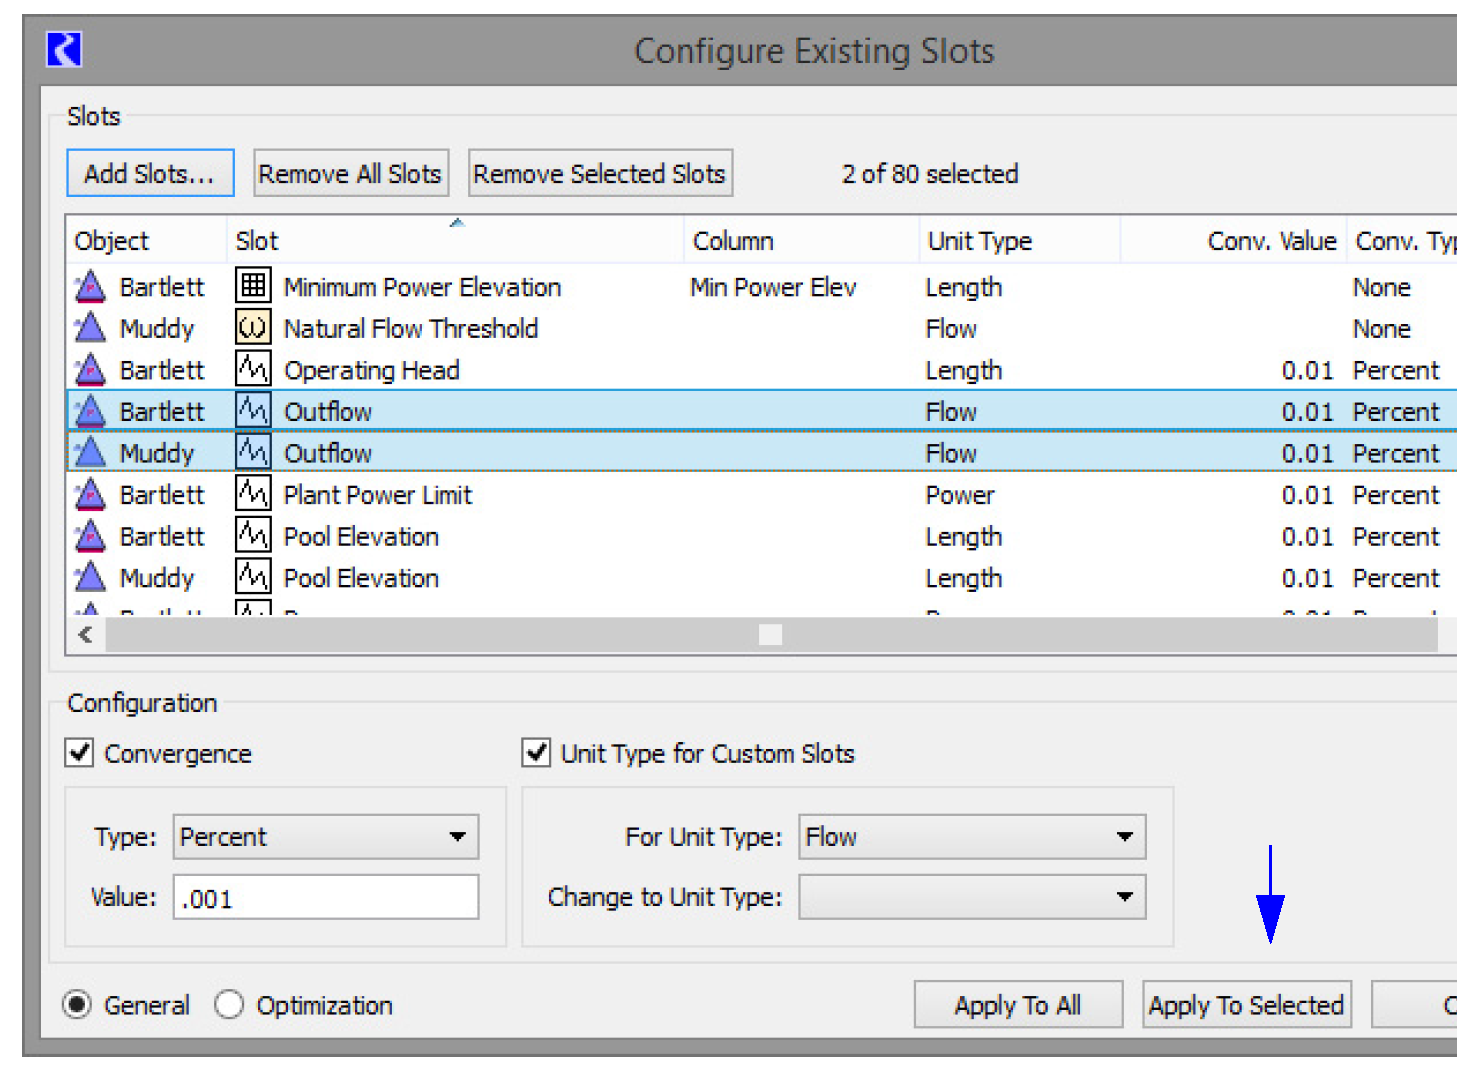
Using the selector to choose the appropriate slots is more powerful and more elegant but you don’t see the slots’ configuration values before you make the selection. Selecting all slots, then choosing the desired slots in the list view allows you to see all these slot configurations before you modify them.
Revised: 01/10/2025