
Data Extractor Tool
The Data Extractor Tool (DET) extracts slot data from a collection of model files, often saved as part of an MRM run. Slot data can be extracted to an RDF file from MRM-created model files or by other DMIs that can be modified and then executed through a script.
Why use this tool? Sometime you don’t know what data you want or need to analyze before you start the multiple runs or you’ve already made many runs and realize you need additional values out of each model. The data extractor tool can be used to pull the data out of the models. There are two general approaches where you may have many saved model files that could be used with the tool:
1. Using the MRM functionality to save a per-trace model file. See Save Model File for more information.
2. Any set of models that have been run and saved. For example, you might run the same model everyday for operations and then save the model.
With the Data Extractor Tool, if you realized you forgot or need to get additional data out of the model files, you don’t need to re-run the MRM or even re-open each saved file, but can instead use the Data Extractor Tool to extract the necessary data.
There are two approaches to extract data:
• MRM Per-Trace Model Files: from models created as part of an MRM, extract slot data to an RDF file. For more information, see Extract Data From MRM Per-Trace Model Files.
• Selected Model Files: using: for any collection of objects use a script to import and then execute a DMI. For more information, see Extract Data From Selected Model Files.
First, we will describe how to access the DET and general configuration. Then we describe two approaches.
Accessing the DET
The Data Extractor Tool is available from two locations:
• On the main RiverWare workspace, use Utilities and then Data Extractor Tool menu.
• On the MRM Run Control, use the View and then Data Extractor Tool menu.
Using the DET
The DET has two tabs - one for configuring the extraction and the other for displaying diagnostics during the extraction. This section first gives an overview of the configuration tab, how the extraction works, and then discusses the diagnostics tab.
Configuration Tab
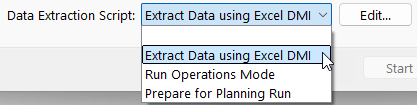
At the top-level select the type of data extraction:
Figure 3.12 Select Type of Data Extraction

The selection will determine the controls for selecting the model files and for configuring the output. The two selections provide very different configuration, see the following sections for more information:
Note: The configuration changes made to the DET don't persist, either during the RiverWare session or in the model file. If you close and reopen the DET, the configuration must start over.
Performing the Extraction
Once the desired approach is configured, select the Start button to perform the extraction.
Figure 3.13 Data Extractor Start Stop and Close buttons

Tip: There can be a lag between pressing Start and the first extraction as the process must be initialized.
The DET performs the extraction by creating a batch script and invoking RiverWare in batch mode. The batch script loads each model file in turn and executes one or more batch commands for each model file. See the section’s different approaches for details.
Note: During the extraction, the Start button is disabled and the Stop button becomes enabled. Because the run is spawning batch runs in the background, it is not possible to monitor the other processes. As a result, there is no other hourglass or spinning cursor to indicate the extraction is happening.
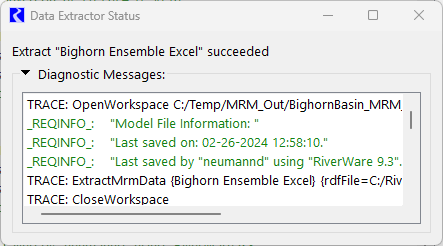
When the extraction is finished, the status window opens as shown below.
Figure 3.14 Screenshot of the Data Extraction Status window
If the extraction failed, an error message is displayed in the diagnostic messages. An extraction will fail if any of the batch commands fails.
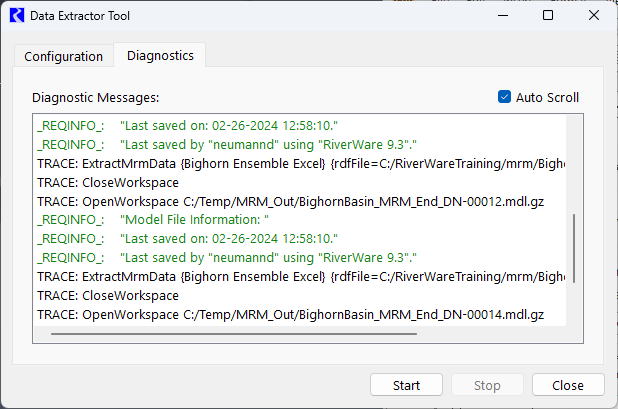
Diagnostics Tab
The diagnostic messages from the batch mode invocation of RiverWare are captured and displayed in the diagnostic tab as shown in Figure 3.15.
Note: If validating the MRM configuration generates warnings, or if informational diagnostic messages are enabled, there can be many diagnostic messages.
Figure 3.15 Data Extractor Tool Diagnostics Tab
Extract Data From MRM Per-Trace Model Files
This section describes the approach to extract data from MRM Per-Trace Model Files to an RDF file.
Requirements for Use
There are two requirements to use this approach:
1. Multiple Run Management (MRM) enables you to save per-trace model files. Before making the MRM runs, you must enable this feature to save the per-trace model files. See Save Model File for more information on how to enable this feature
2. This approach extracts slot data to an RDF file. Thus, you must have an output control file that specifies the slots that you would like to extract from each model file. See Control File for more information on the format for the control file.
Configuration
Figure 3.16 shows the DET for a sample model that has been run in MRM and has saved per-trace models.
Figure 3.16 Annotated Sample DET configuration tab
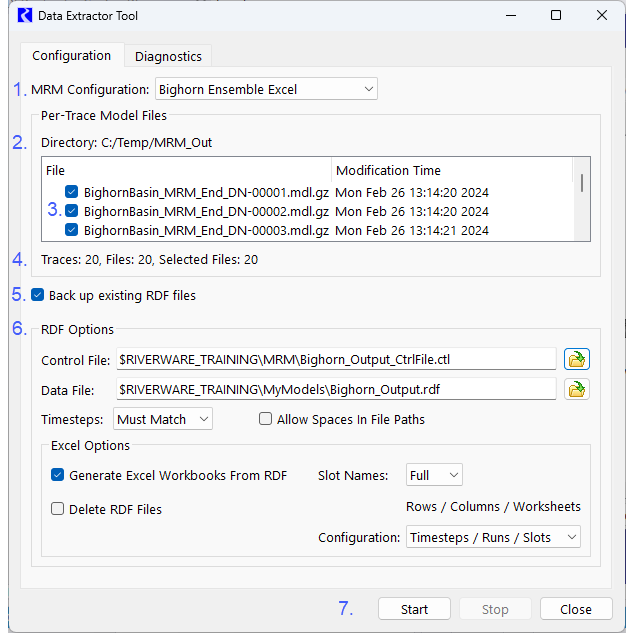
The numbers in the above Figure 3.16 correspond to the following:
1. Select the MRM configuration.
2. The folder location of the saved model files is shown. This came directly from the MRM configuration.
3. The per-trace model files are shown with their modification times. Missing per-trace model files are displayed as disabled and unchecked. Check any existing per-trace model files to use in the extraction process. Unchecked per-trace model files are not included in the extraction.
4. Text provides the number of traces, existing per-trace model files and selected per-trace model files.
5. If desired, select to back up existing RDF data files. When this is selected, the RDF files will be backed up by appending “(N)”, where N is the next highest value for an RDF file. For example, KeySlots.rdf would be backed up to KeySlots (1).rdf, KeySlots (2).rdf, and so on.
6. The same RDF Options are available as in the MRM configuration as described in RDF Options. A typical use case is that you would either specify a new or different RDF control file or an existing (but edited) RDF file. Change any other desired options for the RDF output.
7. Once all configuration is complete, there is a button to start the extraction process. There are also buttons to stop the extraction and to close the DET. See Performing the Extraction.
How it works
Conceptually it works as follows:
For each model specified in the configuration
Open the model
Update the MRM configuration with the new RDF options.
Generate the RDF file
Close the model
END FOR
After all models are visited, the first model is re-opened and it then starts the process to create the Excel files from the RDF files, if specified.
Note: None of the per-trace models are saved as a part of the batch runs, so they will not have any of the modified RDF options if subsequently opened interactively.
More specifically, the automatically-created batch script looks like this:
OpenWorkspace {first per-trace model file}
ExtractMrmData {MRM configuration name} keyword=value …
CloseWorkspace
…
OpenWorkspace {last per-trace model file}
ExtractMrmData {MRM configuration name} keyword=value …
CloseWorkspace
OpenWorkspace {first per-trace model file}
GenerateMrmExcel {MRM configuration name} keyword=value …
CloseWorkspace
ExtractMrmData {MRM configuration name} keyword=value …
CloseWorkspace
…
OpenWorkspace {last per-trace model file}
ExtractMrmData {MRM configuration name} keyword=value …
CloseWorkspace
OpenWorkspace {first per-trace model file}
GenerateMrmExcel {MRM configuration name} keyword=value …
CloseWorkspace
See ExtractMrmData in Automation Tools and GenerateMrmExcel in Automation Tools for more information on the RCL batch commands.
See Performing the Extraction for more information on the mechanics of the process.
Extract Data From Selected Model Files
This section describes the Data Extractor tool when using Selected Model Files.
Requirements for use
This approach requires you to create a script to perform the desired extraction steps. This gives you flexibility as the script can do many different actions or operations. This section describes the requirements for the script. In this section we will use an Excel Database DMI as the example. We want to run an updated Excel Database DMI in each saved model file to extract data to an Excel sheet.
Note: This approach was primarily tested using an Excel Database DMI. With scripts there is much functionality and it may work for other DMIs or sequences of actions but hasn’t been tested for every possible case.
The data extraction is performed by a RiverWare script containing actions that:
1. Import database DMI. An Import Database DMI script action should import that DMI. You must export the Database DMI to a file, before starting the DET extraction. The file can contain multiple DMI definitions and multiple dataset definitions. See Import Database DMI in Automation Tools for more information.
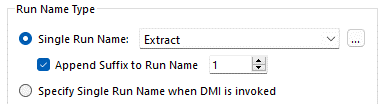
2. Configure Excel Dataset. The Configure Excel Dataset action should specify to use sheet suffixes, such that they can be incremented by the DET. As an example, assume the dataset's Single Run Name is “Output”: If the DET didn't intervene, each model file would extract its data to the sheet “Output”, overwriting one another. But, the DET will intervene and as the DET is stepping through the model files it will set the Configure Excel Dataset action's sheet suffix to the next value of 1, 2, … The model files will extract their data to “Output1”, “Output2”, … See Configure Excel Dataset in Automation Tools for more information.
3. Execute DMI. The script action Execute DMI is the mechanism that actually does the extraction of the data from each model. See Execute DMI in Automation Tools for more information.
Note: The script editor allows you to add any action to the script. Beware, you can call actions that will get you in trouble. It is up to you to not shoot yourself in the foot.
Configuration
This section describes the configuration tab when the approach is Selected Model Files.
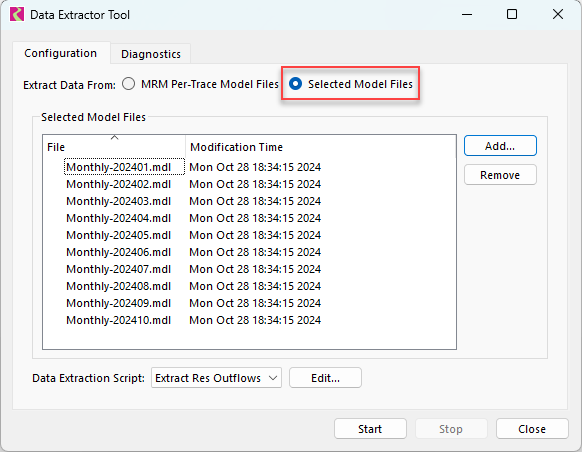
Figure 3.17 Data Extractor Tool with Selected Model Files Approach
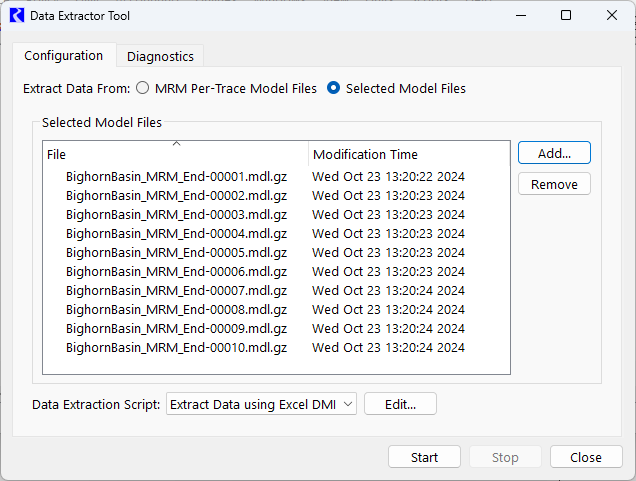
Select Model Files
When using this approach, you must select the desired model files for which data will be extracted. The following figure shows a screenshot of the selection panel.
Figure 3.18 Figure 2: Selected Model File List
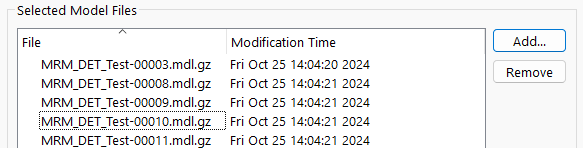
Use the following two buttons.
• Add: Open a file chooser and add model files to the list. Use Ctrl-Click or Shift-Click to select multiple files in the file chooser.
• Remove: remove the selected model files from the list.
The model file names are displayed alphabetically in a list, with tooltips displaying the model file paths.
Specify the Script
Select the script from the Data Extraction Script menu. To review or configure the script, select “Edit” to open the Script Editor.
How it Works
When the DET process is invoked, the DET will create a temporary script from the source script for each model file, as follows:
1. Clone the user-specified source script.
a. It should contain one or more Import Database DMI action.
b. For each Configure Excel Dataset action that is setting the sheet suffix, set the sheet suffix to the next integer : 1, 2, … This allows each model to output to a different run name.
c. It should have one or more Execute DMI actions.
2. Export the script to a file, scriptFileN
3. Delete the script.
The DET will then create a RCL batch script with the following RCL commands for each model file:
OpenWorkspace {modelFileN}
ImportScript {scriptFileN}
ExecuteScript {cloned user-specified script}
CloseWorkspace
Finally, the DET runs the batch RCL script. It opens each model file, imports the script, executes the cloned user-defined script to modify and run the DMIs, and then the closes the workspace. It then repeats sequentially for each model specified.
See Performing the Extraction for more information on the mechanics of the process.
In our example, the final product is one Excel spreadsheet with one run attribute corresponding to a per model file.
Use Case - Extract data to Excel
The following summarizes our use case. A user has a main model, Monthly.mdl. They run the model each month and save the model with a date stamp, for example Monthly-202401.mdl. After a while, they realize they need to generate additional Excel output from the saved model files. To use the DET, the user would:
1. Create an Excel output DMI in the master version of the model. The Excel dataset should set the single run suffix and a value, although the value doesn’t matter as the script below will modify it.
The DMI slot selection should contain the slots to export.
2. Export the Database DMI(s) and associated dataset(s) to a file. In our example, we use C:/Monthly/ResOutflows.dbmi
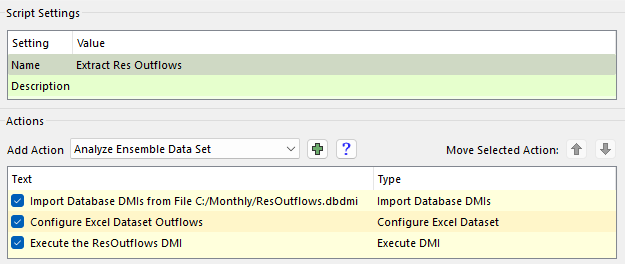
3. In the master model, create a script with three actions:
Import Database DMIs
Configure Excel Dataset
Execute DMI
The following screenshot shows a sample script in the Script Editor:
For the Configure Excel Dataset action described above, specify the single run suffix. Specifying the single run suffix in the Excel dataset and in the script action might seem redundant, but the script action provides the “hook” the DET uses to increment the single run suffix.
4. Configure the DET by selecting the extraction type, the model files, and the script.
5. After selecting the model files and script action, clicking the Start button to perform the extraction. This will create (or add to) the Excel sheet specified in the DMI. The run names will be Extract1, Extract2, ...
Revised: 01/10/2025