Ensemble Data Tool
The Ensemble Data Tool (EDT) is a tool for quickly visualizing the RDF results of an MRM run. A screenshot is shown in Figure 3.12 for a sample RDF file with over-plotted lines for each slot. This section describes the Ensemble Data Tool and how to use it.
Figure 3.12 Screenshot of the Ensemble Data Tool
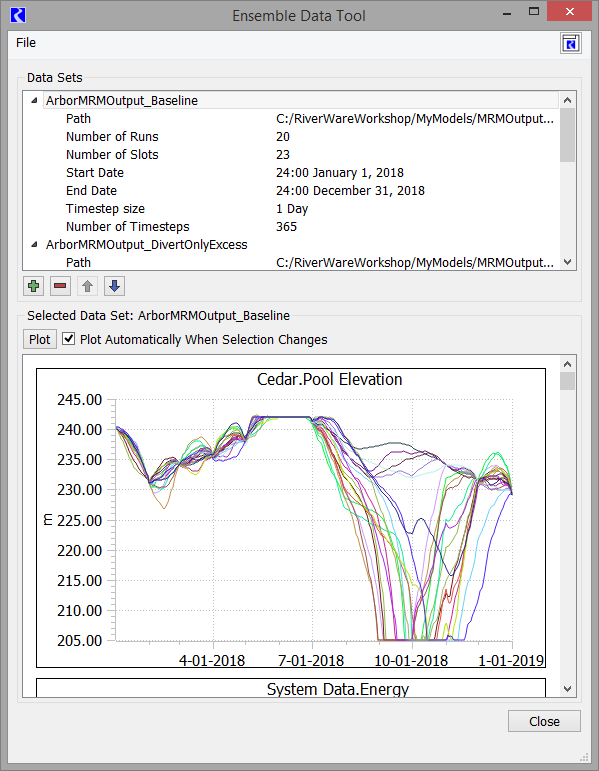
The Data Set panel at the top presents the list of data sets as an expandable tree view. Selecting a data set expands its row in the tree view.
For each data set, the following properties are shown in the tree view:
• Path: the path of the RDF file from which the data set was created
• Number of Runs
• Number of Slots
• Start date: earliest date/time of series data
• End date: latest date/time of series data
• Timestep size
• Number of timesteps
The middle area has operations to manage data sets:
• Create a new Data Set from an RDF file
• Delete the selected Data Set
• Move the selected Data Set up or down in the list.
The EDT lower panel displays the Selected Data Set panel as a scrollable list of line charts, one per slot, with data for each trace over-plotted. For performance reasons, by default these plots are updated “on demand,” but you can choose to have them automatically re-displayed whenever you select a new data set.
Accessing the Ensemble Data Tool
Access the Ensemble Data Tool from either:
• The Multiple Run Control dialog using the View and then Ensemble Data Tool menu.
• The workspace Utilities and then Ensemble Data Tool menu
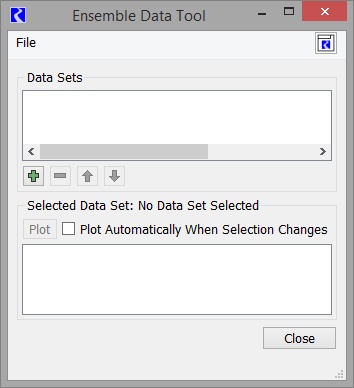
The Ensemble Data Tool opens as shown in Figure 3.13.
Figure 3.13 Ensemble Data Tool with no datasets specified
How to Use the Ensemble Data Tool
The Ensemble Data Tool allows you to view “Data Sets” that are created from RDF files. Use the File and then Create menu or use the + button to create a data set from an RDF file.

Then use the file chooser to select the RDF file and select Open. The Ensemble Data Tool reads the RDF file and shows the default name and metadata in the Data Sets panel. Right click and choose Rename Selected Data Set to change the data set name. Right-click options also include Expand All and Collapse All items in the tree-view.
Use the - button to delete the data set or the arrows to move the data set up or down in the list.
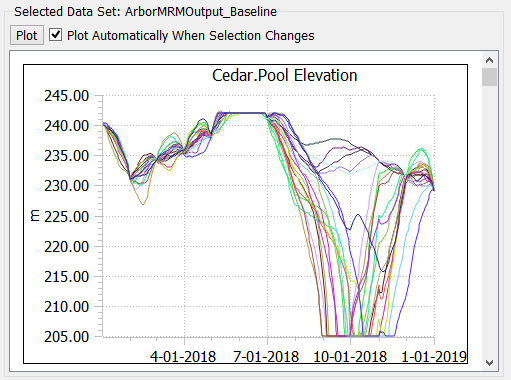
The lower portion of the tool provides over-plots of each slot in the data set as shown in Figure 3.14. Because data sets can be large, the plots are created on demand using the Plot button. You can choose to have them automatically displayed whenever you select a new data set using the Plot Automatically When Selection Changes.
Figure 3.14 Screenshot of Ensemble Data Tool Selected Data Set panel
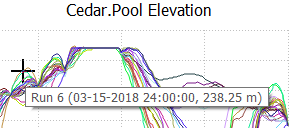
Hover over a curve to see the run/trace number:
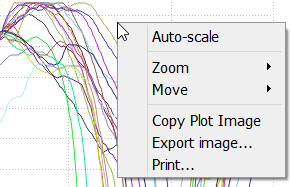
Draw a rectangle to zoom in. Click and drag the middle mouse button to pan the plot. Right click on a plot area for additional plotting functionality as shown in Figure 3.15.
Figure 3.15 Ensemble Data Tool Plotting controls.
Script Actions for Opening and Analyzing Ensemble Data Sets
The following script actions operate on the Ensemble Data Tool:
• Analyze Ensemble Data Set - Perform statistics on data sets.
• Create Ensemble Data Set - Read an RDF file and create a dataset in the Ensemble Data Tool.
• Delete Ensemble Data Set - Close / remove the specified data set from the Ensemble Data Tool, freeing the memory associated with the data set.
• Open Ensemble Data Tool - Open the Ensemble Data Tool dialog box.
A sample use case would be the following sequence of script actions:
1. Create Ensemble Data Set action to read an RDF file and create the data set.
2. Open Ensemble Data Tool action to open the dialog box.
3. Memo action to pause while you look at the plots.
4. Analyze Ensemble Data Set to perform statistical analysis on the data set
5. Open Slot to show the slot populated by the Analyze Ensemble Data Set.
6. Delete Ensemble Data Set to remove the data set from memory.
Revised: 08/02/2021