Configuring Charts
When creating (or editing) a Chart configuration, the configurable properties of a chart include the following. See Figure 5.1.
• Name of Output Device
• Description
• Chart Type
• Data, including:
– Slots
– Labels
– Colors
– Label Location
– Label Addition
– Display Precision
• Radial Data, if applicable, including:
– Radial Slot Name
– Note for Radial Total
– Note for Radial Percent
• Chart Settings
– Chart Title
– Chart Subtitle
– Note for Chart Total
– Background Color for display and printing
– Other settings including Bold Labels
– Display Date
– Option to show timestep controls and timestep
• Fonts, used to control the size and font used for all text shown on the chart.
Figure 5.1
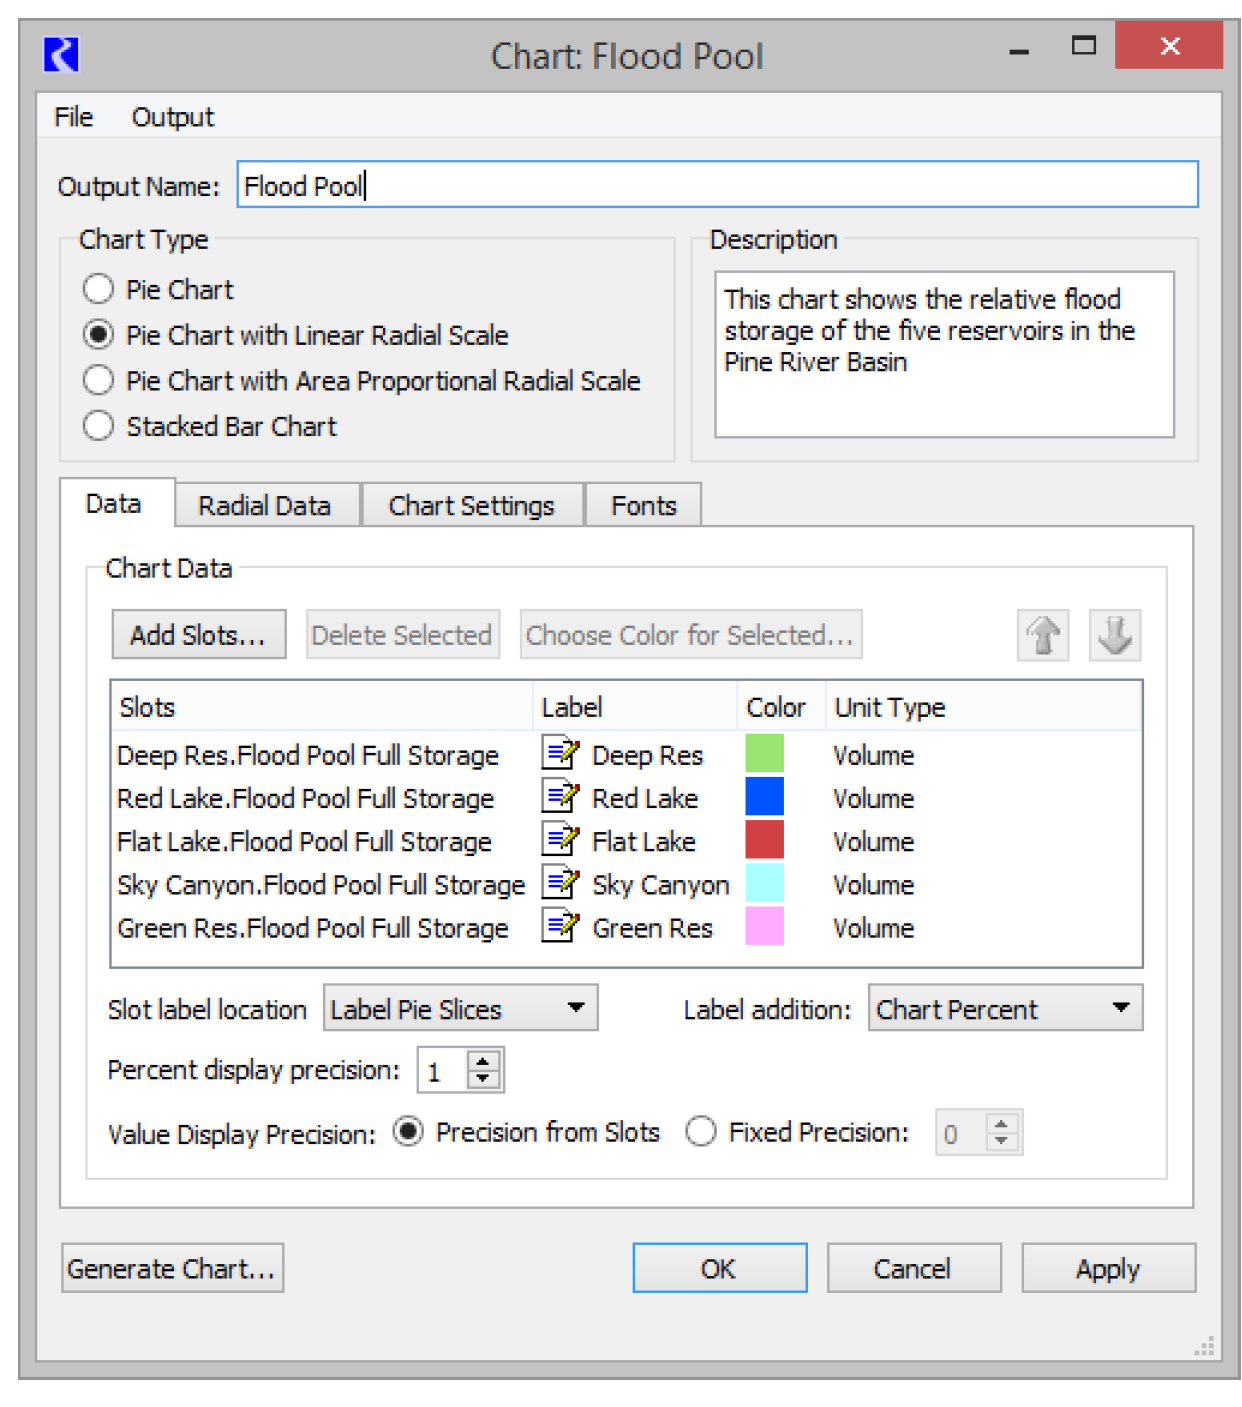
Following are descriptions of these options.
Output Name
Output Name is the name of the device that will appear in the Output Manager’s list of devices.
Description
The Description box allows text describing the chart to be saved with the device - this text does not appear on the chart itself.
Chart Type
Chart Types specify one of the chart types as shown. See Chart for descriptions.

Data Tab
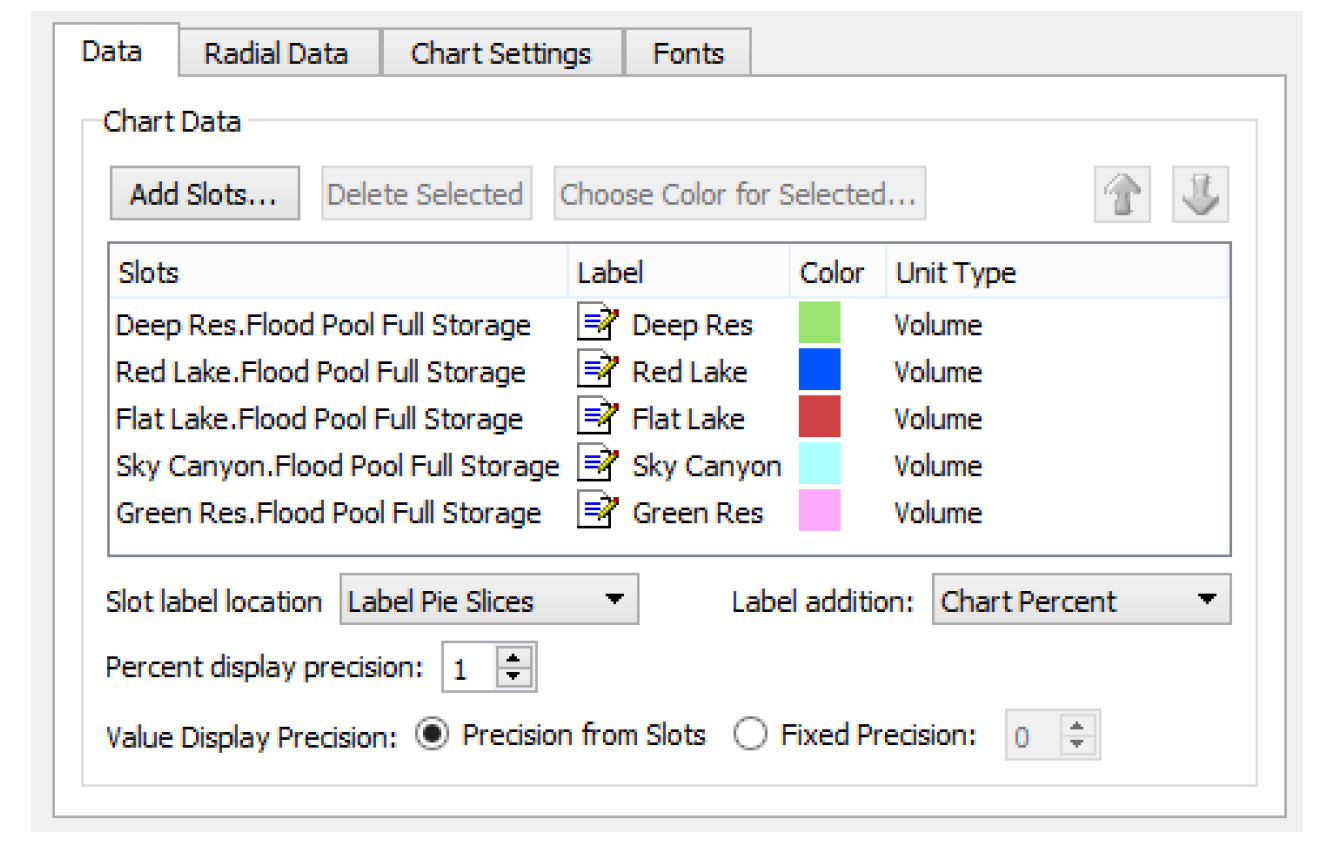
The Chart Data frame contains the slots to be shown as the main dimension of the chart. Select Add Slots to open a slot selector to select series, periodic, or scalar slot data for inclusion in the chart. The slot/row is given a default Label that will appear on the chart. Selecting or double-clicking the label allows editing of the text. Colors can be changed by selecting a row and selecting Choose Color for Selected. The Unit Type of the slot is shown for reference. If unit types do not match for selected slots, a warning dialog is generated as a chart cannot be created from slots with mismatched unit types.
Figure 5.2
Note: See Output Devices for Aggregated Values for details on creating aggregated data for display in this or other output devices.
Slots are ordered in the chart by the order in the slot list. The slot order can be rearranged by selecting rows and selecting the Up and Down arrows. In a pie chart the first piece of the pie starts at 3 o’clock and then proceeds counterclockwise (anticlockwise).
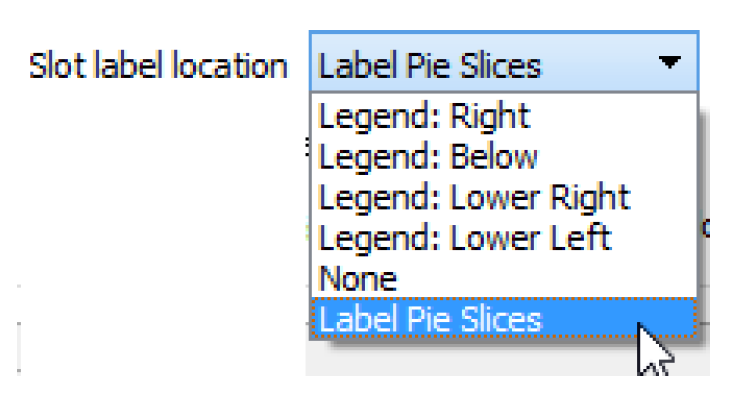
The Slot Label Location combo box allows a choice of where the slots will be labeled on the chart. See Figure 5.3.
• Legend: Right shows a color block and the slot name for each slot in a legend positioned to the right of the chart.
• Legend: Below shows a color block and the slot name for each slot in a legend positioned directly below the chart.
• Legend: Lower Right shows a color block and the slot name for each slot in a legend positioned below the chart and to the right of any timestep controls being shown.
• Legend: Lower Left shows a color block and the slot name for each slot in a legend positioned below the chart and to the left of any timestep controls being shown.
• None: No legend or labels are shown. This is often desirable when the chart is included on an Output Canvas and canvas lines are used to label the pie slices.
• Label Pie Slices is only applicable to pie-type charts and places slot labels around the pie at the slice for a slot.
Figure 5.3
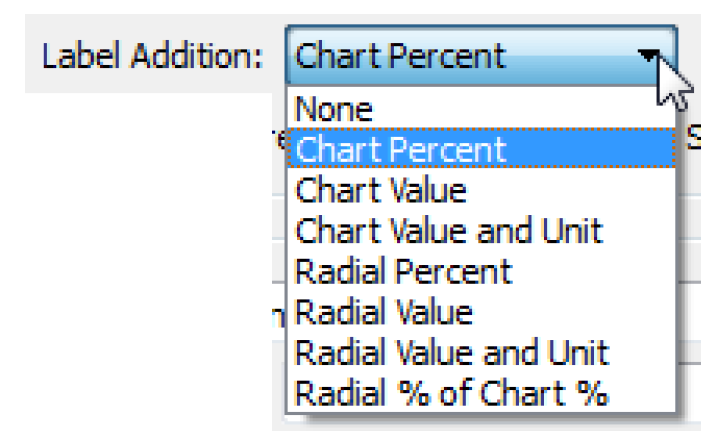
The Label Addition menu provides a choice of items that can be added after the slot labels on the chart. The radial choices are only shown if a radial type chart is selected. See Figure 5.4.
• None adds nothing to the slot label.
• Chart Percent adds the percent of the slot’s contribution to the total (Red Lake 20.4%).
• Chart Value adds the amount of the slot’s contribution to the total (Red Lake 1135358).
• Chart Value and Unit adds the amount of the slot’s contribution along with its unit (Red Lake 1135358 acre-ft).
• Radial Percent adds the percent of the slot’s contribution that is colored in (Red Lake 63.2%).
• Radial Value adds the amount of the slot’s contribution that is colored in (Red Lake 717546).
• Radial Value and Unit add the amount of the slot’s contribution that is colored in along with its unit (Red Lake 717546 acre-ft).
• Radial % of Chart % adds the percent that is colored of the percent contribution to the total (Red Lake 63.2% of 20.4%).
Figure 5.4
The Percent display precision selector controls the precision with which percent values in labels are shown. Two options are provided for specifying the precision of values shown in labels. The Precision from Slots option displays a value in the precision that is assigned to the slot from which the values comes. The Fixed Precision option displays all values with the precision specified in the adjacent spin box.
Radial Data Tab
The Radial Dimension frame is enabled only if a radial type chart is selected. The Slot Name field is where the name of the slot for the radial dimension data is indicated. For each slot in the Chart Data list, the corresponding slot is found on the same object as the slot. The radial percent value, determining how much of a slot’s portion is colored, is calculated as the radial slot value divided by the slot value. The unit types of the slot and the radial slot must match or the chart cannot be generated.
Figure 5.5
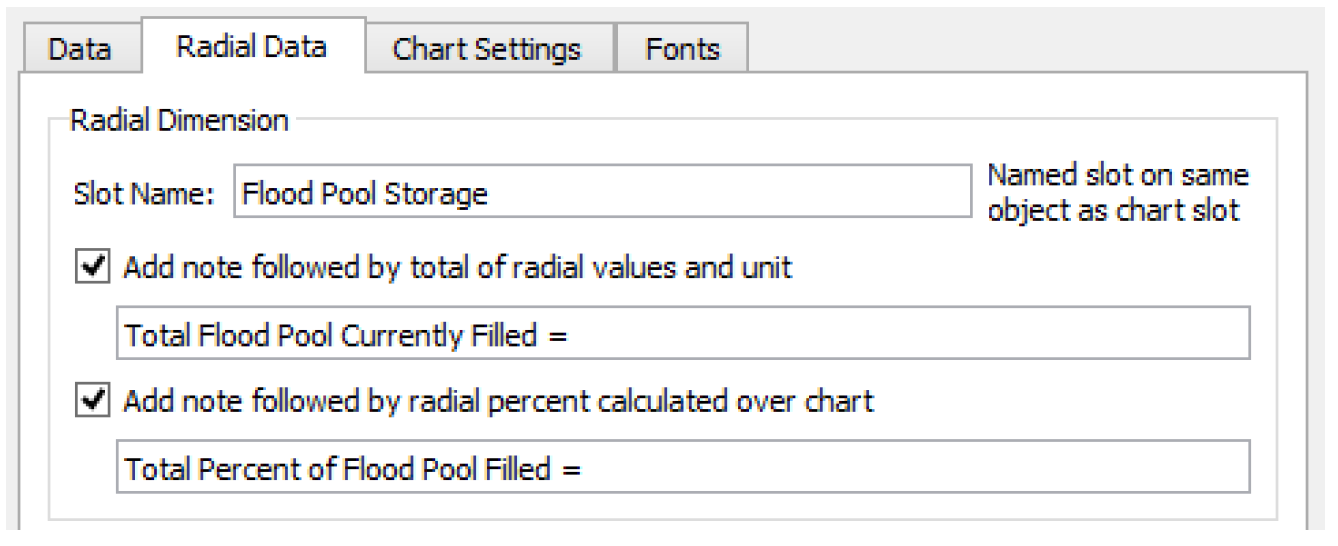
There are also options to add radial notes to the bottom of the chart display.
• Add note followed by total of radial values and unit - the text is shown as a note followed by the total of all the radial slot values on the chart along with the unit. (Total Flood Pool Currently Filled = 353407 acre-ft).
• Add note followed by radial percent calculated over chart - the text is shown as a note followed by a percent calculated as the total of all radial slot values divided by the total of all chart slot values (Total Percent of Flood Pool Currently Filled = 63.5%).
Chart Settings tab
The Titles and Text frame allows entry of text for the Chart Title that is centered at the top of the chart display and the Chart Subtitle that appears underneath it. Also in this frame is the option to Add note followed by total of chart values and unit. When checked, the entered text is shown as a note on the bottom of the chart followed by the total of all slots’ values with its unit. (Total of Flood Pool for Pine River Basin = 5,565,480 acre-ft).
Figure 5.6
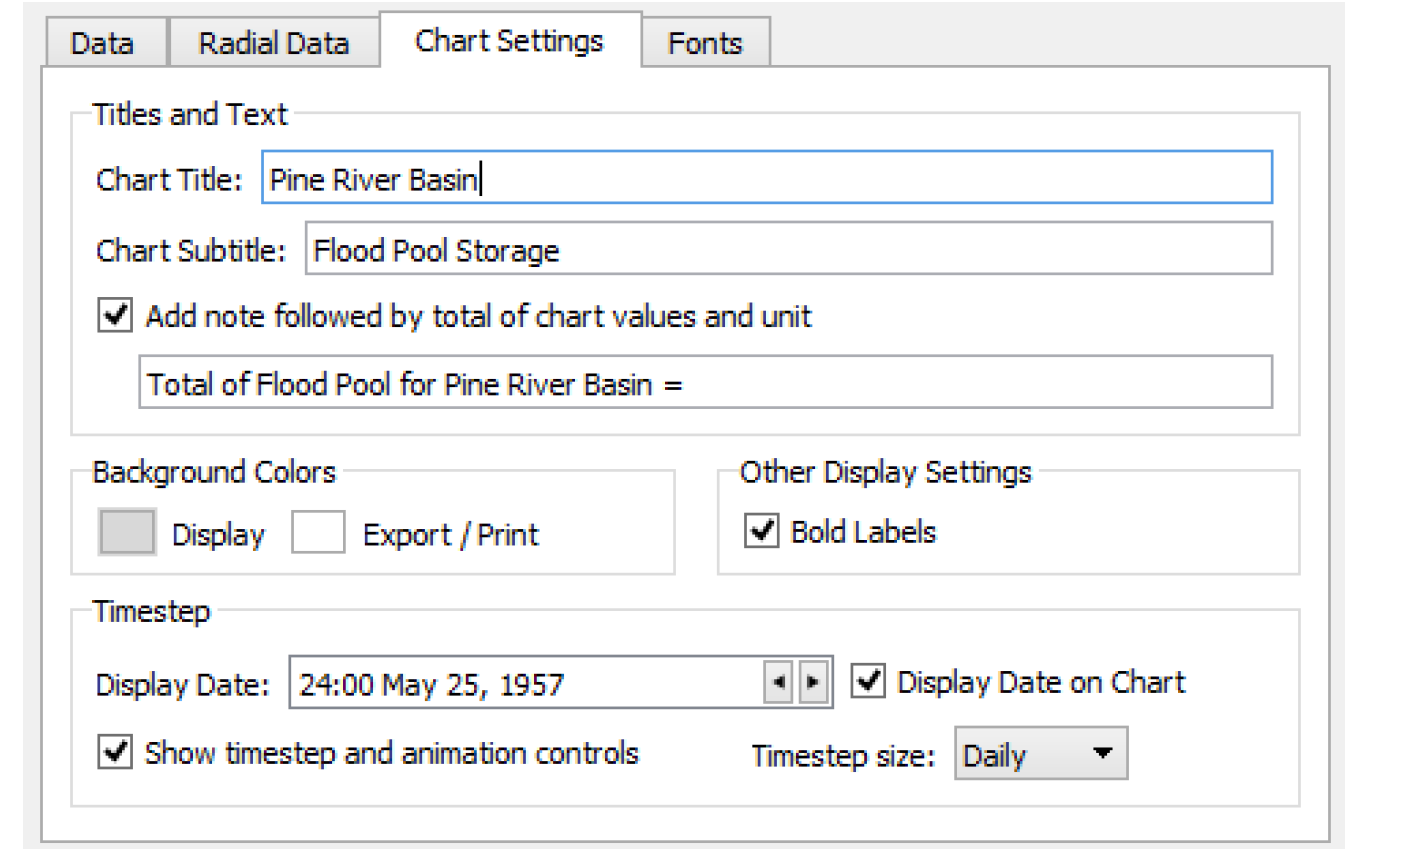
Use the two buttons in the Background Colors frame to change the color of the background for display (on screen) and for exporting and printing.
In the Other Display Settings frame, you can choose whether or not to have Bold Labels on the text displays.
In the Timestep frame, use the Display Date field to specify the date at which data is shown. Also, optionally specify if you would like to Show timestep and animation controls. These controls allow you to step through timesteps on the chart. See Animation for details. In addition, if you would like to show only data for a larger timestep, select an alternative Timestep size. For example, maybe in a model with a 1 Hour timestep, you only want to step through the data at the end of each day. If you do select a larger timestep, the chart will be shown at the Display Date rounded up, if necessary, to the next valid timestep. If you don’t want to show the date on the chart, deselect the Display Date on Chart control.
Fonts tab
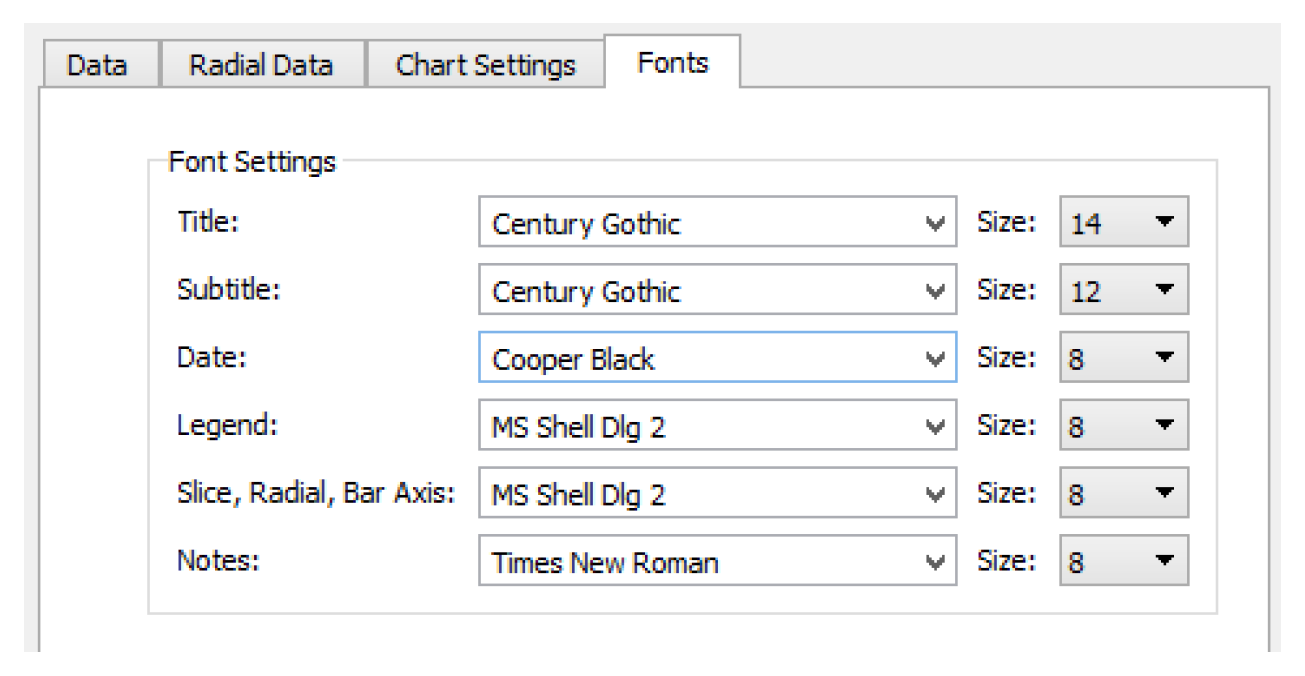
The text fonts can be changed by selecting Fonts. In each text element menu, select a named font, and in the associated Size menu select the font size.
Figure 5.7
General Buttons
The chart is shown by selecting Generate Chart at the bottom of the dialog. Once a chart display is generated, it is updated with future configuration changes made in the configuration dialog when the chart is regenerated.
Select OK to save the current configurations to the output device and close the dialog. Selecting Cancel will ignore any unsaved configuration changes and close the dialog. Apply will save the current configurations to the chart device and leave the configuration dialog open.
Revised: 01/05/2024